Search Indexes
A search index allows users to search within specified fields of domain models, with real-time updates, multiple configurable indexes, and a user-friendly UI that integrates into the application menu for efficient and flexible data retrieval.
Introduction
The search index feature empowers users to perform searches within the fields of domain models, offering flexible search options such as partial and exact matches, case-sensitive and insensitive searches and more. As a developer, you can configure which classes and fields should be indexed, allowing for tailored search experiences.
The search user UI is ready-to-use and can be integrated directly into the application’s menu. When triggered, this UI provides a search modal where users can input queries and view a list of results. Each result links directly to the corresponding detail page of the class, enhancing user navigation. The search index is updated in real-time as classes are inserted, deleted, or modified. Additionally, developers can manually trigger an index update or schedule updates to occur at specific times.
Example Use Case:
Consider a product catalog where users need to search for keywords within product descriptions. By configuring a search
index that includes the product class and its description field, users can quickly find products that match their search
terms and navigate directly to the product details page.
Setting Up a Search Index
The configuration of search indexes is managed within the Configuration model under the "Indexes" section.
-
Create a New Index:
Navigate to the "Indexes" section and click on "Add" to create a new index. zAppDev generates a name for the index, which can be customized if desired.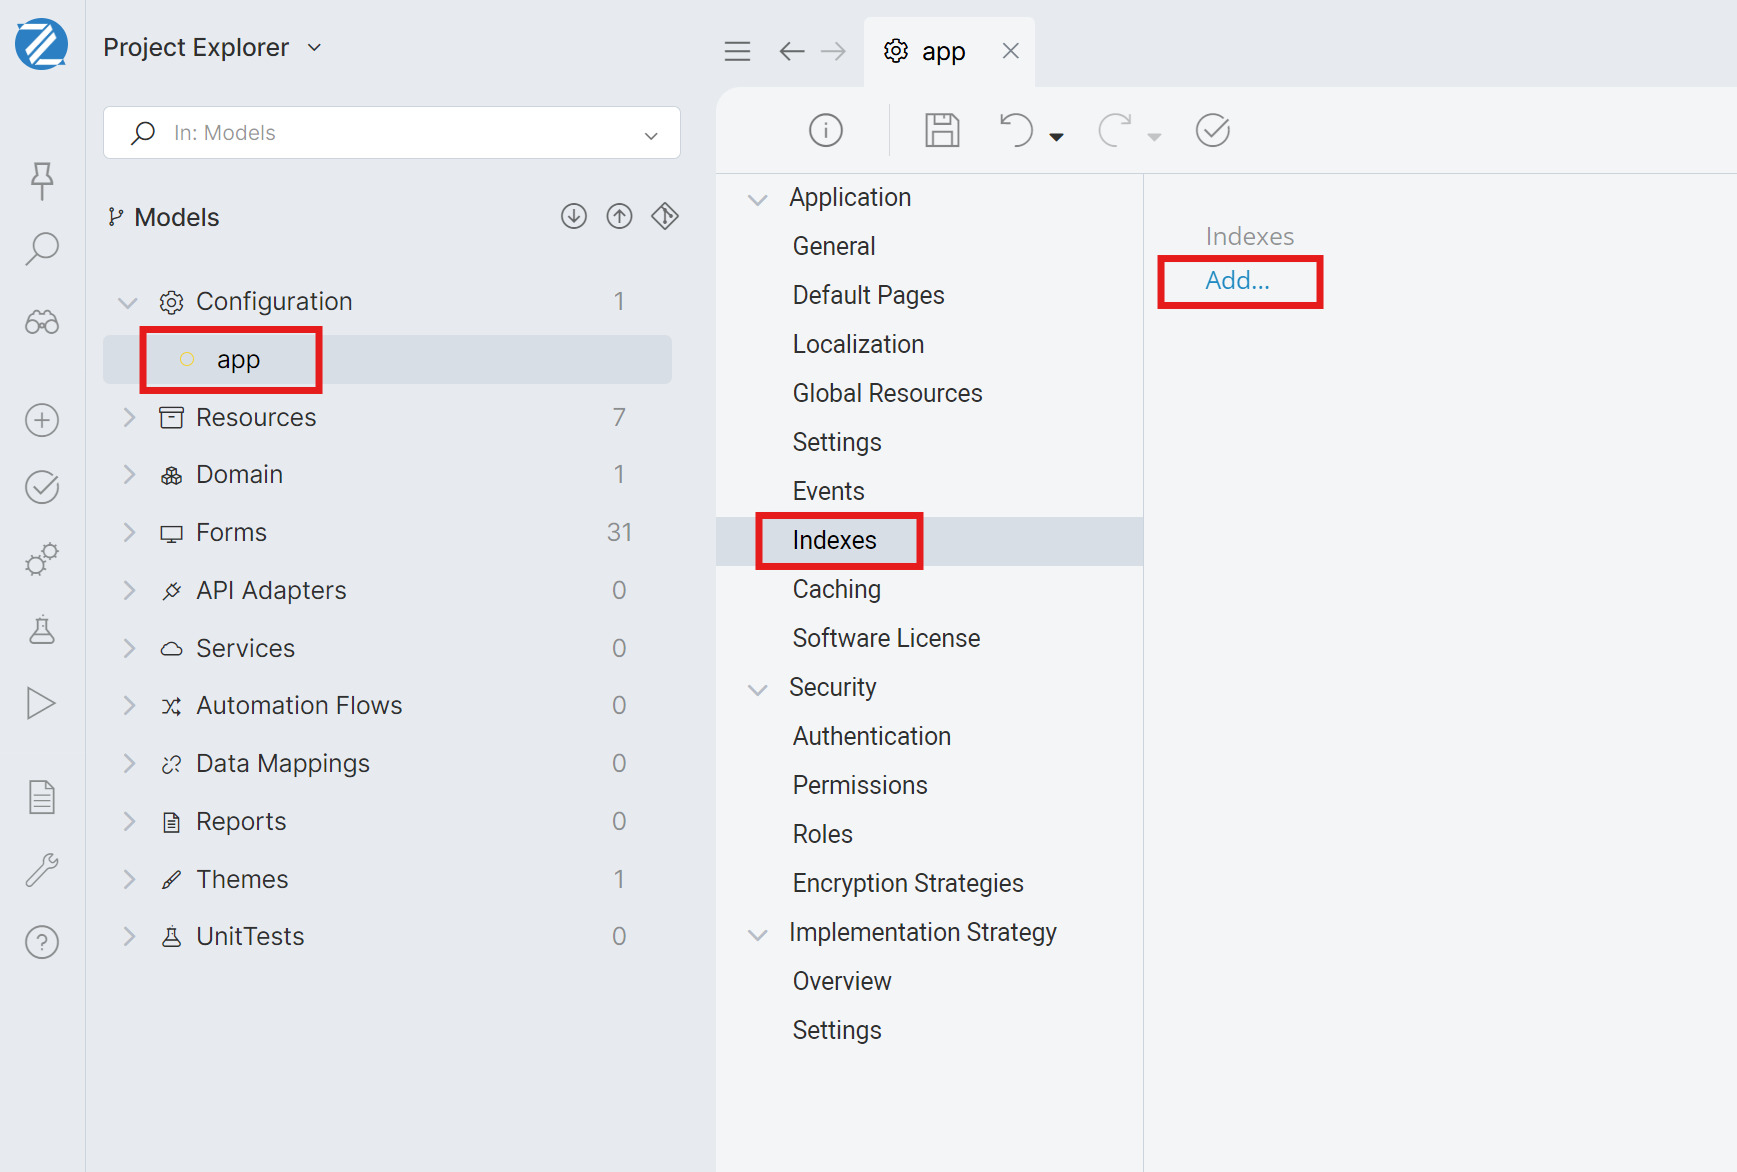
-
Add Classes and Fields:
Each index can include one or more domain classes, and for each class, you can specify the fields to be indexed. Click "Add Class" to include an existing class in the index and then select the relevant fields.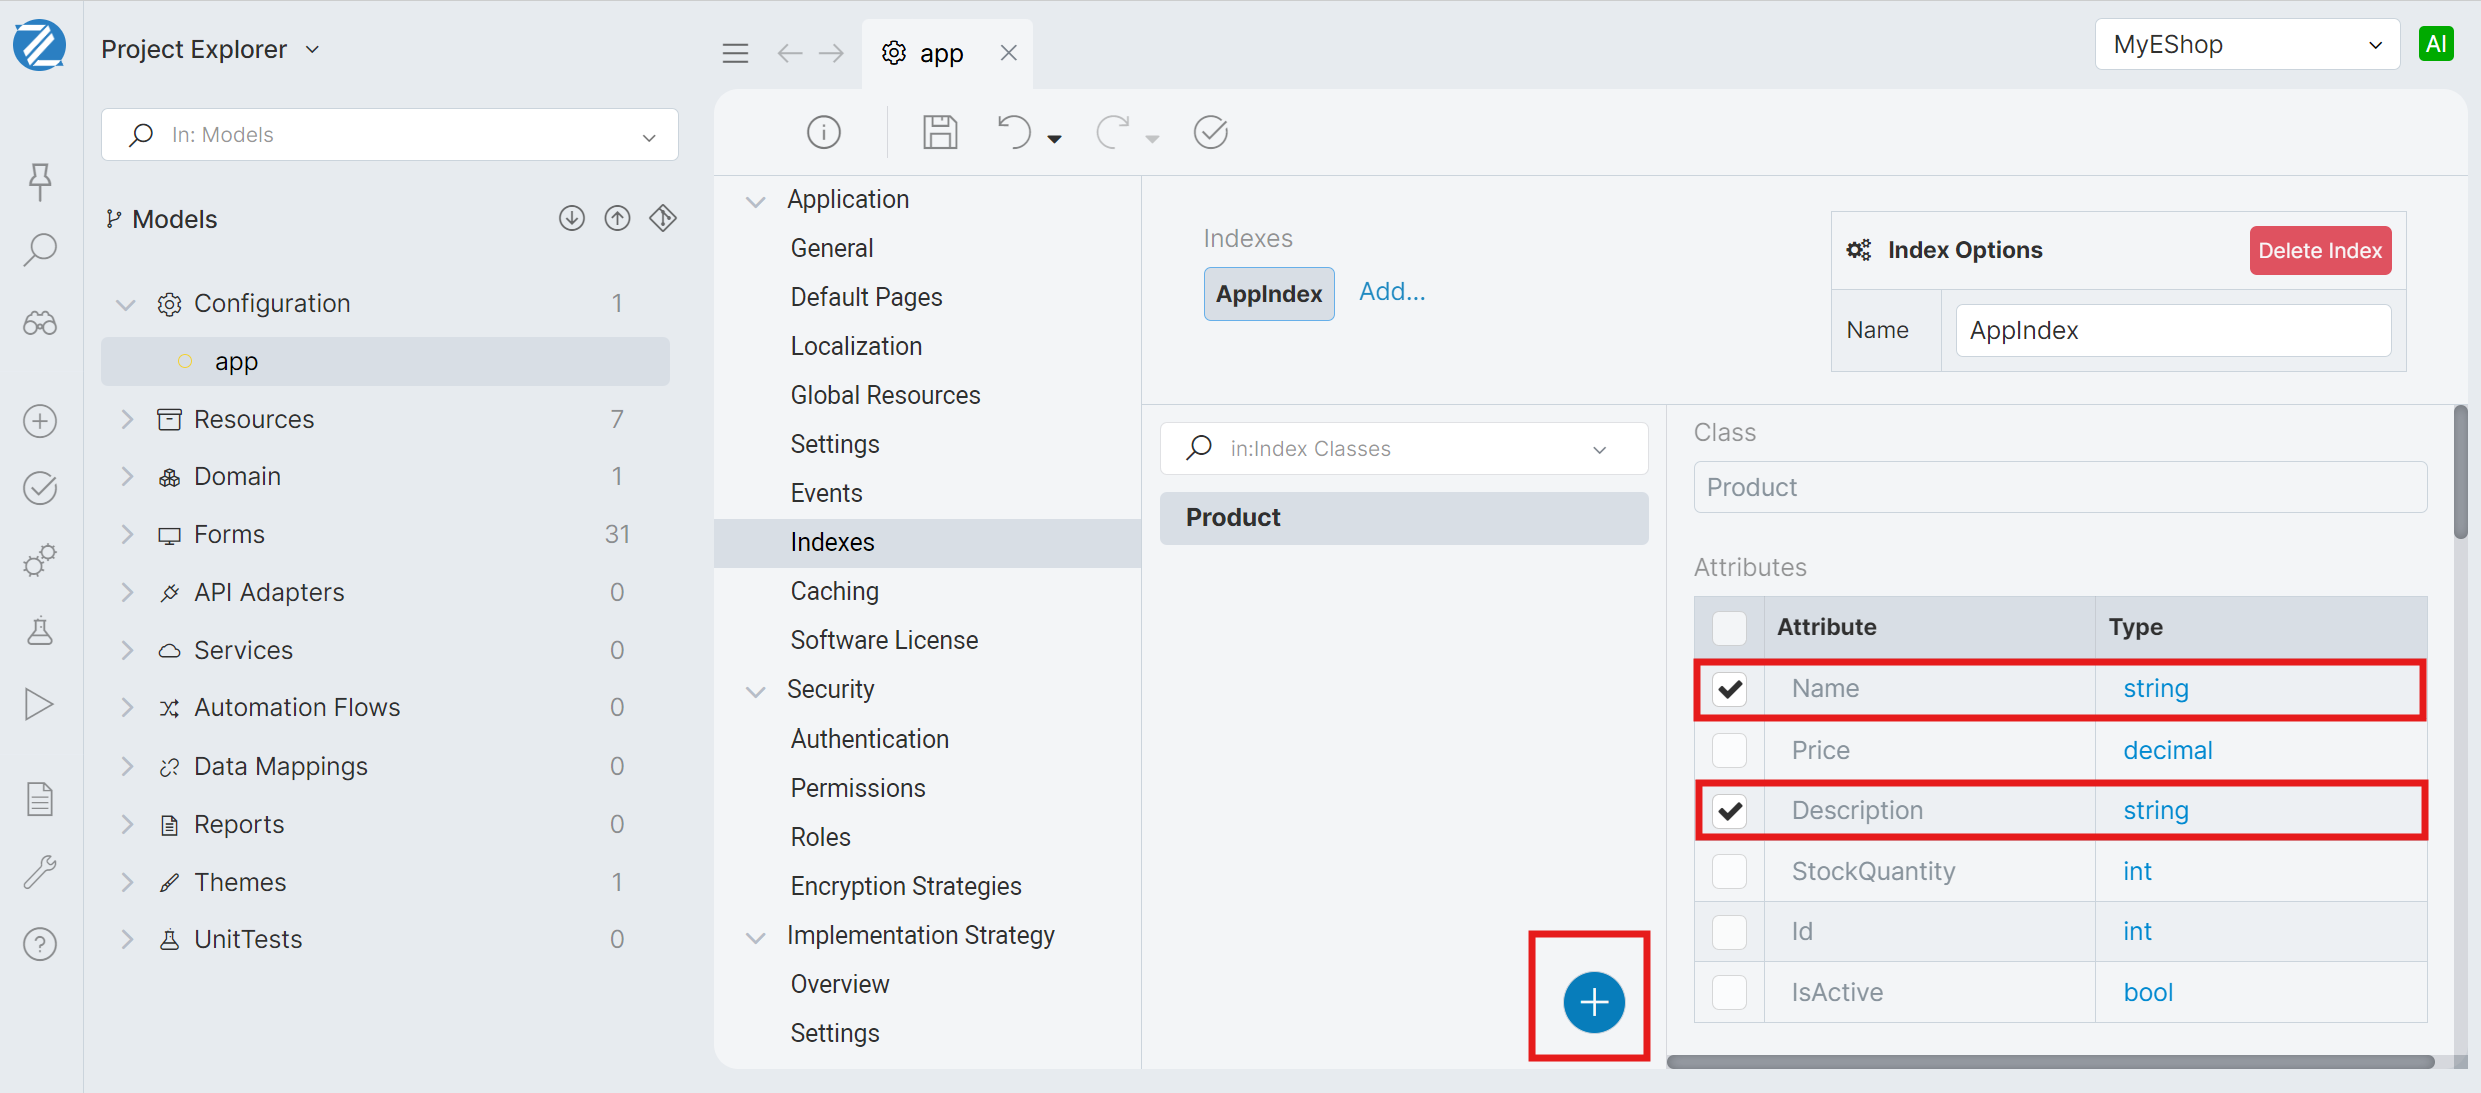
-
Specify Class Options:
For each class you must specify an action controller, a primary label, a secondary label, a filter, and optionally an icon. The action controller is the entry point action of a Form, where user will be navigated once he selects the result. The primary, secondary labels, and the icon are the fields that will be displayed in the search results. The filter is a condition that determines whether a class instance will be indexed. For example, you can filter the results to exclude inactive records according to the business logic.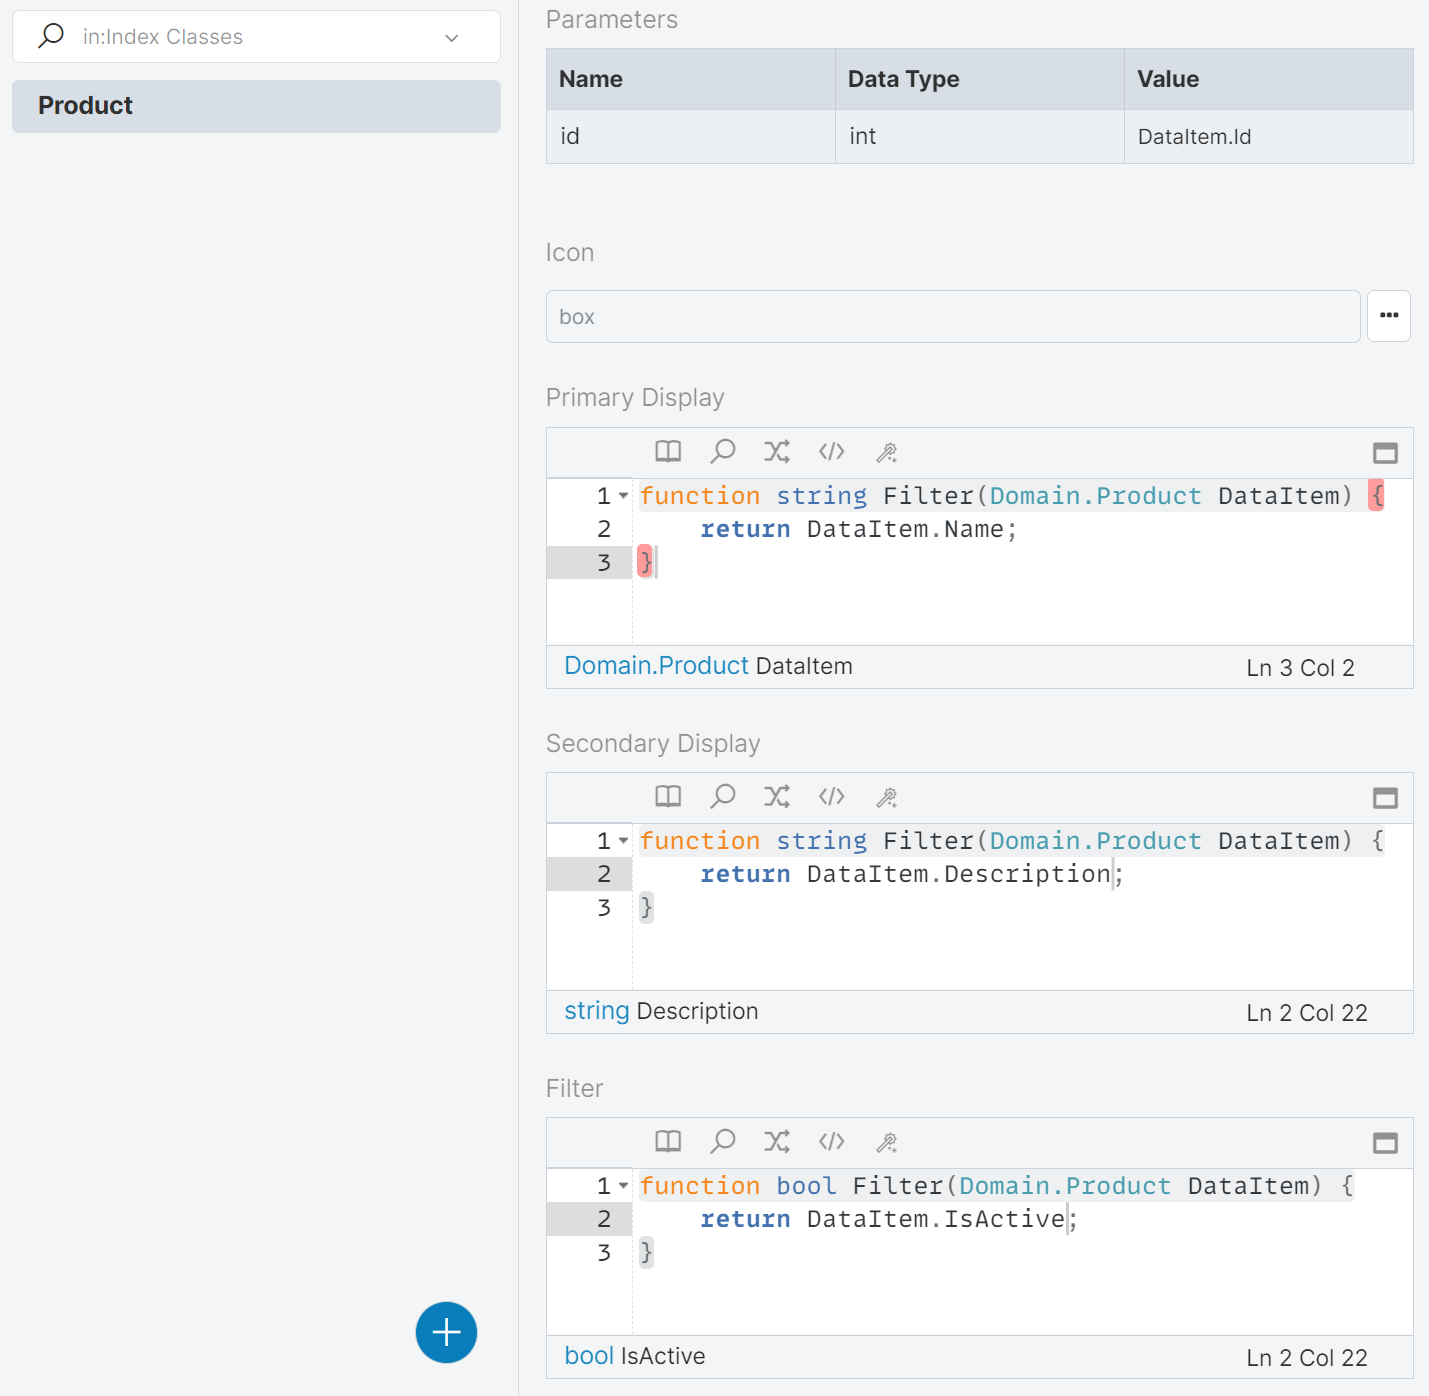
-
Automatic Updates:
Once configured, the index will automatically update whenever the associated classes are inserted, updated, or deleted. This update occurs after the next build of the application.
Indexed fields will be included in the search results if a user’s query matches any content within those fields.
Using the Search Index
To enable users to utilize the search functionality, the search UI must be integrated into the application's menu control.
-
Enable Search in Menu Control:
Go to the menu control settings and enable the search feature. Add the index you created to the menu properties.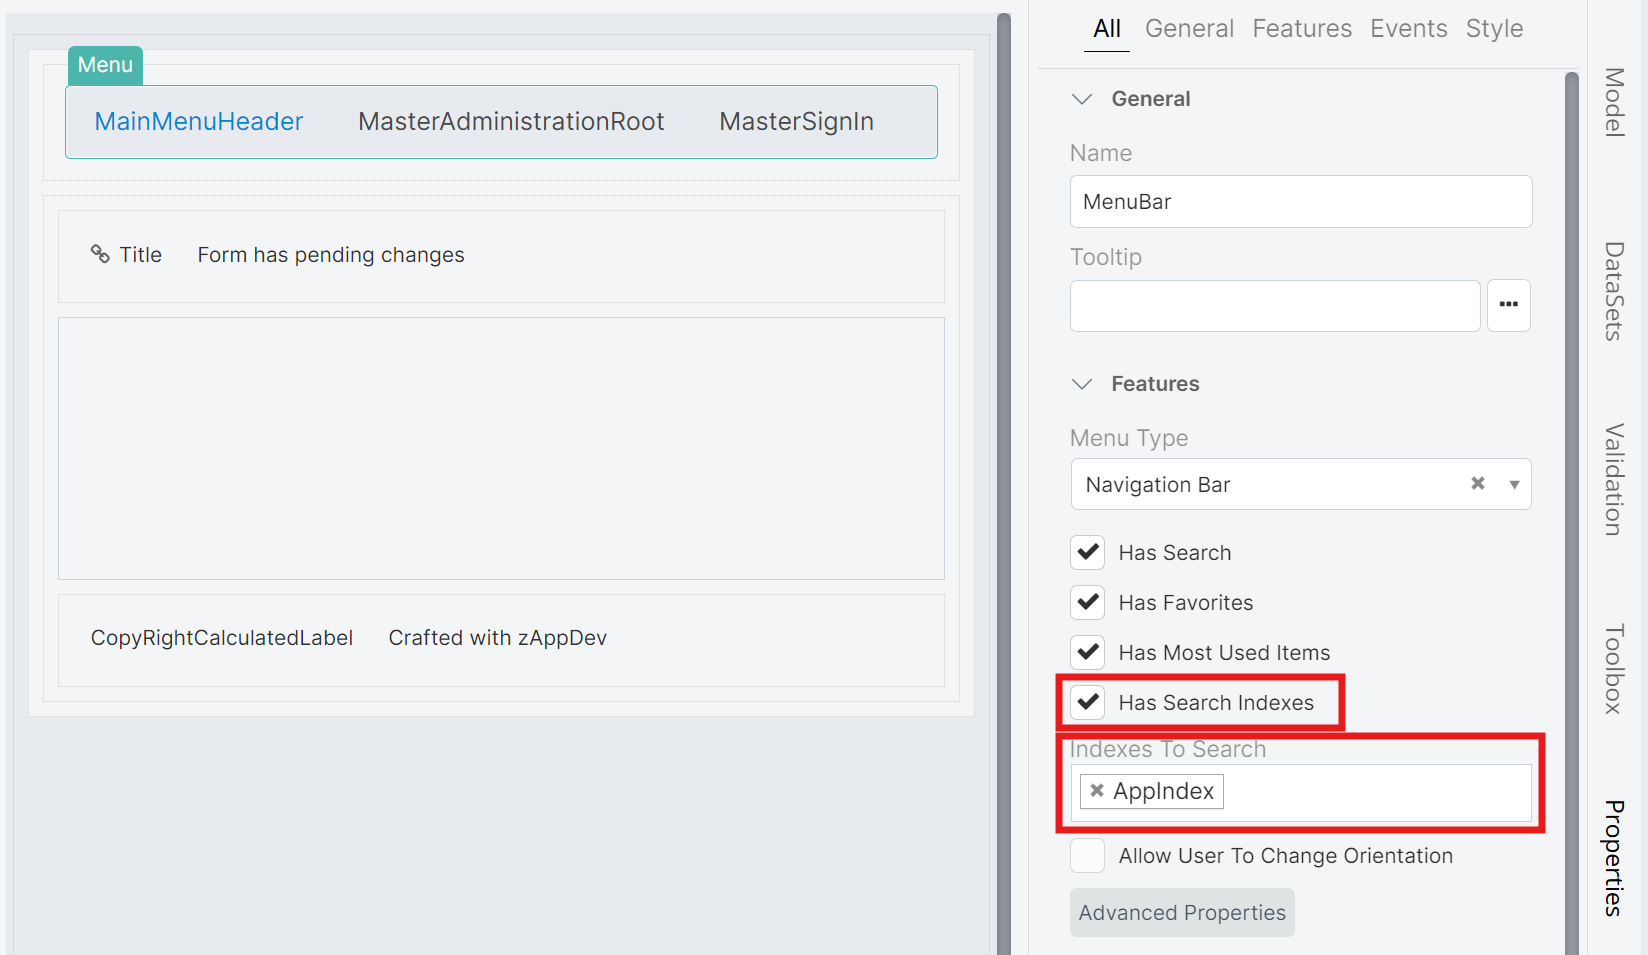
-
Search Modal:
The menu will now display a search icon. When users click this icon, a search modal appears, allowing them to query the indexed classes. Clicking on the search results will automatically navigate the user to the respective resources.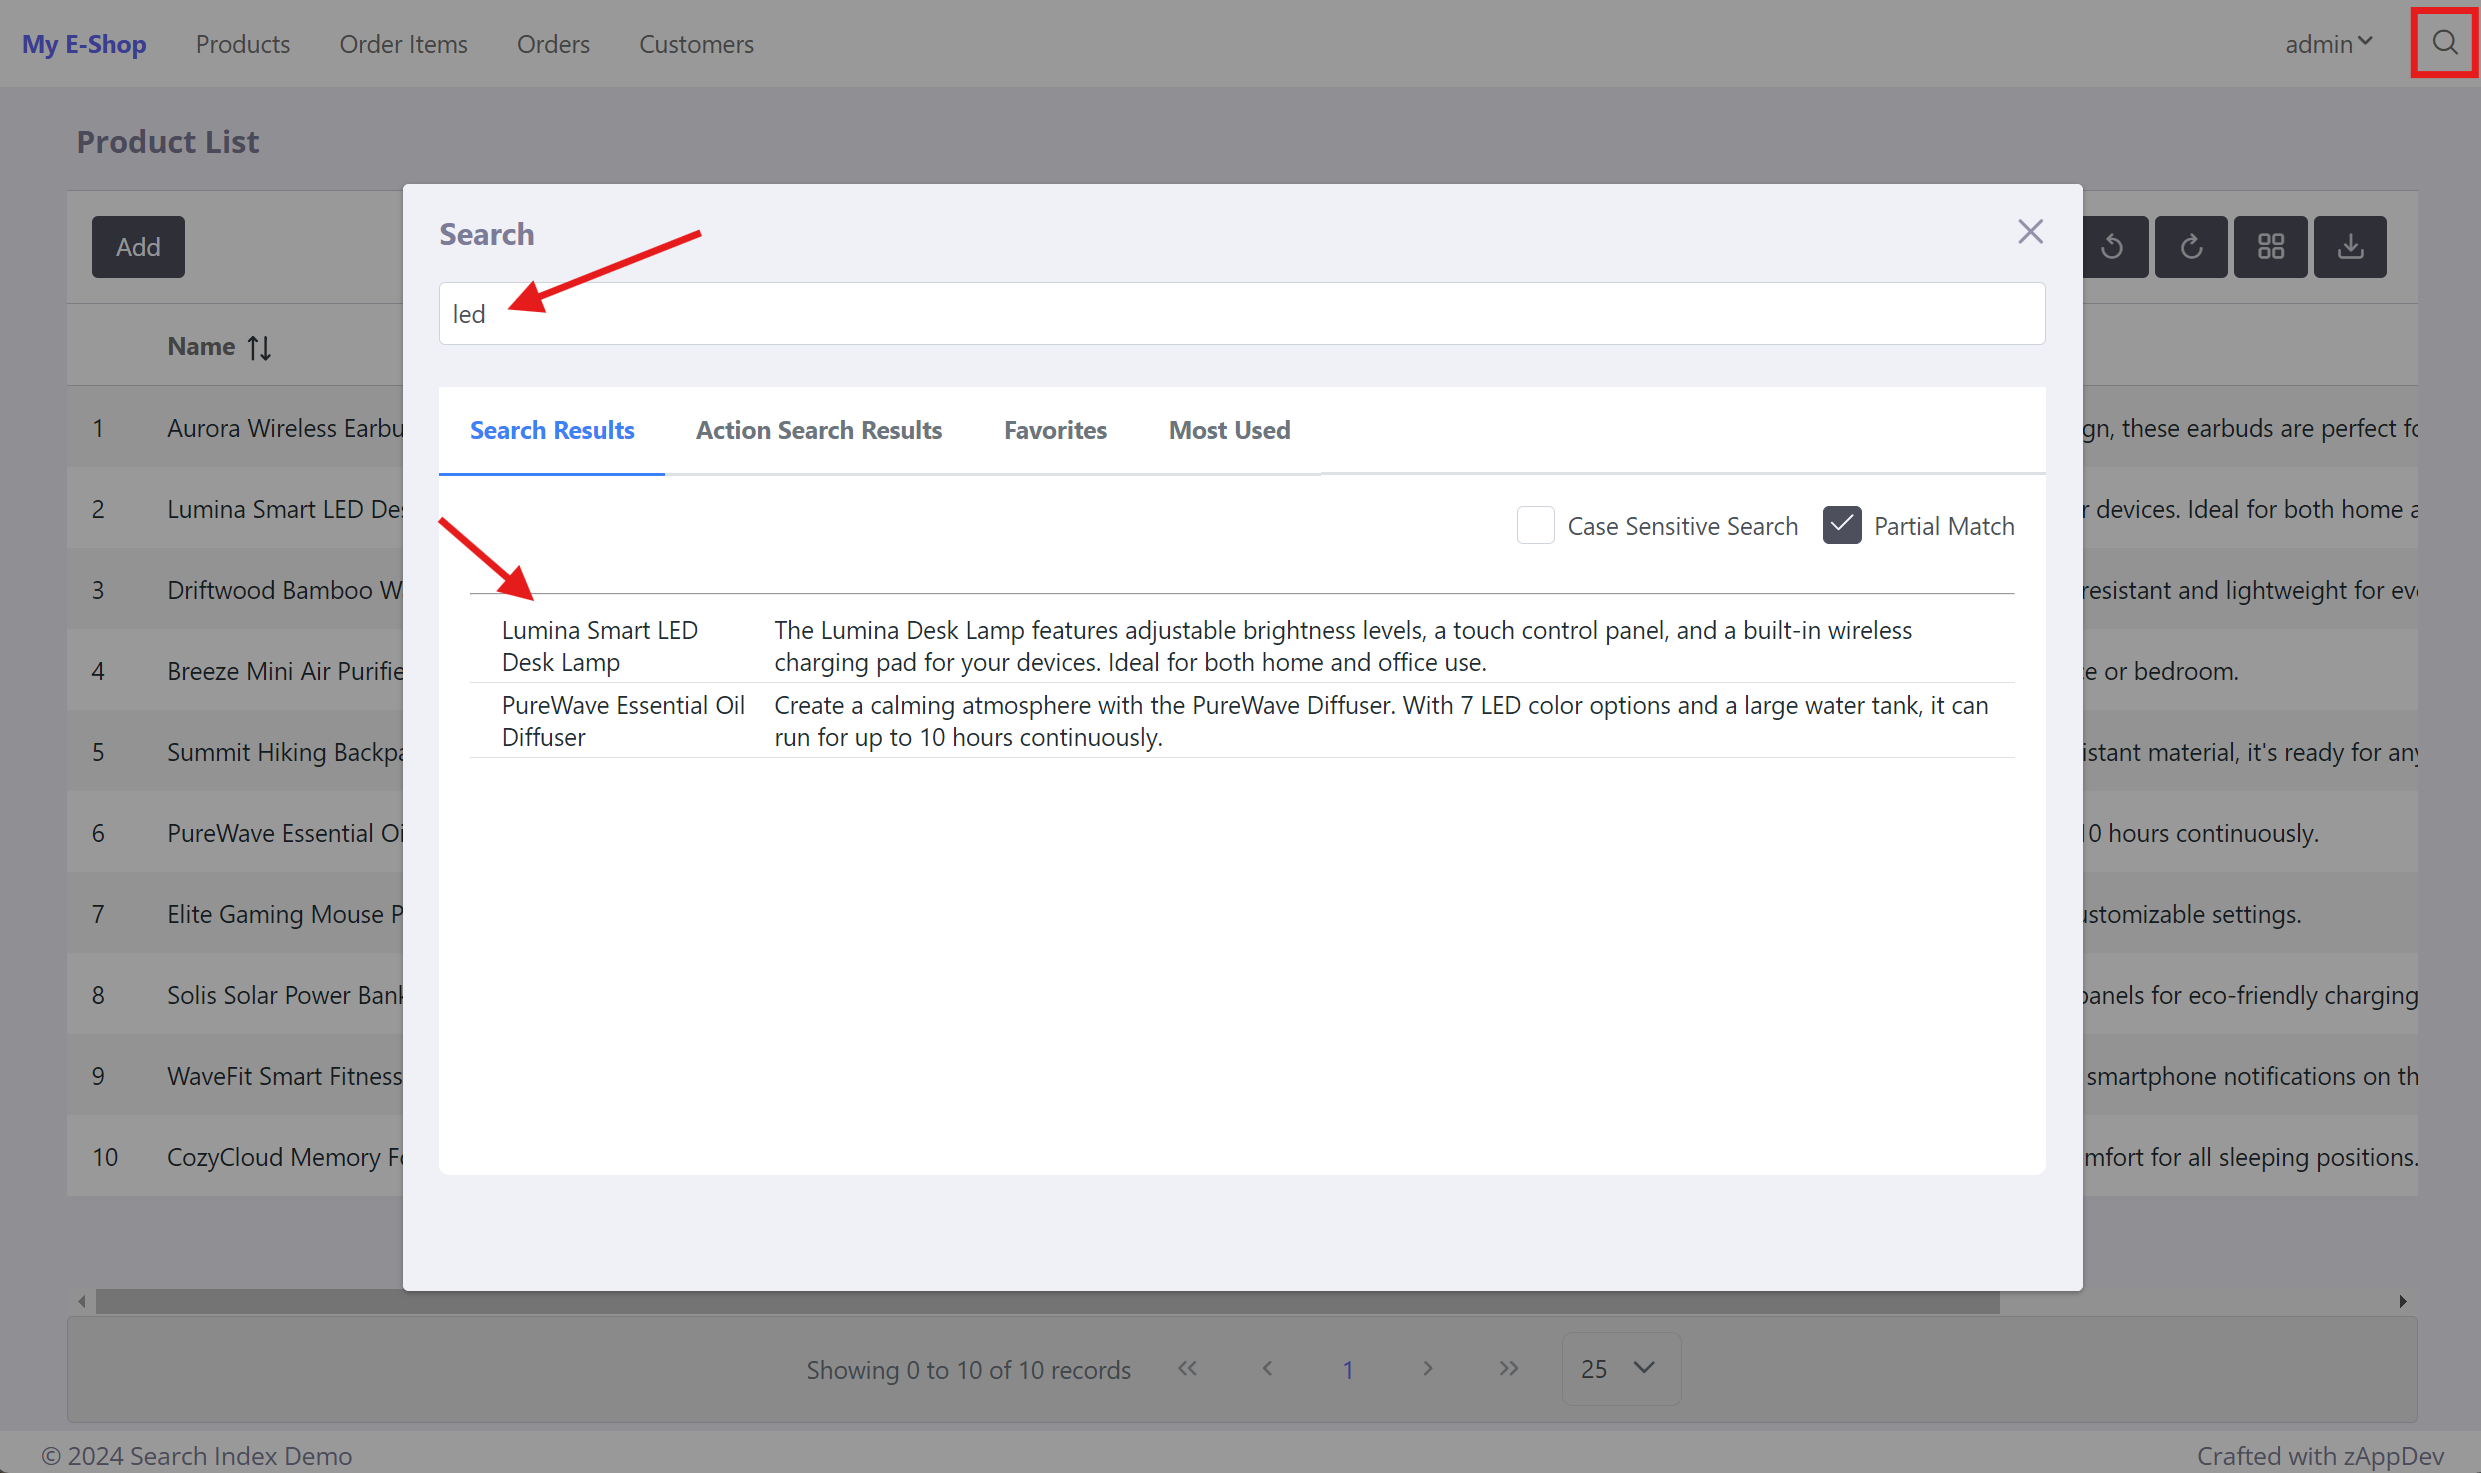
Managing Multiple Indexes
zAppDev supports the creation of multiple search indexes, each with its own unique configuration. This capability allows you to organize and manage searches across different sets of classes and fields effectively.
Benefits of Multiple Indexes:
-
Scalability:
For applications with numerous classes and fields, splitting them into multiple indexes can make management more efficient and improve search performance. -
Granular Control:
You can create specialized indexes for different domains within your application. For example, one index could be dedicated to product-related classes, while another focuses on customer-related classes. This allows you to activate different search presets based on the context of the application.
Rebuilding the Index
The index rebuild feature enables developers to manually reset and rebuild the search index from scratch. This is particularly useful after making changes to the index configuration, such as adding a new field to a class, or when creating an index after data has already been populated in the database.
Triggering an Index Rebuild
To rebuild an index, use the following command:
Application.Indexes.INDEX_NAME.Rebuild();
For instance, if you have an index named "MainSearchIndex," you would trigger its rebuild with:
Application.Indexes.MainSearchIndex.Rebuild();
Practical Use Cases for Index Rebuild:
-
Administrative Control:
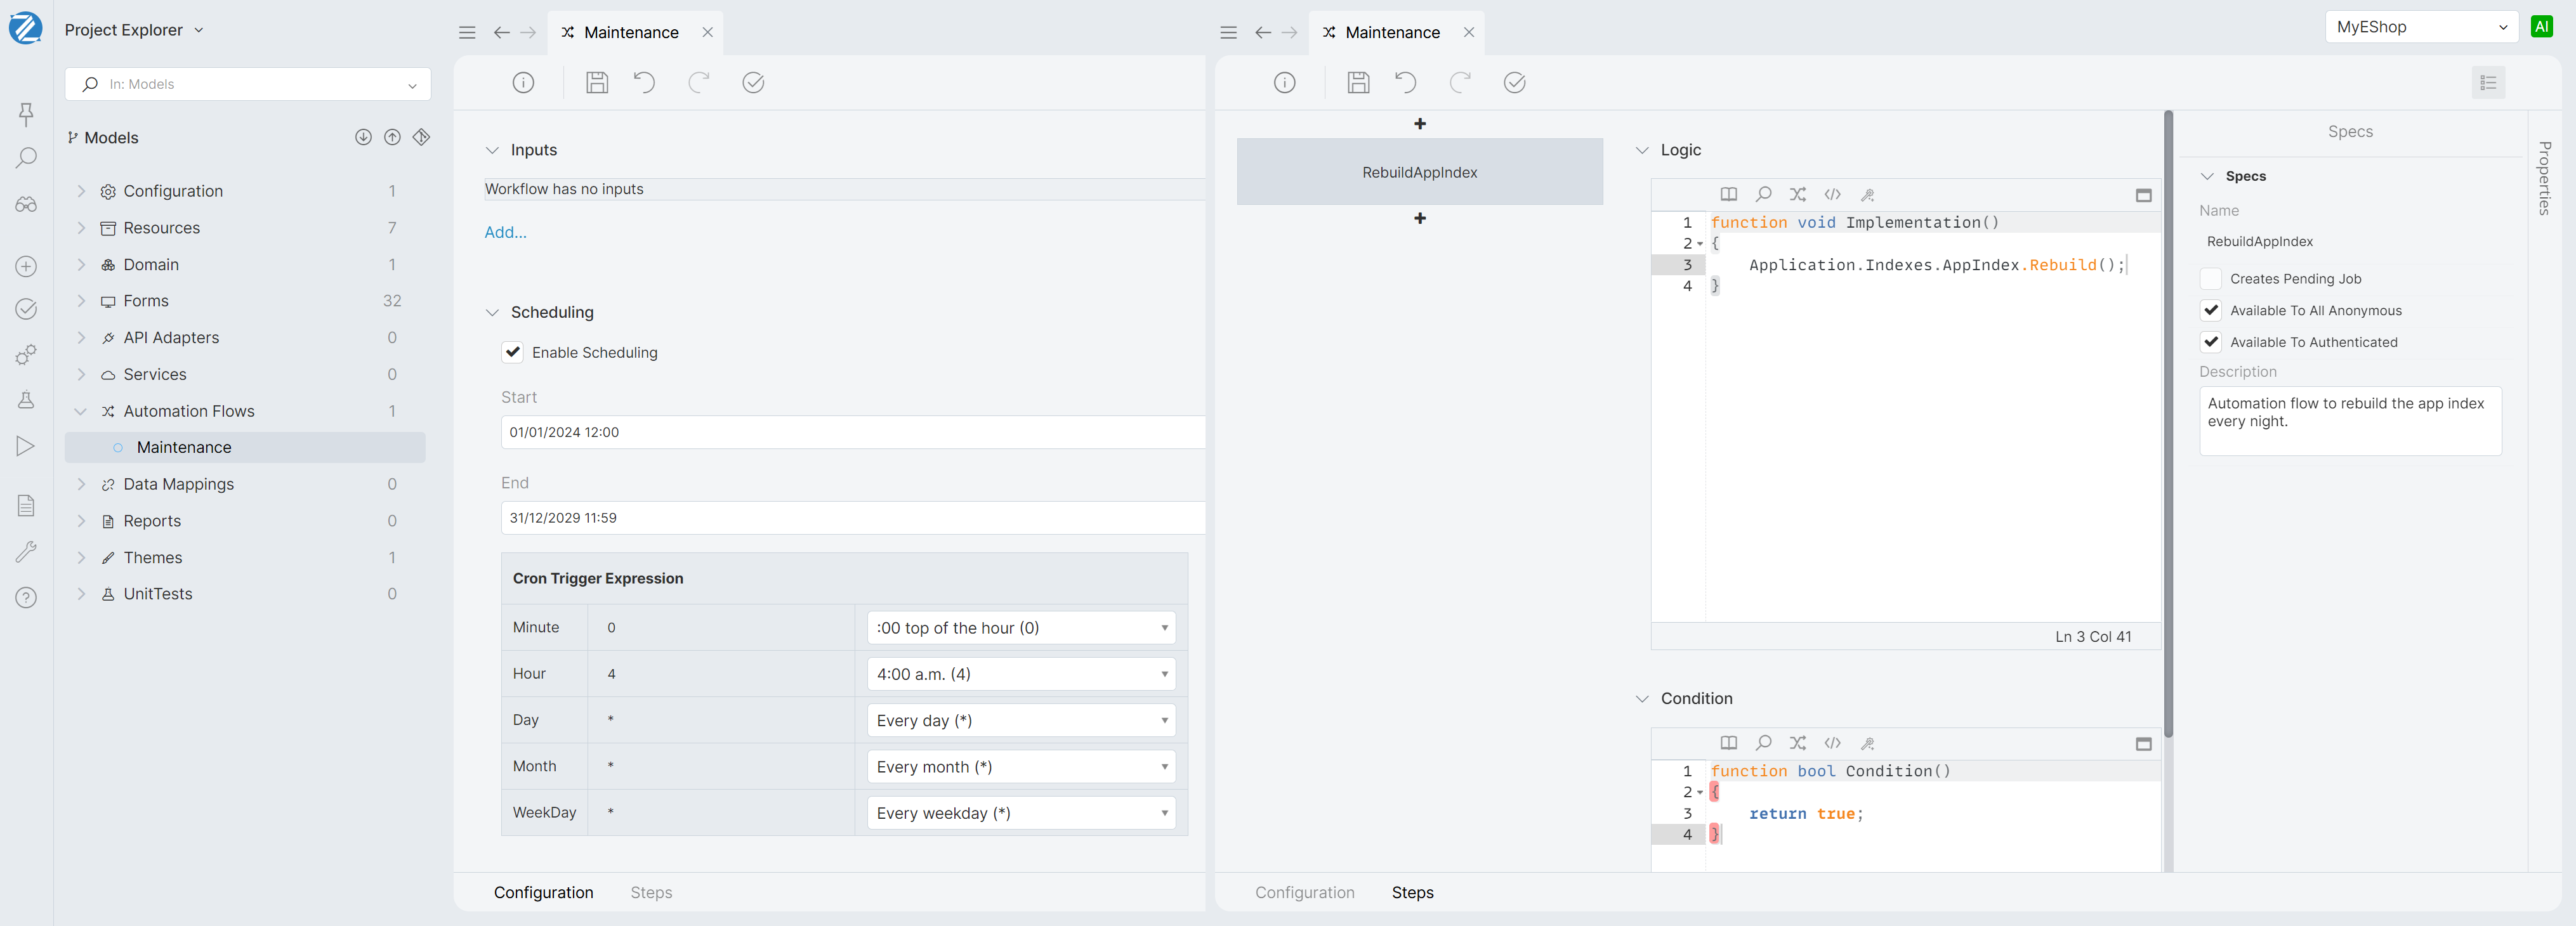
Add a button to an administrative page within your application that allows authorized users to trigger the index rebuild within a form controller. For example, the controller can have the following body:function void RebuildIndex() { Application.Indexes.AppIndex.Rebuild(); ShowMessage("The index has been successfully rebuilt!", AppLib.MessageType.Success); } -
Scheduled Workflows:
Configure a workflow to automatically trigger the index rebuild at regular intervals, such as nightly.