Live Testing
Once you have your Exposed Service set up you can use the Online API Documentation page to test it. You can access the testing page by clicking on the following button:

Important
You must first build your application before you can test your Exposed API.
Interface
A new window/tab will pop up and the following screen will be displayed:
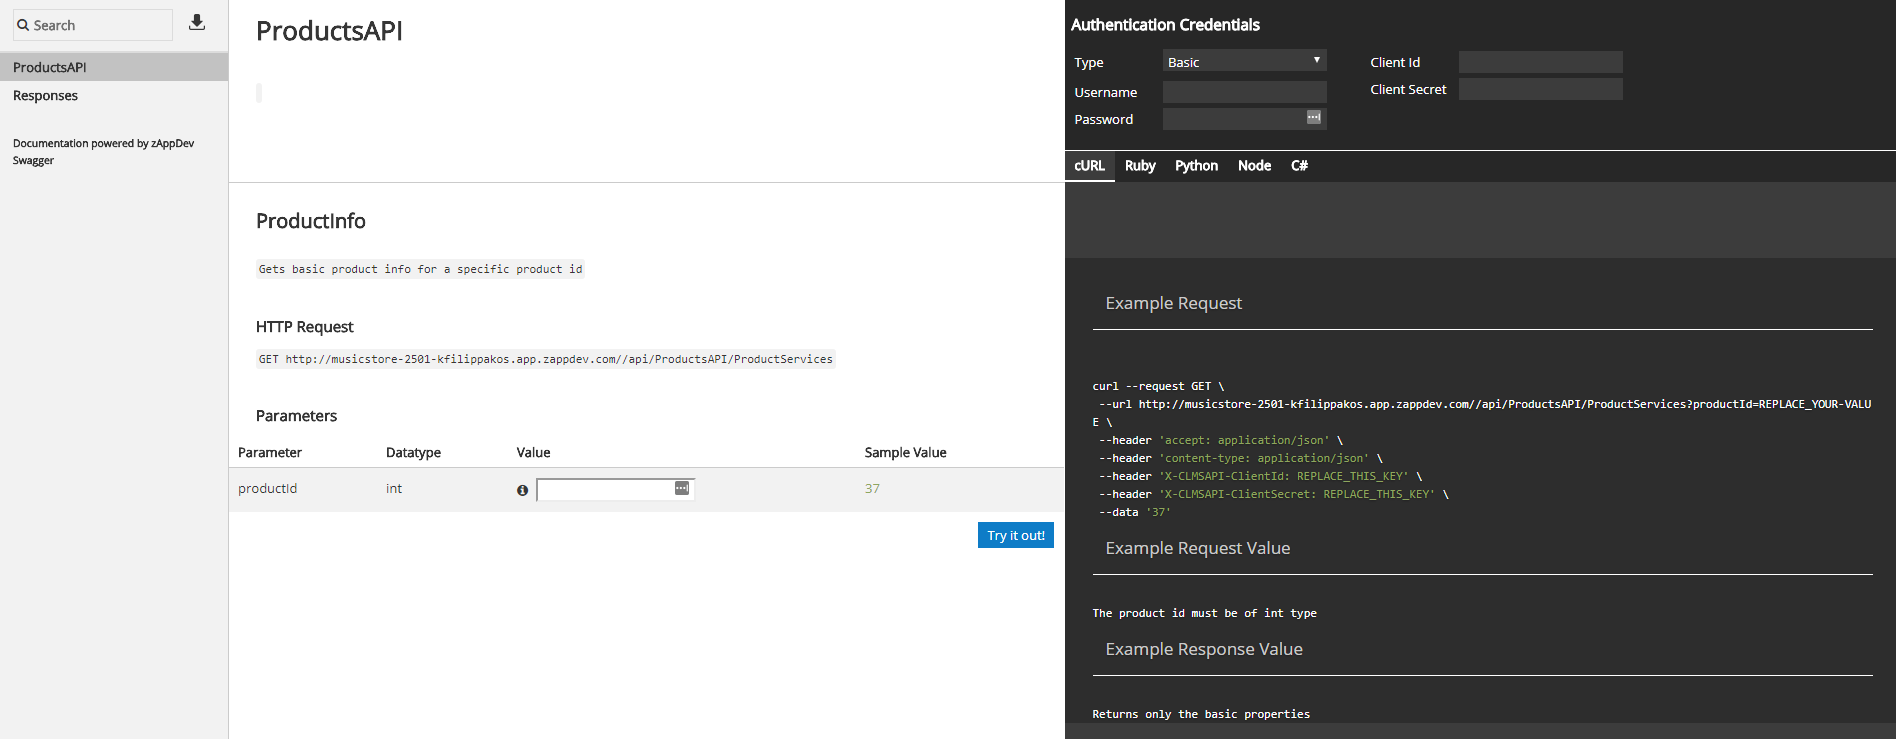
The interface is divided into 3 columns. The left one is the navigation pane, where you can search and select any Exposed API of your application.
Note
Next to the search button there is also a download button. This opens a URL with the 'signature' of your Exposed API model, describing every Operation's configuration. This can be used in systems that support swagger definitions to create compatible endpoit clients that will access your API. zAppDev supports this feature when creating services through the new model wizards: Interface and Exposed & External.
The middle one displays information about the endpoint URLs of each Exposed API, its parameters and a button to test it.
The right section allows you to enter the appropriate Authentication Credentials if needed, and request examples to the currently selected API in several flavours such as cURL, Ruby, Python, Node and C#.
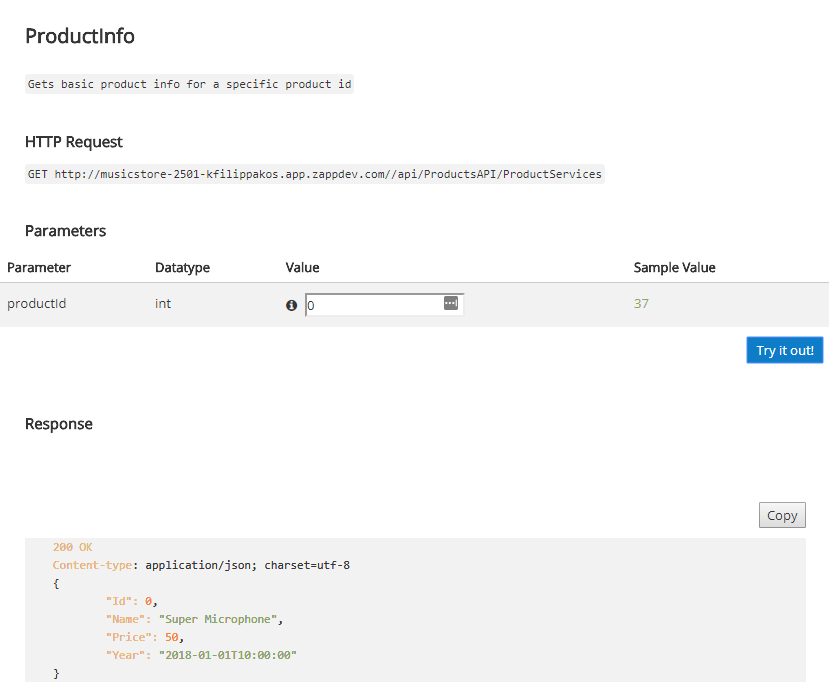
Testing
To test an Exposed Service first you should first fill the Authenication Credentials if needed. Next you should fill the parameters and click the "Try it out!" button. Below is the output of the example API used in this documentation:
Note
A HTTP response code table with short descriptions is provided at the end of the API's for reference when testing your Exposed Services.