Notifications
Introduction
This How-To will help you add a custom notification mechanism to your Application.
Info
The steps described in this document work using the Dark Theme, provided by zAppDev. If you are working with a different theme, use this How-To as your "base" and then configure your CSS according to your UI.
All the models you will need, are provided and can be downloaded from here. If your working on an already created Application, you might have to rename some Models (i.e. User etc) or Controls.
Caution
Changing the names of any control, class or attribute described in this document might cause unexpected behavior. Remember to properly adjust all names - especially to the JS files.
Steps
1. Business Object
The first step will be to create some Business Objects. So, go to your Application and create a new class named Notification. Make sure to add the following attributes:
- Type: string
- Reason: string
- DateCreated: DateTime
- IsRead: bool
Now create a new User class that will inherit the ApplicationUser and associate it with the Notification, sot hat you can filter the notifications based on their recipient.
Next, create a NotificationAction class with the following attributes:
- Link: string
- Type: string
Create a "1 to many" association between the Notification and NotificationAction classes, so that one Notification can have many Actions.
The NotificationAction class will provide extra functionality to your Notification, instead of just informing you of things.
With the classes described, the following scenario is now possible: A User receives a Notification, stating him/her that a meeting is to be attended. The Link can provide a URL for further information regarding said meeting, RSVP statuses etc.
Finally, create an Operation to create such Notifications.
Your final Business Objects should look like:

2. Event
Now, go to your Application's Configuration: Configuration → app → Events Add a new Event and name it NotificationCreated Go back to the Operation you created at Step 1 and add the following line into the Operation
Events. NotificationCreated.Raise();
3. Dataset
Now that you have the Business Objects and Events in place, it's time to add some logic to your Application. Go to your Master Page, add a new Dataset and make it retrieve your Notifications. For more intelligent results, add a filter, into the Filter section of said Dataset and place code in order to filter the results based on whether or not the Notifications have been Read (IsRead) by the Logged-In User. This should look something this:
return
    DataItem.IsRead != true
    &&
    DataItem.Recipient.UserName == AppLib.Session.GetCurrentUserName();
4. UI
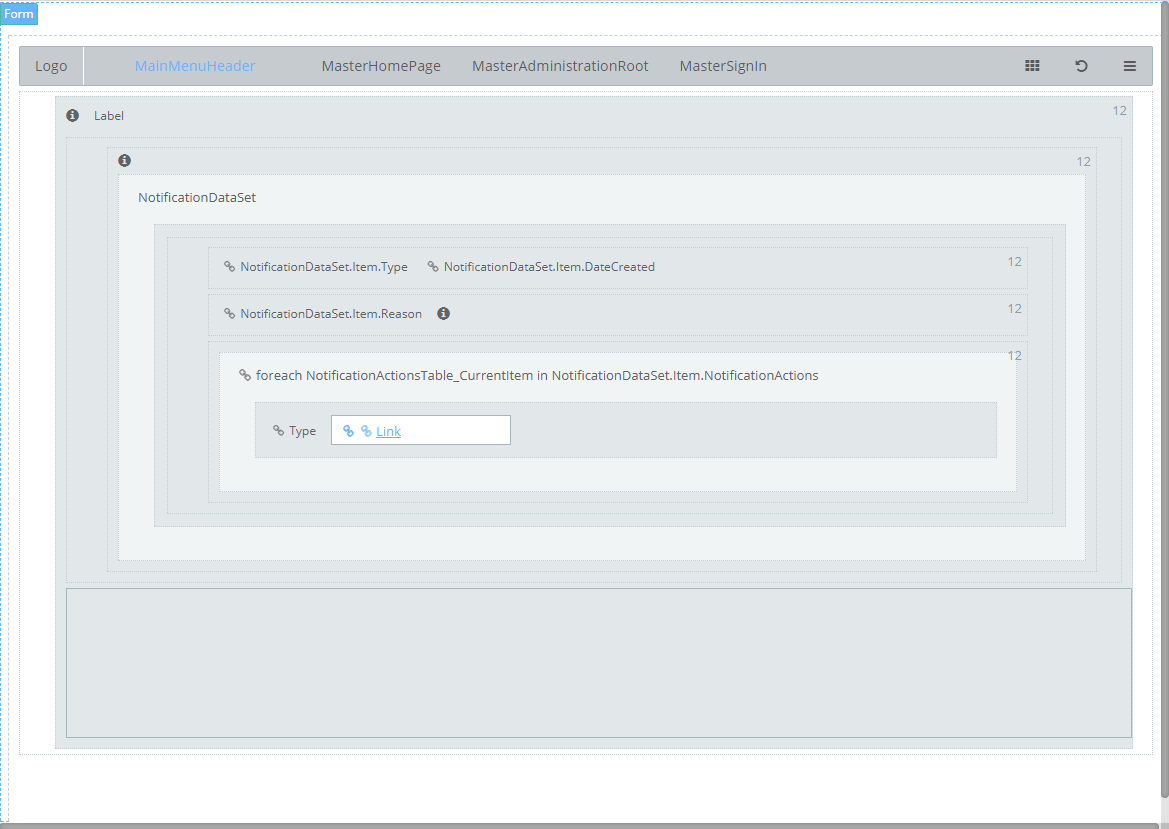
Now, add a Layout in your MasterPage and place a Data Grid. Bind the Data Grid to the Dataset you created in the previous step. Make sure your Data Grid has one row with only one cell. In this cell, add a new Layout, with 3 columns. In these columns, add the following (per column)
- Column 1: Add 2 labels. Bind the first one to the Type and the second one to the SendOn properties of the Notification.
- Column 2: Add 1 label. Bind it to the Reason property of the Notification. Additionally, add one icon, showing the OK image
- Column 3: Add a Bound Table and Bind it to the NotificationDataSet.Item.NotificationActions (where NotificationDataSet is the name of the Dataset you created in the previous step). Add a Layout into this table with a Link and Title labels bound to the Link and Title properties of the NotificationActions.
Finally, add
- an icon that will open/close the Notification dialog. Name it NotifiactionsShow
- a label named TotalNotifications
Your end result should look like this:
5. Event Listener
In your Master Page, add a new Event Listener, and select the Event you made during Step 2. In this event listener write the following code
FormControls.NotificationTable.Refresh();
This code will refresh the notifications table each time a new notification is created.
6. Mark as Read
Add a new Controller Action that takes an object, with the same type as the notification, as an argument. In our example, this is ‘Domain.Notification notification’. In the controller action add the following code
notification.IsRead = true;
notification.Save();
FormControls.NotificationTable.Refresh();
Now find the OK icon you created during Step 4 and configure its OnClick event, by adding the Controller Action you just created. Make sure to pass the "NotificationTable_CurrentItem" as its parameter.
7. Upload Files
Upload the attached CSS and JS files in your project. Go to your master page and add the files. Now you are ready to go.
Author
The notification mechanism described in this document was developed for the needs of a specific Application. However, effort was made so the mechanism can be easily integrated in any zAppDev Application. Feel free to contribute in this document and on the development of the mechanism. Contact the Author for any further information.