Associations
Create Association
To create a new Association between two Classes,
- Place your mouse at the boundaries of the Class (anywhere, along any side of the box). You should see a crosshair cursor
- Left-click on the Class and drag your mouse until you reach the related Class
- Set the Association Definition in the Modal that will appear as soon as you design the line of your new Association (for more information, go here)
Hint
To create an Association with a Class that is defined in a different Business Objects Model, bring the latter into your current as a Shadow Class.
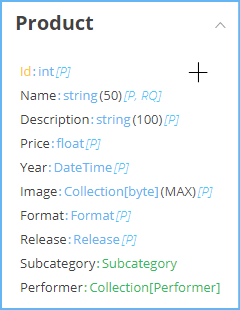
Alternatively, you can just add a complex Attribute:
- Add an Attribute (or select one you wish changed)
- Select the associated Class as its Datatype
Note
If the Class you are assigning to the Attribute is defined in a different Business Objects Model, it will be automatically brought into your current as a Shadow Class. No need for you to create it manually
Properties
As soon as you create a new Association, you will be able to set its Properties to further define the relationship between your two Classes. If you add an Association by dragging a line between your two classes, the Association Properties modal will be shown automatically. In all other cases, you can open it by:
- Double-Clicking on the green Association line, or
- Selecting the green Association line and clicking on the Advanced Properties button of the Properties Grid
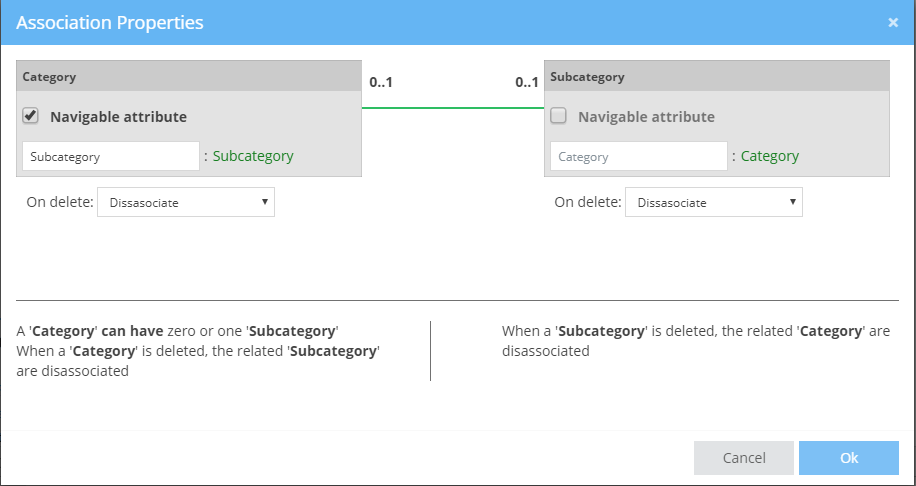
The Association Properties will present the two Classes. For example, in the above Image, we drew a relationship between a Category and a Subcategory.
Navigable attribute
Under each class, you will see the Attribute that will hold the relationship. For example, in the Category class shown above, the attribute responsible for the connection to the Subcategory class is named "Subcategory"
and is of a Subcategory type.
If you check the Navigable attribute, the Attribute will be added into your Class. This will make it accessible in your code. In the example shown above, the Subcategory attribute of the Category class is navigable.
Thus, the following line of code is valid: Domain.Category.Subcategory. In contrast, the Subcategory class has not defined its Category attribute as Navigable. Thus, the following is false: Domain.Subcategory.Category (the Category attribute is not present in the Subcategory Class)
You can rename a Navigable attribute to anything that makes sense within your Application.
Hint
Although it can seem handy to define all Attributes as Navigable, being able to access then from any side of the Relationship, I would advise you to set as Navigable only those Attributes that you will, in fact access.
Imagine for example two classes: Order and Status. The Status shows the status of the Order (e.g. New, InProgress, Complete, Billed etc.). Now, you want to be able to get the Status of an Order (Order.Status).
Thus, you will set the Status attribute as Navigable. However, you do not care for the opposite relationship: you will never access a Status and then require to see its Order. So, you should leave the Status.Order Attribute as not navigable.
Again, the easiest thing to do is to define everything as Navigable. My advice would be to be careful, as this might lead to the increase of the transferred data between your Front-End and Back-End. No need to transfer Objects (i.e. Order information for any Status) if you have no use in it.
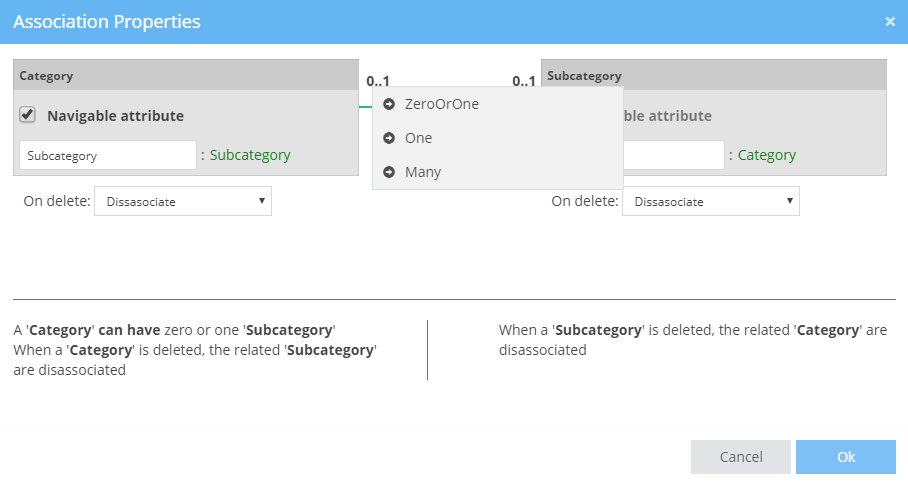
Multiplicity
To set the Multiplicity of your Association:
- Click on the Multiplicity indicator (e.g. 0..1 of the previous Image)
- Select the Multiplicity from the Menu that will appear
Attention
When setting the Multiplicity rules, you are defining its rule for the opposite side.
For example, to state that "A Category has multiple Subcategories", you must click on the Multiplicity indicator immediately adjacent to the Subcategory class.

Notice that as soon as you define a many relationship, the Attribute holding the relationship will be changed into a Collection.
In these cases, if you wish, you can define the way that the Collection should be ordered, by selecting the Attribute as the "base" of the ordering, as well as its type (Ascending or Descending).
For example, the Image that follows designs the following Business logic: A Category has many Subcategories. The Subcategories collection should be Ordered by Name in an Ascending order from A to Z

Deletion Rules
The deletion rules define what should happen to the opposite Class in the case that the current is deleted. There are four (4) available rules. Lets check them out, by using the following example:
A Music Store Application has Categories for its Products: Rock, Metal, Classic etc. Each Category has multiple Subcategories. For example, the Rock category contains: Hard Rock, Classic Rock, Punk Rock etc.
| Rule | Description | Example |
|---|---|---|
| Dissasociate | Keep the associated Objects, but remove their association to this Class | By deleting the Rock category, the Hard Rock, Classic Rock and Punk Rock subcategories will remain existent in our System. However, their parent Category will be null. |
| Restricted | Prohibit the deletion of the current class, as long as it is related to existing objects. | Whenever you try to delete the Rock category, you will get a Business Exception prohibiting you to do so. The only way to delete the Rock category is to first delete its subcategories (Hard Rock, Classic Rock and Punk Rock) |
| Cascade Delete | Cascade the Deletion of the Parent to all its children | If you delete the Rock Category, its subcategories (Hard Rock, Classic Rock and Punk Rock) will be immediately deleted as well |
| Do Nothing | Delete the current Entity, however leave all related Entities be - do not delete them (same as the Dissasociate rule) | (same as the Dissasociate rule) |
Property Grid
You can define all the aforementioned properties using the Property Grid, at the right-side of the Designer
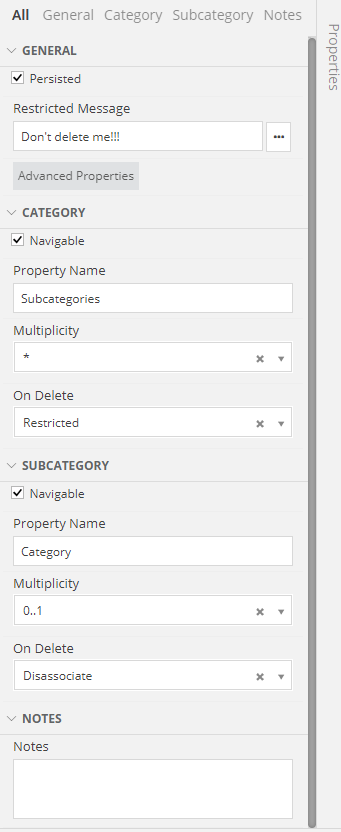
All the aforementioned properties can be defined in the Property Grid as well, that has some additional configuration such as:
Persisted
Defines whether the Association between the two Classes should be saved into the DataBase.
Restricted Message
The message to be displayed every time a user is deleting an Object that is bound by a "On Delete: Restrict" relationship
Notes
Useful notes regarding the Association
Available Operations
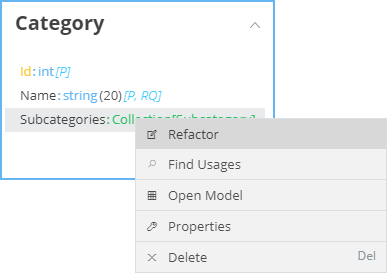
By right-clicking on an Associated Attribute, you will see a Menu like this:
| Operation | Description |
|---|---|
| Refactor | Read information here |
| Find Usages | Read information here |
| Open Model | Navigates you to the Business Objects Model in which the Class of this Attribute is defined |
| Properties | Displays the Association Properties modal |
Association with Systemic Class
If you are creating an Application using a Template (e.g. Web Application Template), you will notice that many Classes have been pre-defined. These are called Systemic Classes. You cannot define Associations with Systemic Classes. If you have such a requirement, what you can do is:
- Define a class of your own
- Set its Base Class to the Systemic Class
- Associate your class with the one you just created
Example
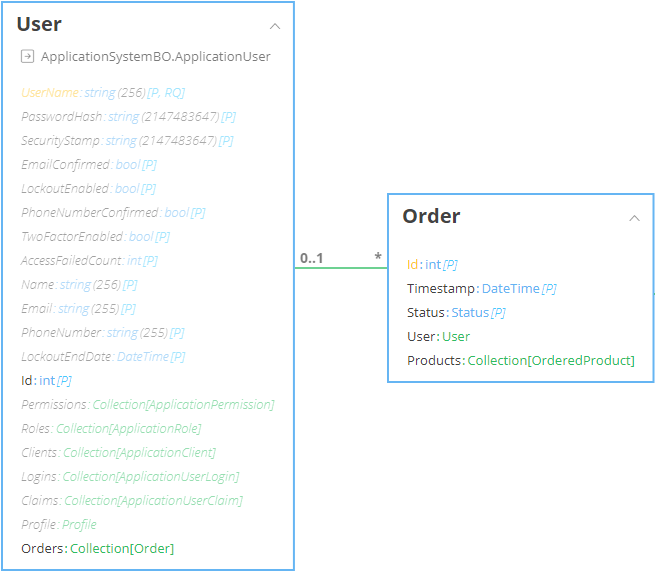
One of the Systemic Classes in the Web Application template is the ApplicationUser. If you want to create a relationship between the ApplicationUser and his/her Orders, you should:
- Create a class, say User
- Assign its Base Class to ApplicationUser
- Associate the Order class with the User
Design Rules
- An association cannot have the same name as one of its connected Classes
- An association with a Systemic Class is prohibited.
- An association between two persisted Classes must also be persisted.
- An association between two non-persisted Classes must also be non-persisted
- An association must not have a Restricted On Delete rule on both ends.
- Associations with a Multiplicity of 1 must have a Cascade Delete or Restricted value as their On Delete rule
- Associations between Classes that have a Multiplicity of 1 at one end and 0..1 at the other, must have On Delete rules as:
- Disassociate or CascadeDelete for the 0..1 end
- Cascade Delete, Disassociate or Restricted for the 1 end
- Associations with a Many Multiplicity at an end that have a Cascade Delete as their On Delete rule, must be navigable from both sides
Remarks
If your Associations end up looking like spaghetti, find out how to re-organize them in a clearer way here.