Model
Introduction
The Model is the representation of your Form's Data, that will be sent (where and when required) to the Back-End (Controller). It can contain Domain-Specific Information (Database Data) as well as any other entity that will help you create a comprehensive and powerful View.
The Model can be filled with values at any point of your Form's lifecycle in any of the following ways:
- From a Controller Action of a Logic Item, using Mamba (e.g.
Model.PageTitle = "My Profile";) - By user's Action (e.g. when a User is changing the value of a Textbox or adds some more records in a Table)
- From a Controller in a Normal type of Page when it changes the Model of its Master Page
- By filling it with Database Values (e.g.
Model.ApplicationUsers = Domain.ApplicationUser.GetAll(); - Any other way you can think of
Hint
Remember that if you want to show items of your Model in a Form, they must have a value. Why am I saying that? 'Cause say you need to show a Table filled with all the Users of your Application. You can do it in one of two ways:
- Using a DataSet for the
Domain.ApplicationUserClass, calling theGetAll()Operation - Using a Model with a
Domain.ApplicationUserCollection ( e.g.users: Collection[Domain.ApplicationUser])
If you choose to use the Model, you should first populate it with data from your Database (e.g. from an Entry Point controller action) like so: Model.ApplicationUsers = Domain.ApplicationUser.GetAll();
Definition
Adding & Removing Properties
You can define the structure of your Model in the Model Panel.

To add a new property into your Model, simply click on the  button, type in its Name and select its Data Type.
To remove it, right-click on the Property you wish to delete and select "Remove"
Hint
You can distinguish between Properties that are used and not, by the color of their circular mark:
Properties with a
Properties with a

In order to avoid using unnecessarily large Models (sending them back and forth between the View and the Server), you can delete your unused properties.
Defining a Property as a Collection
Now, often you will see that you need a Collection of Properties, instead of a single Property. For example, in the example shown above our Product has one only only one SelectedCategory. However, what if our requirement was that a Product can have multiple Selected Categories ?
To address such a requirement, all you have to do is define your Property as a Collection:
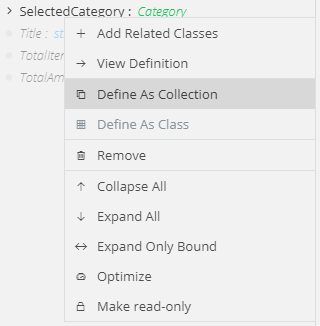
- Add the Property you need into your Modal (in our case: SelectedCategory: Category)
- Right-click on it
- Select the Define As Collection
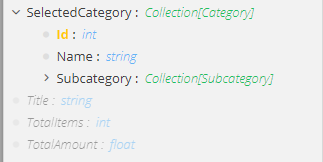
Momentarily, your Model Property will be defined as a Collection, ready for you to use in repetitive controls (i.e. Grids) and logic.
Hint
You can turn a Collection into a single Object (revert the process descibed before) by selecting the Define As Class option of the dropdown menu.
Modifying a Property
At any point you can rename a Model Property and/or change its type.
To rename a Property, double-click on its name and type in a new one.
To change the Type of a Property, double-click on its Data Type and select a different one from all the Types available in your Application
Attention
You can modify only 0-level properties - not their children.
For example, if you use a Property of a Product type inside your Model, you will not be able to alter its Description: string child, as this was the way it was defined in the Business Model.
You can, however, change the name of the Product property or completely change its type (e.g. to Offering)
Related Properties & Optimization
zAppDev does everything in its power to optimize your Model, by excluding unnecessary objects, collections and children items at large depths. Take a look at this example:
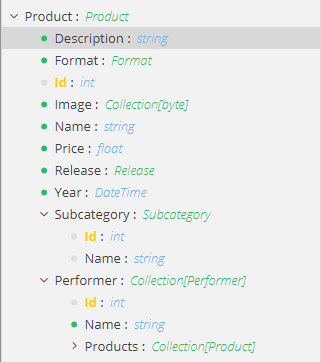
The Model of a View presented has a Product class that consists of: - Several 1st level properties (e.g. Description, Image) - One children Class: Subcategory - One child Collection: Performers
Now, take a closer look at the complex classes (the Class and the Collection). Let's take for example the Subcategory. You will notice that only its 1st level children are included in the Model. In reality, the Subcategory class has more complex properties that where not fetched: - A collection of Products - A Category class denoting its parent Category
Smartly enough, zAppDev created a Model using only shallow depths of complex relationships, in order to make the Model as light as possible. However, some times you will need Classes defined at larger depths. For example, say that you wish to present the Category information of your Product's Subcategory. To do that, you will need to include it in the model. To do that, all you need is to:
- Right click on the Object that contains the hidden child (in this case, the Subcategory class)
- Select Add Related Classes
- Choose, from the Modal Window that will appear, one or more Children Classes that you want to add
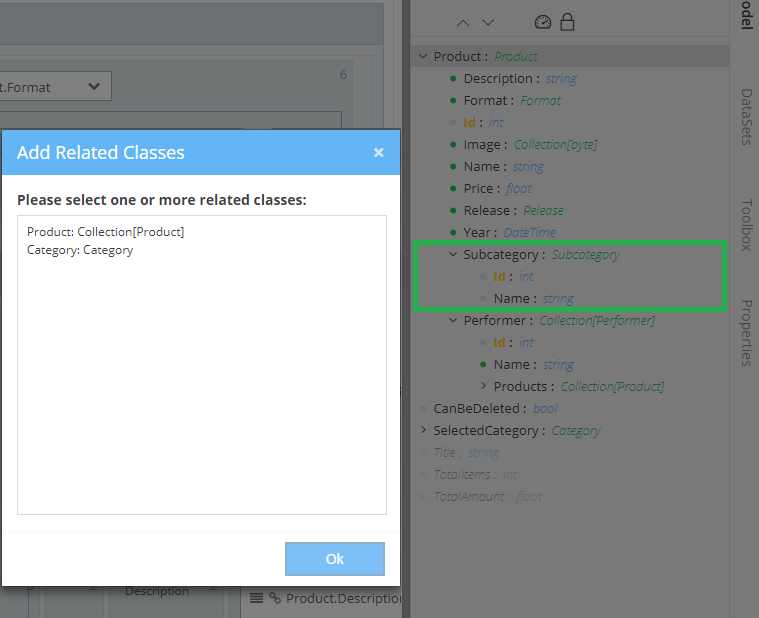
So, if you were to add the Category information of a Products Subcategory, you would add it as a Related Class and your Model would look like this:
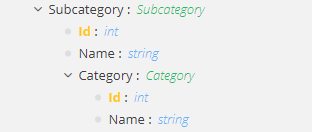
From this point on, you will be able to use the classes you added at deeper levels inside your View, your Controllers and your form's Logic.
Hint
To exclude a Related Class from your Model, in order to optimize it in terms of data, just right-click on the Class you wish to be gone and select Remove
Inheritence
As any other Form Model, a Master Page might have its own Model. This Model will be visible to and accessible from any other Form Model that uses that Master Page.
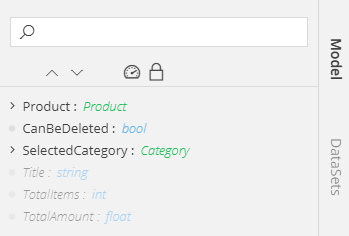
In the example shown above, the Properties Title, TotalItems and TotalAmount have been defined in a Master Page that this Form is using. You can distinguish them from their lower opacity.
You can use these external Model Properties inside your Form Model as you would do with your own Model. However, you cannot alter their signature: Name and Data Type. Do to that, you will need to change them from inside the Master Page Form Model where they had been initially defined.
Usage
After defining your Model and its underlying Properties, you are free to use it, change it, display its values for viewing and/or editing purposes etc.
Mamba
To access your Model's Properties, use the static identifier Model like so:
foreach Domain.Performer performer in Model.Product.Performer{
    performer.Products.Add(Model.Product);
}

Model.Product.Save();
DebugLib.Logger.WriteInfoLine("Successfully saved Product: " + Model.Product.Name);
Attention
Remember that in order to use a Property (whether you're inside a Controller Action or a Logic Item), you will need to have it added inside your Model (if it was omitted by zAppdev for optimization reasons).
Components
To bind your View Components to your Model Properties, just select (or type) their path (no Model identifier needed here)
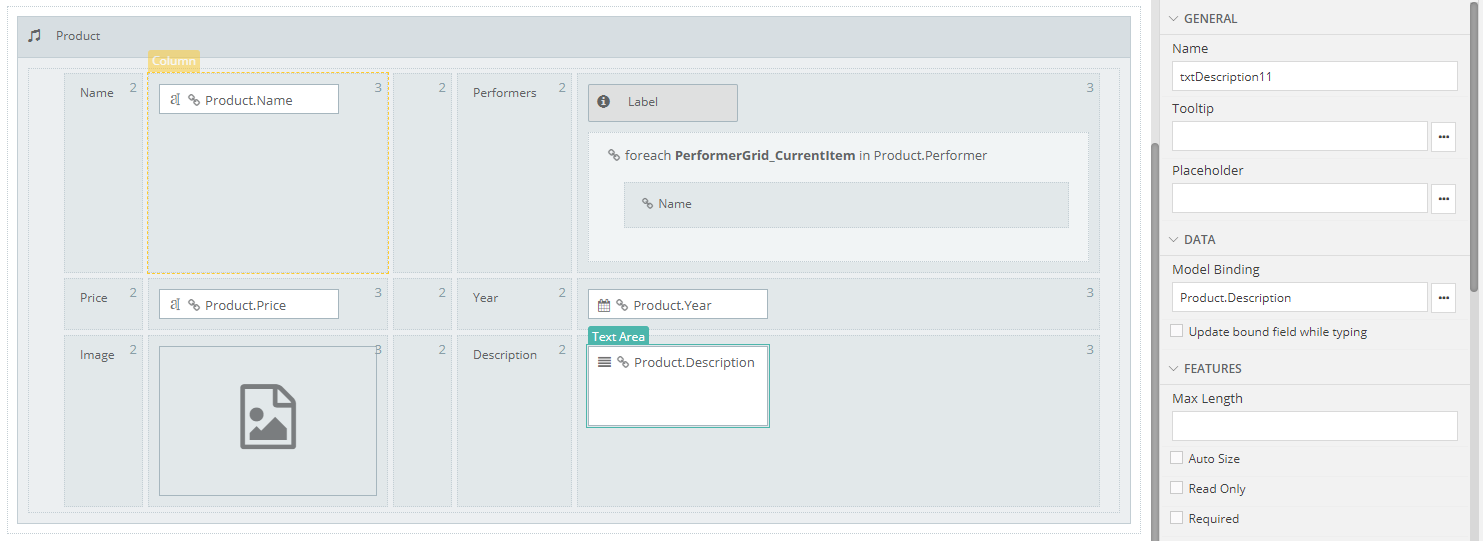
Additionally, you can create components or whole fields, bound to your Model, by just dragging and dropping any Model Property onto your View. zAppDev will decide which component suits best for the type of Property you are dropping, or ask you to select an appropriate one. For example:
- Whenever you drag & drop a simple
DateTimeproperty, zAppDev will create a DateTime Picker Component and bind it to that property - Whenever you drag & drop a simple
stringproperty, a TextBox bound to the latter will be created - If you drag & drop an
Objectof a certain class, zAppDev will present it (ready, set and bound) in a Table Layout, after asking you what kind of Layout would you prefer - If you drag & drop a
CollectionofObjects, zAppDev will create a Grid bound to it, set and ready with operations which you can use to edit, add to and/or delete from said collection.