Taskbar
Taskbar is the left side ribbon/menu that contains a few of the most useful operations you might need during your Application Modelling.
| Icon | Button | Description | Shortcut |
|---|---|---|---|
 |
Toggle Taskbar Autohide | Enable/Disable autohide of the taskbar | - |
 |
My Applications | Lead to Control Panel | - |
 |
Explore | Show/Hide Navigator | - |
 |
Search | Open Search box | CTRL + P |
 |
New | Open Add new model window | CTRL + Insert |
 |
Validate | Validate all models | CTRL + Shift + E |
 |
Build | Build the application | CTRL + Shift + B |
 |
Run | Run the application | Alt + R |
 |
Environments Configuration | Options related to the various deployment environments | - |
 |
Git | Commit changes or Update your application | - |
 |
Upload or Download | Upload, download models or manage modules | - |
 |
App Logs | View application logs | - |
 |
Tools | Various developer tools including Rebuild, Deploy, access to database etc. | CTRL + Alt + Shift + B for Rebuild |
 |
Show Shortcuts | View Shortcuts and other Help options | - |
My Applications 
This item navigates you to the Control Panel.
Attention
If you visit the Control Panel, your current project will remain open. However, it will be closed as soon as you open a different Project.
To return to your current project use the back-arrow button 
Explore 
Toggles the visibility of the Navigator - the panel that presents you with a visual and hierarchical representation of your whole Project.
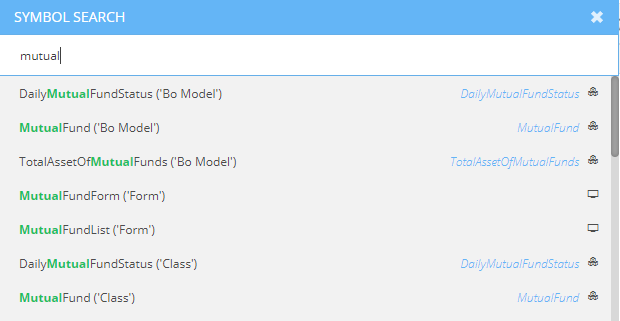
Search 
It can become easily obvious that the larger your Application, the harder it is to find symbols, such as objects and members. In order to to help you easily find any needle in your Application's haystack, the Symbol Search offers you features for Search and Navigation throughout your whole Application scope.
As soon as you start typing the term you are searching for, suggestions will pop up rapidly detecting any Operation, Class, Member, Resource, Form, Control, Action etc. even in the darkest corners of your Application that you can then click on to be automatically navigated to their place within the Project.
New 
The New button allows you to add any type of Model into your Application. All you have to do after clicking it is:
- Select the type of Model you want to add (e.g. Business Objects Model, Form Model, etc.)
- Fill in some required (per Model) fields
- Click Ok to create your Model
Validate 
This item lets you validate all the models of your Application. The results will be presented in the Console, where you can easily check any possible errors and/or warnings.
Build 
Build your solution. As with the Validation, the build progress will appear in the Console, where you will be able to see messages, warnings, errors as well as the status of the Building Process.
As soon as the Build Process is finished, you will be informed of its outcome with a notification.
Run 
Runs your Application, in a new browser tab.
Attention
Make sure to successfully Build your project, before running your Applicatio, in order for your changes to be applied.
Git 
The Git item opens a Version Control menu that you can use to either Update your project or Commit your changes.
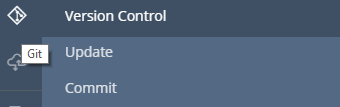
Commit
The Commit operation can be used to save the changes of your local working copy into the shared Application.
Tip
Using this button you commit all pending models. If you want to commit a particular model you have to do it from Navigator:
- Right-click on a model
- Hover on Version Control...
- Click on Commit...
Update
The Update operation updates your local, working copy by capturing all changes made by other users developing the same Application.
This way all users work collaboratively on the same application and stay in sync.
Warning
You must update your working copy first, before committing your changes
You can resolve possible conflicts in Navigator.
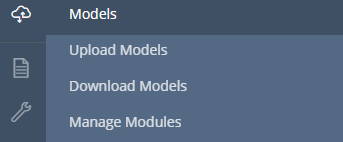
Upload or Download 
The Upload or Download item opens a menu that you can use to Upload, Download and Manage Modules.
Upload Models
Allows you to Upload Models into your open Application, using either a file selector or by dragging and dropping from your workspace.
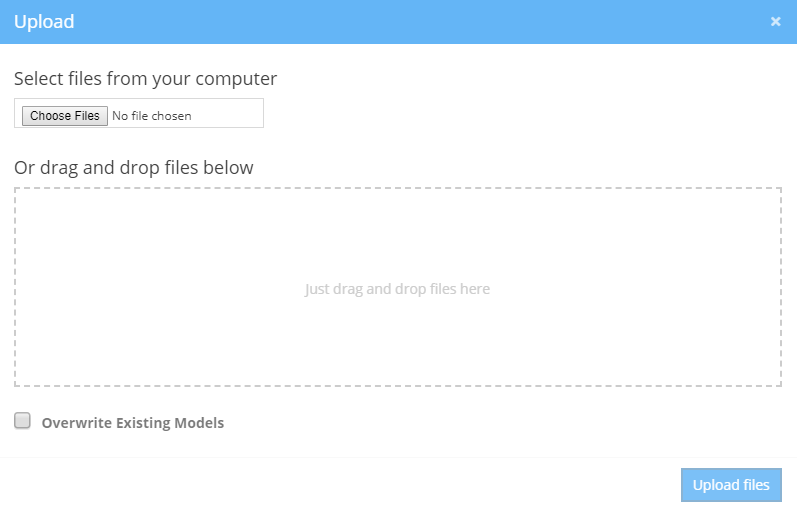
As soon as you Upload a new Model, it will be yours to use, change and/or extend.
Important
If a Model with the same name as the one you are Uploading already exists in your Project, your Upload process will fail.
In such cases and if you want to overwrite the model(s), check the Overwrite Existing Models option.
Download Models
Allows you to Download all or some of your Models, in the form of a zip file.
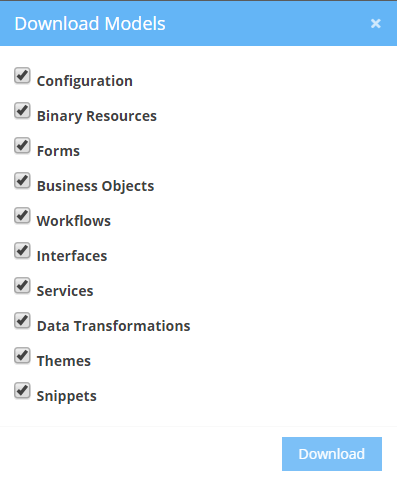
Hint
Later on you can share your zip or any of its files with another user, that will be able to upload it/them into his/her Application.
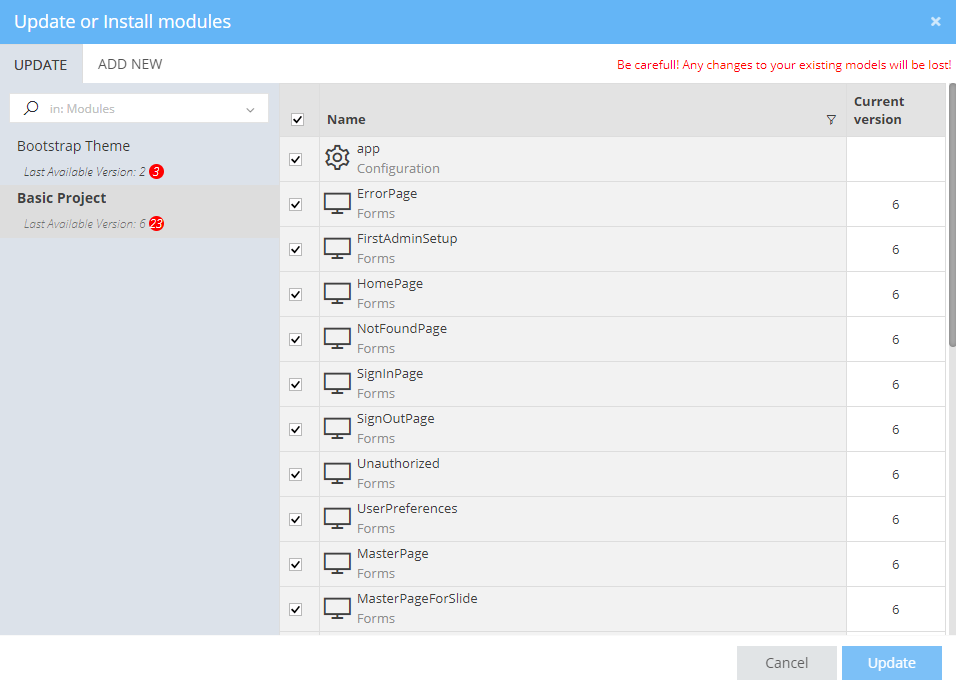
Manage Modules
Allows you to preview all zAppDev Modules with regards to your Application: view whether a new Module exists or not, update a Module, check their Versions and even add a new one.
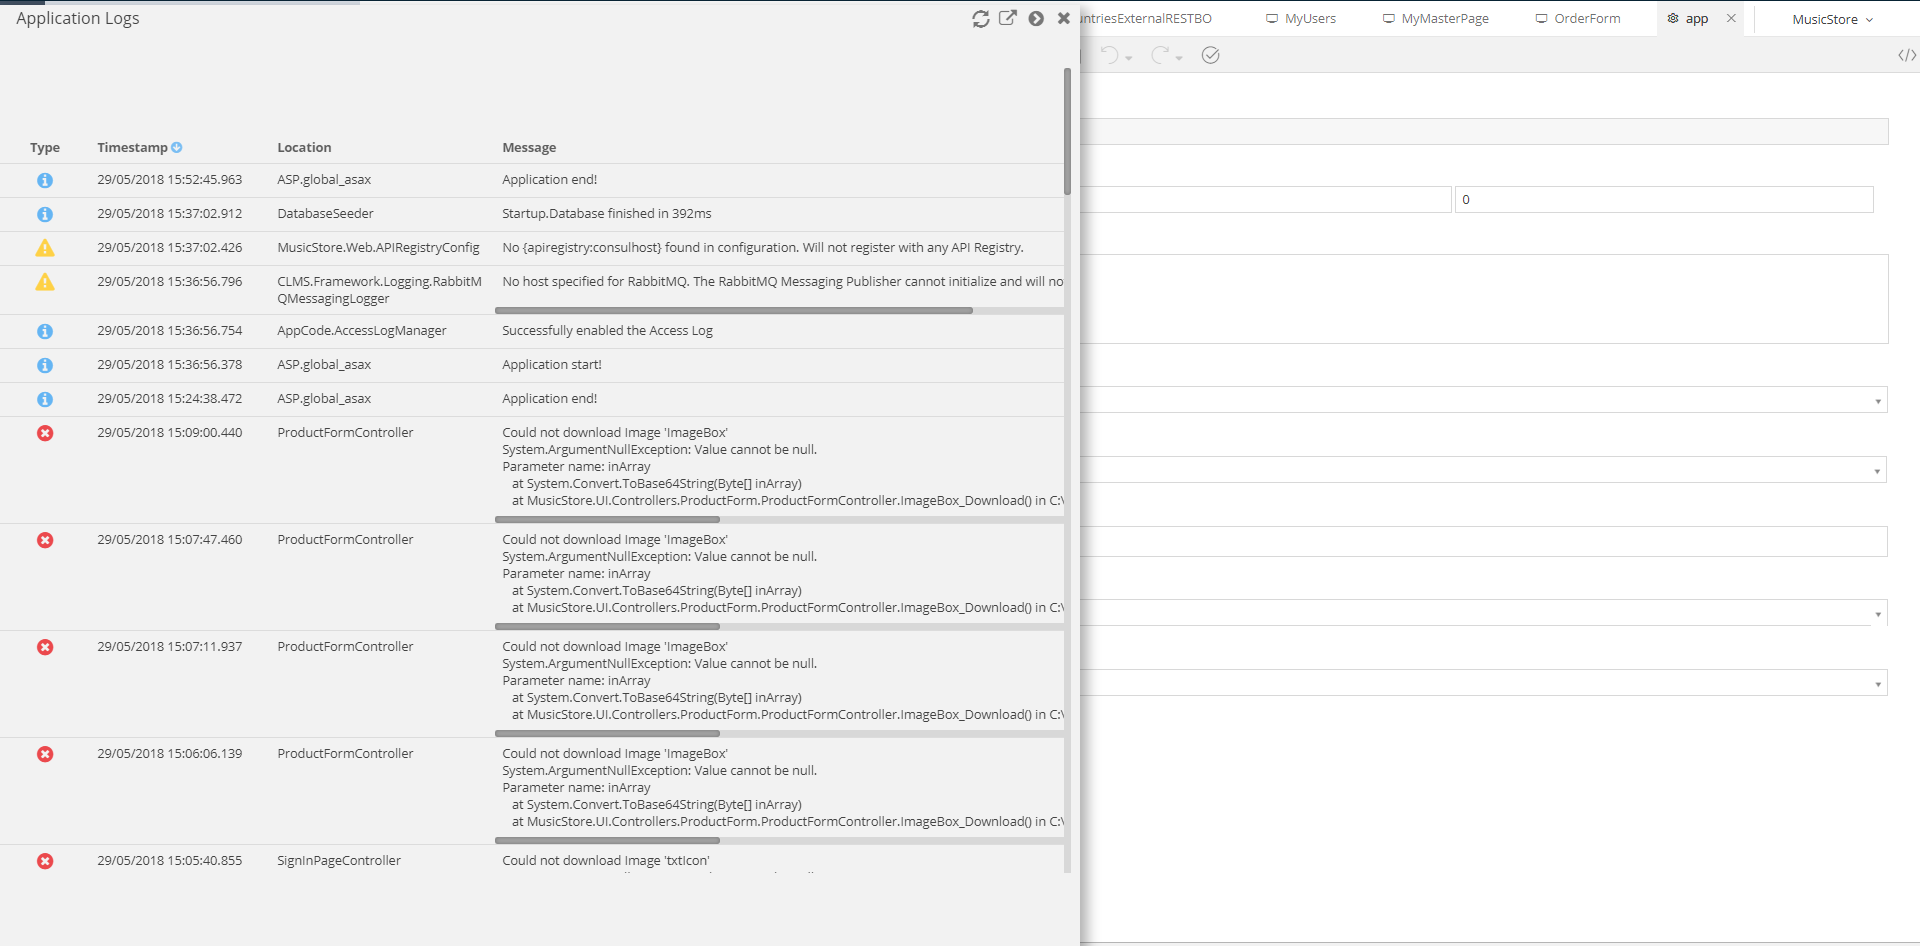
App Logs
This item opens your Application Logs. Basically, anything that your Application logs either automatically or due to a DebugLib.Logger.WriteInfoLine("Successfully saved the Product"); -type command will be available in the App Logs blade.
Feel free to refresh your log, in order to view any possibly new messages, expand the window or set it in a full-screen mode for better experience.
Tools
The Tools menu item includes some of the most useful operations with regards to your Application:
- Rebuild All
- Deploy
- Export Domain Model
- Database
- Source Code
- App Data
- Published Versions
- Download Solution
Read more for Tools
Show Shortcuts
Opens a blade with some useful shortcuts, documentation and tutorials. A description of the available items can be summarized as follows:
| Item | Description | Example |
|---|---|---|
| Workspace Shortcuts | A list of useful shortcuts |  |
| Live Help | If checked, adds live pop-ups onto your Workspace that provide useful information about the properties, items, panels etc. of the Workspace |  |
| Documentation | Opens a new browser window/tab containing the documentation you are now reading | |
| Tutorials | Starts a Live Tutorial that walks you through zAppDev and its features, with regards to the Tutorial you chose. |  |
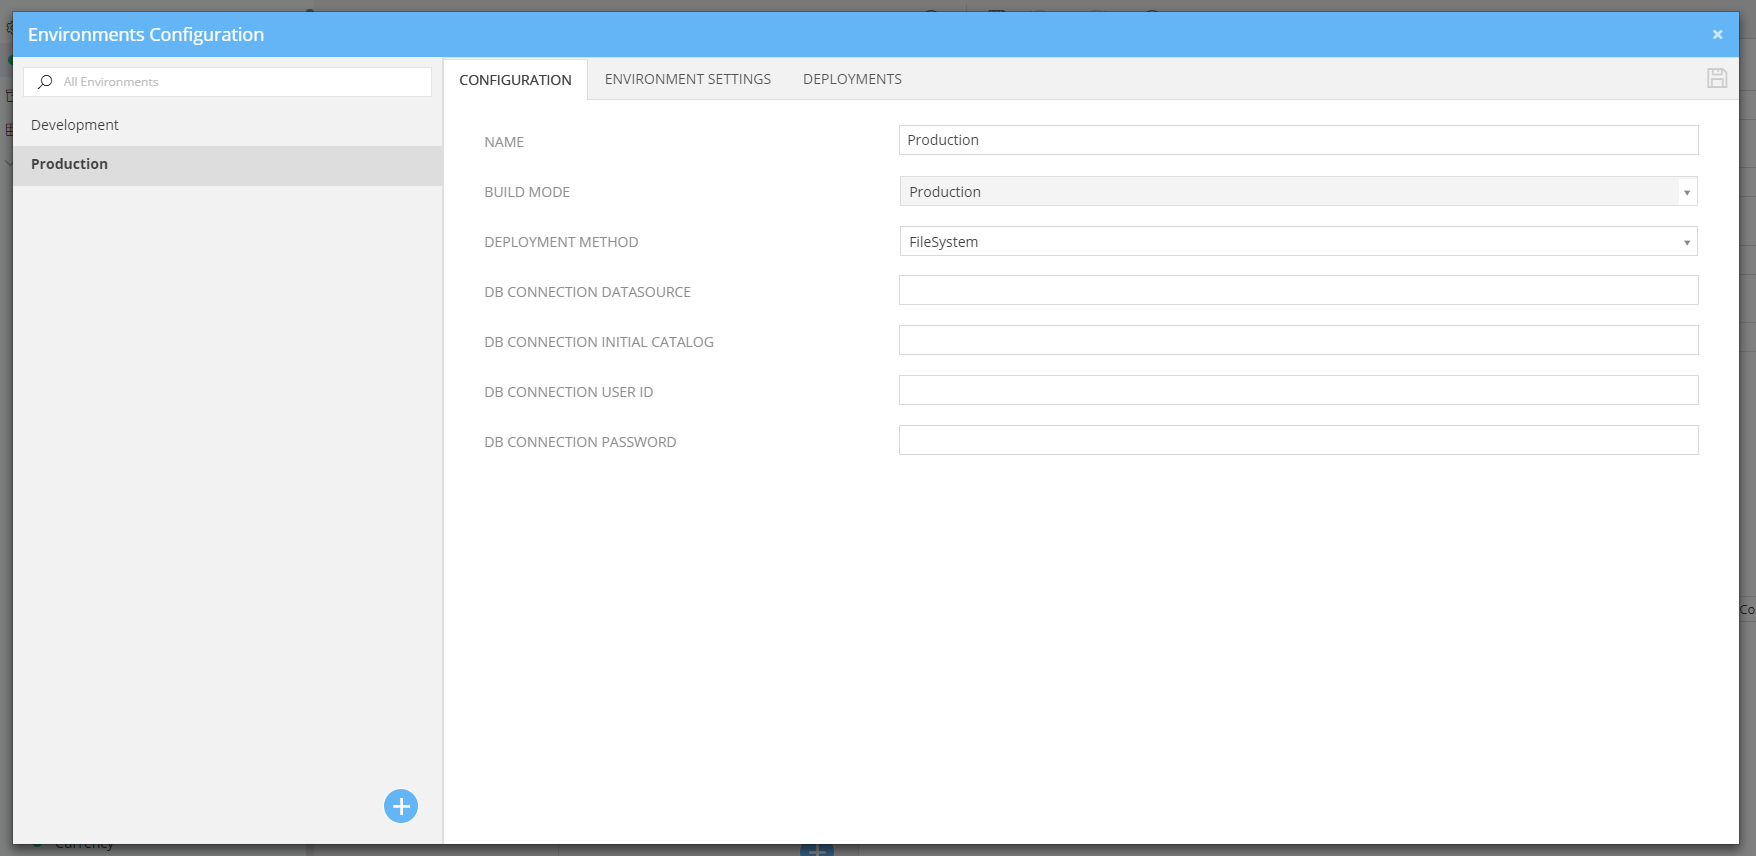
Environments Configuration
Opens a modal that allows you to define options related to the various deployment environments. You may add as many environments as you wish and handle them independently in terms of configuration and deployment.
Read more for the deployment process here.
Adding an Environment
To add a new Environment, simply click the  button, on the bottom of the list to the left.
Important
By default, there is only one environment: Development. For this environment only Configuration section is available.
Saving changes
To save any changes to the Environments Configuration, click the diskette icon  , on the top right of the modal.
Configuration
In this section you may set properties regarding the Deployment Environment.
Default Options
Here is a brief description of the configuration options available by default:
| Option | Description |
|---|---|
| Name | The environment name |
| Build Mode | Application Build Mode |
| Deployment Method | The method used to deploy the application (File System or FTP) |
| DB Connection Datasource | The Datasource part of the Database connection string |
| DB Connection Initial Catalog | The Initial Catalog part of the Database connection string |
| DB Connection User Id | The UserId part of the Database connection string |
| DB Connection Password | The Password part of the Database connection string |
FTP Options
Here is a brief description of the configuration options available when FTP Deployment Method is selected:
| Option | Description |
|---|---|
| FTP Host Address | The FTP server host address |
| FTP Connection User Name | Your FTP User name |
| FTP Connection Password | Your FTP password |
| FTP Destination Directory | The target directory in the FTP Server |
| FTP Port Number | The FTP server port number |
Environment Settings
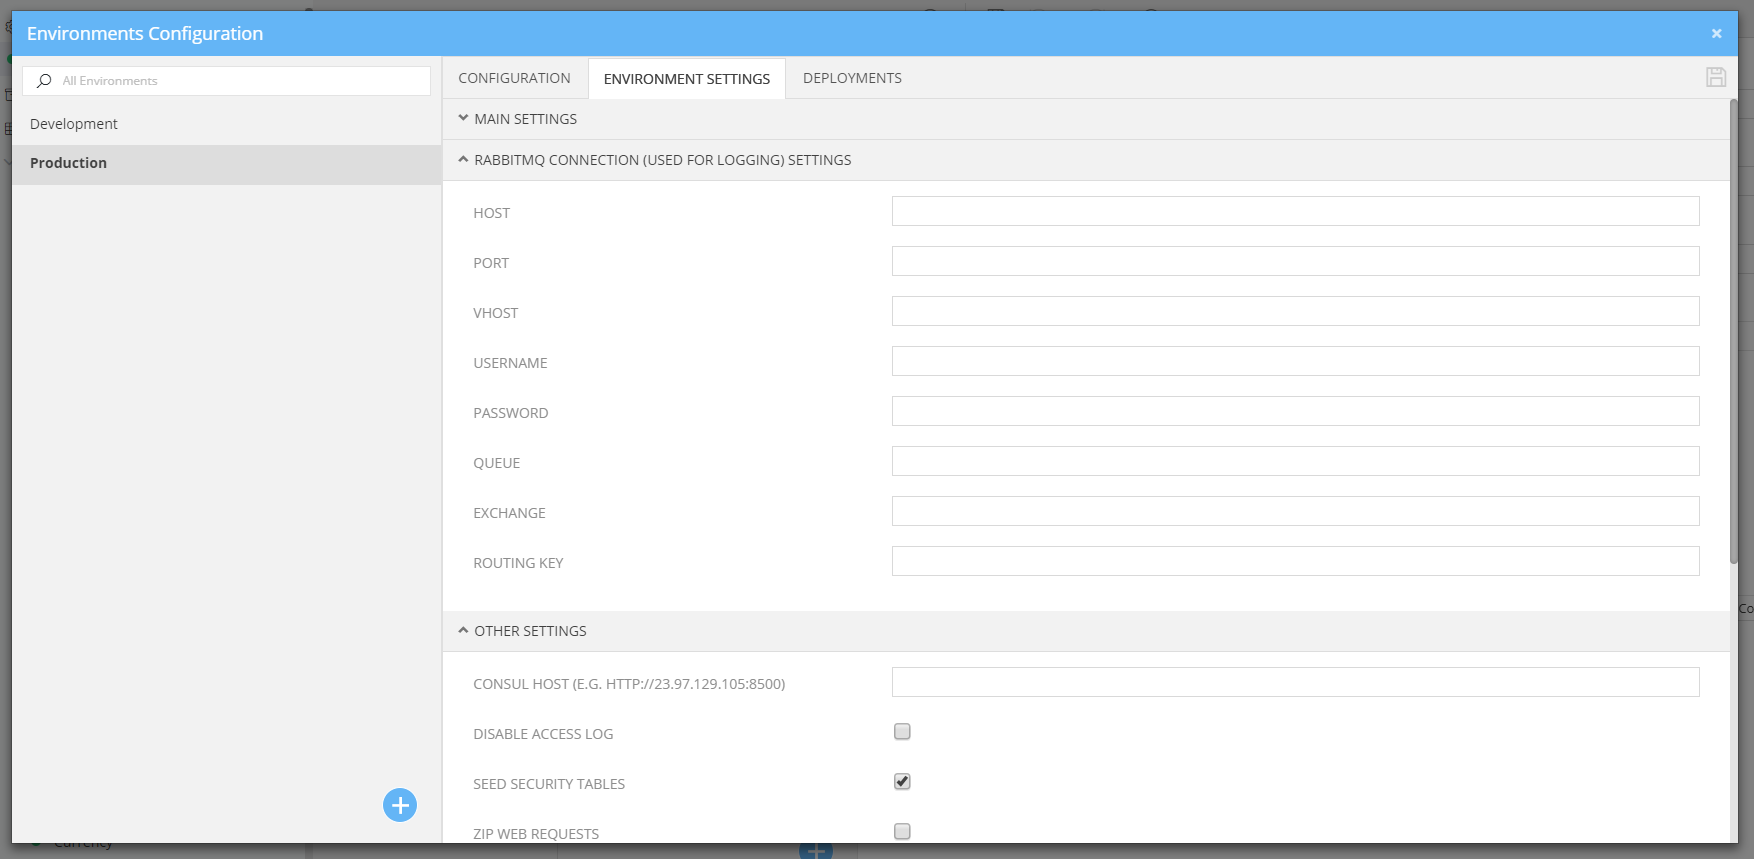
Main Settings
In this section you can set values for the application settings. The available settings depend on the Configuration Model. For more details on these settings, refer to this.
Here is a brief description of the default settings, common to all applications:
| Option | Description |
|---|---|
| Email Host Address | Email Host Address used to send emails |
| Email Password | Email Account Password |
| Email Username | Email Account Username |
| Email From Account | Email Account Address |
| Email Port | Email Account port |
RabbitMQ Connection
zAppDev applications support advanced logging through a sophisticated module based on RabbitMQ, a well known message broker. To enable this module, enter your RabbitMQ connection and queue details.
Read more for RabbitMQ message broker here.
Here is a brief description of RabbitMQ connection settings:
| Option | Description |
|---|---|
| Host | The RabbitMQ server host address |
| Port | The RabbitMQ server port number |
| VHost | The RabbitMQ Virtual Host name |
| Username | Your RabbitMQ connection username |
| Password | Your RabbitMQ connection password |
| Queue | The Queue name that will be used for logging |
| Exchange | The name of the Exchange where the logging Queue is bound to |
| Routing Key | The routing key that the Exchange uses to route the log message to the Queue |
Other Settings
This section exposes various settings concerning the generated application:
| Option | Description |
|---|---|
| Disable Access Log | If true, access log will be disabled throughout your application |
| Seed Security Tables | If true, Roles & Permissions data that is persisted to the Database will be updated based on your models |
| Zip Web Requests | If true, the requests performed by the clients using the application will be zipped before being sent to the server |
Redis Server Connection Details
zAppDev applications support advanced caching through a sophisticated module based on Redis, a well known in-memory data structure store. To enable this module, check the 'Use Redis' option and enter your Redis connection details.
A complete zAppDev caching reference can be found here.
Read more for Redis Server here.
| Option | Description |
|---|---|
| Use Redis | If true, enables Redis caching |
| Host Address | The Redis server host address |
| Port Number | The Redis server port number |
| Allow Admin | If true, Redis connection is established supporting commands that are considered risky |
| Password | The Redis server password |
| Use SSL | If true, SSL encryption is used |
| SSL Host Address | Enforces a particular SSL host identity on the server’s certificate |
Deployments
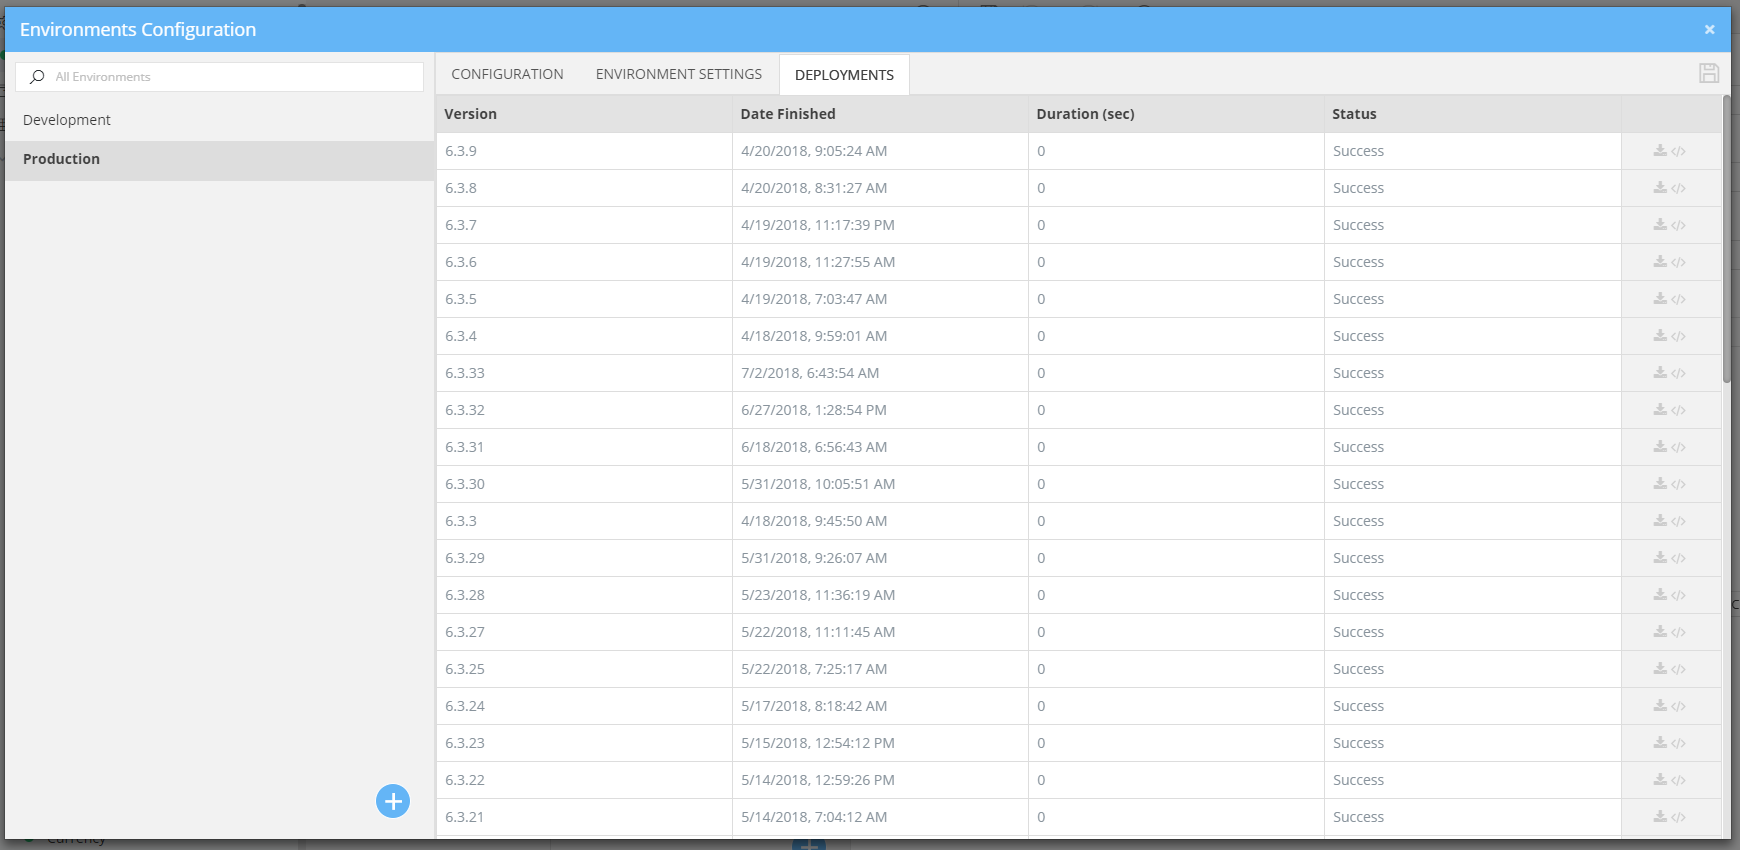
In this section you are presented with a list containing the deployments history for the selected environment.
Here is brief description of the list columns:
| Item | Description |
|---|---|
| Version | The Application Version used for the deployment |
| Date Finished | The exact Date and Time when the deployment process completed |
| Duration (sec) | The duration of the deployment process in seconds |
| Status | The result of the deployment process |
 |
Click this to download the deployed application |
 |
Click this to download a solution containing the code of the deployed application |