Extend the Application User
Introduction
This How-To will explain how to Extend the ApplicationUser class.
The ApplicationUser is a class, pre-designed and created by the Web Application Template that is used as the main User object of your Application.
ApplicationUser class is used for:
- Authentication
- Authorization
- Permission and Role Management
- Application Actions Management
- Auditing
- Profiles Management
- Locales, Languages and other Settings Management
- Any other logic that applies to an account using your Application
The class has multiple Attributes, as well as relationships with several classes:
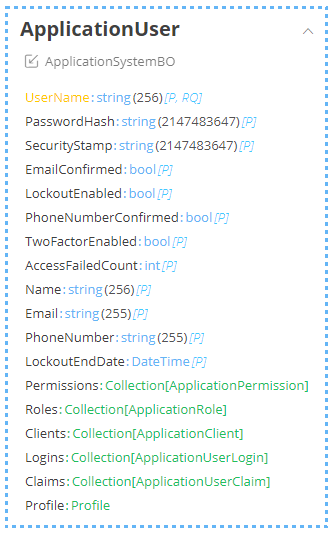
Anything that has to do with the built-in functionality is already there.
If you need more information, such as the Social Security Number, Date of Birth etc for your Application's Users you have to extend the ApplicationUser class. First of, create your own user class that inherits all the properties of the ApplicationUser class and then utilize your new Class to add any additional properties you might need.
Info
ApplicationUser class, as well as its related classes, are Systemic classes, meaning that you cannot alter it. For example, you can not add attributes such as Social Security Number, Date of Birth etc
Extend the Application User
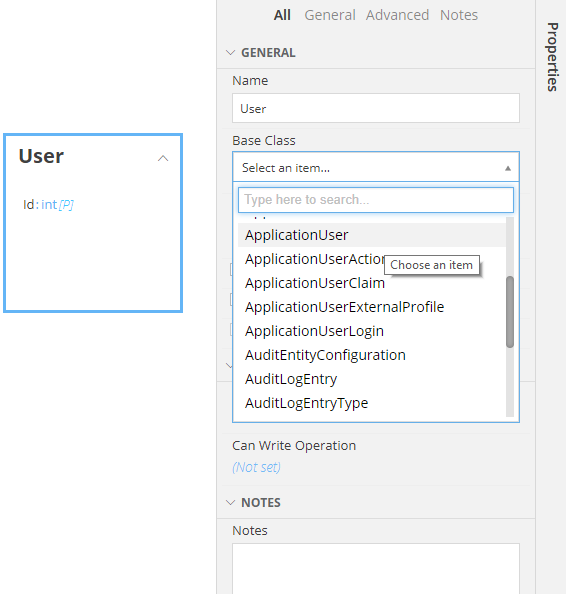
- Create your own Class that you will use as your user. (In this example, I'll name mine: User.)
- Select your new Class.
- From properties on the right find the Base Class Property
- Select the ApplicationUser Class as the Base Class of your new Class
You will see your new class filled with all the Properties inherited from the ApplicationUser:
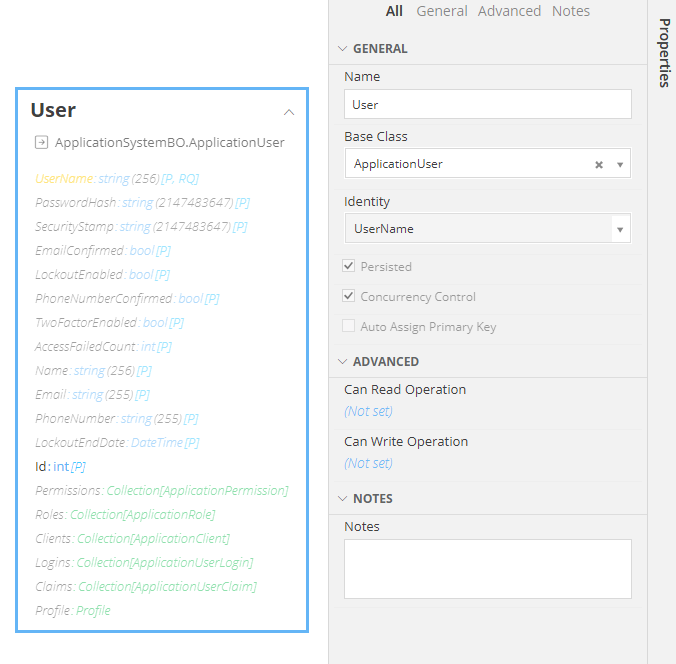
- Remove the Id property, added by the new Class you created earlier, since your Primary Key will be the UserName.
- Add any attributes you want to your new class User.
Modify the Existing Models
The Web Application Template has two forms already created that manage the users:
- UsersList
- ManageUser
- CreateAdmin
These forms use the systemic ApplicationUser Class to List all the saved users, as well as provide functionalities to create new ones, edit the existing ones or delete the ones you no longer like that much.
UsersList
- Open the UsersList Form
- Select the Data List, at properties on the right locate the DataSet used in the List presenting your application's Users
- Click it. You will see it is using the ApplicationUser Class
- Select your Class as this Dataset's Class (on our example is user)
- Click ok
- Save the Form
ManageUser
- Open the ManageUser Form
- Locate its Model on the right
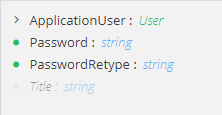
- Change the Datatype of the ApplicationUser Model property (Click the ApplicationUser: ApplicationUser and select the class you created, User in our example)
- Optimize your model (Right click on the ApplicationUser Model property and select Optimize)
-
Bring Roles and Permissions Related classes (Right click on the ApplicationUser Model property and select Add Related Classes. A modal is displayed, select Permissions and Roles and click ok)
-
Go to tab Controller (To edit the functionality of your form)
-
Find the NewUser Action.
Change the code from:to this:Domain.ApplicationUser.Create();Domain.User.Create(); -
Find the EditUser Action.
Change the code from:to this:Domain.ApplicationUser.GetByKey(Id)Domain.User.GetByKey(Id)
CreateAdmin
Optional: If you want your administrator to be of the new class
- Open the CreateAdmin Form
- Go to tab Controller
- Locate Controller Action Create
- Change the code from:
Domain.ApplicationUser adminUser;
to Domain.User adminUser;
At this point, you will have your own, fully functional, comprehensive User class.
Extended Application User & Authentication
Hint
If your Application uses a simple Form Authentication, or you will not use it at all, feel free to move past this section
This section will cover important things you will need to know when working with Extended ApplicationUser Classes and Applications that use Authentications such as:
- OS Authentication
- Google Authentication
- Facebook Authentication
OS Authentication
If you choose OS Authentication for your Application, you can define which User class will represent your User when logging into your App, as shown here. The User class can be:
- Either the ApplicationUser class, which is the systemic class described before, and will be set by default if you do not choose any other
- Either the extended User Class you create by extending the ApplicationUser class (e.g. User class that extends the ApplicationUser)
- Or a further extension of your extended ApplicationUser class (e.g. LinuxUser class, that extends the User class, extending the ApplicationUser class and so on)
External Authentication
Should you choose Forms Authentication and add some External Authentication methods such as Google or Facebook, you will be able to select the User class to represent your User when registering into your app, as shown here. As mentioned before with the OS Authentication, the selected User class can be the ApplicationUser, a class extending the ApplicationUser or any further extension you would like to use.
Important Notes
Warning
In both cases (OS and External Authentication), objects of your extended Classes will be created and saved into your Application Database.
In order for such a process to be completed successfully, never assosiate your extended Application User classes with required associations.
For example, imagine you want each User to be associated with a Phone Number. Since the User is an Extension of a class that will be created Automatically every time a User is logged in or registed into the system, the association should be optional
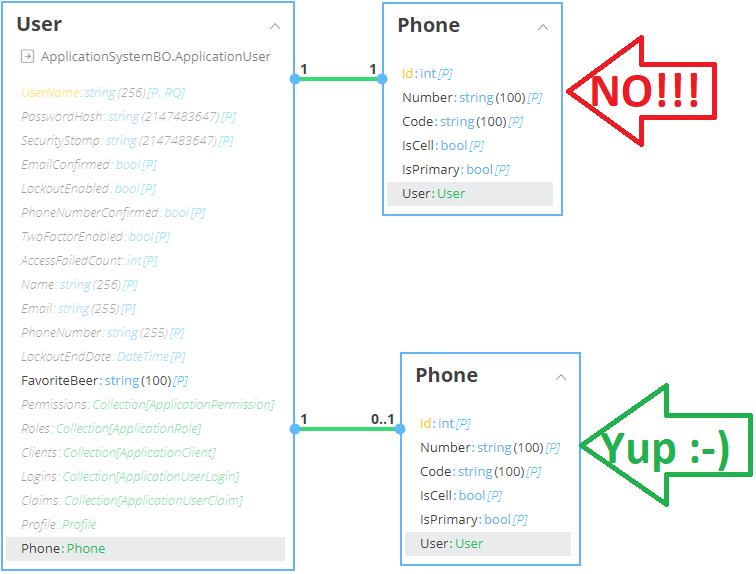
For example: if you create a mandatory association (1-1) then as soon as the User object is created and stored into the Database, it will require a Phone Number. However... the Phone Number will be null at that point (since the User object will be created automatically by the OS or an External Provider). The Save process will throw an exception.