Basic Application
This Walkthrough Tutorial will show how to create a Store Application: An online application allowing users to manage their products, suppliers and making orders.
Creating a New Application
- Go to your Applications
- Click on Create to create a new Application
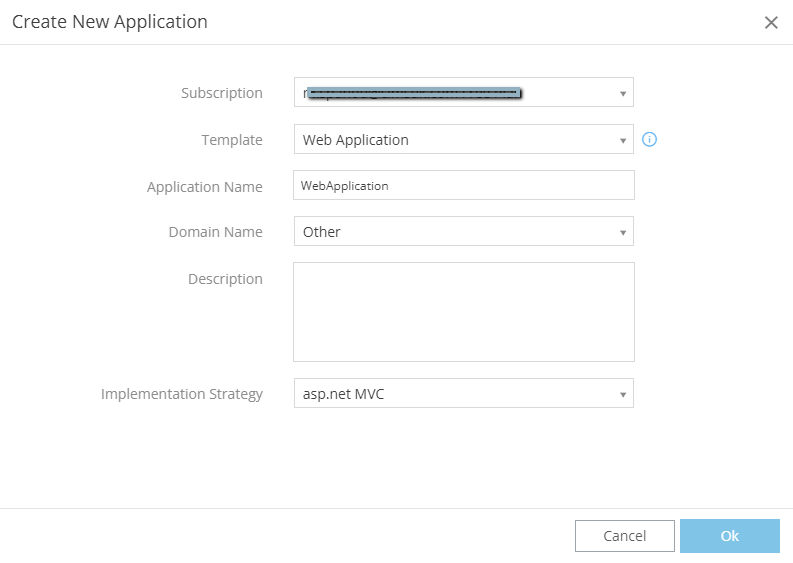
A Modal Dialog will appear:
- Leave the Web Application as the Template
- Type the name of your application, in this case MyStore
- Add a relevant Description
- Leave Asp.Net MVC as your Implementation Strategy
- Click OK
Business Objects
In this section we will see how to:
- Define Business Objects
- Design our Domain Model (Classes and their associations)
Business Objects Models
Information
Business Object Model is a designer that will hold your Classes and/or Enumerations.
There are two ways to add a new Business Object Model:
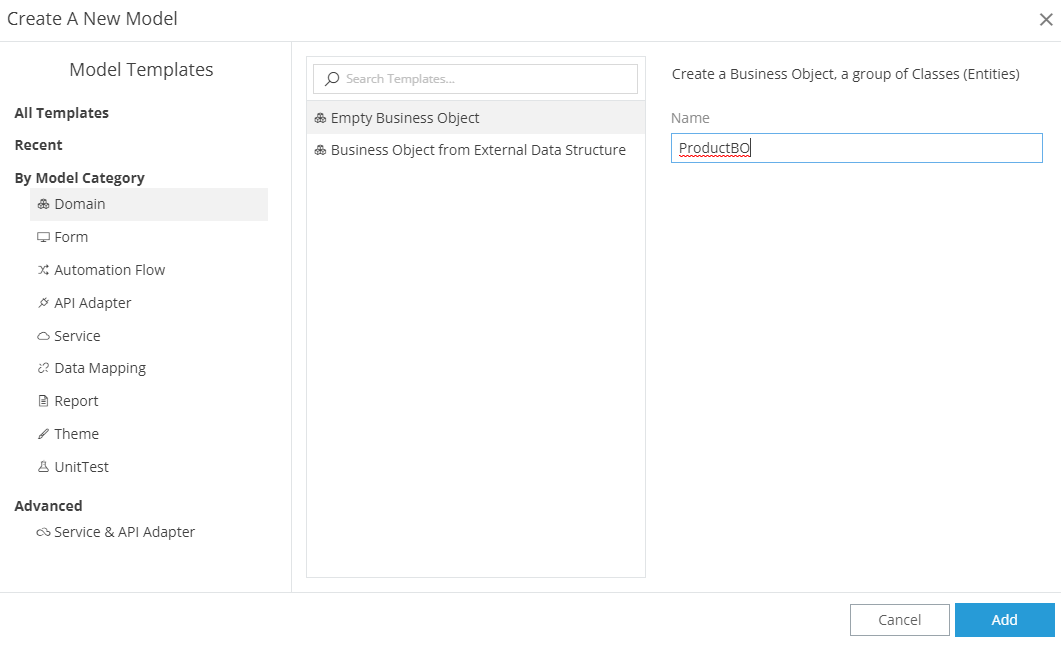
First Way
- Take a look at the main vertical menu (far left)
- Click the plus (+) button
- A modal dialog is displayed
- Find the Domain option
- Select Empty Business Object on Templates, if not selected
- Name the new Business Object as ProductBO
- Click Add
Second Way
- Take a look at the Models Tree (Left Menu)
- Right-click on the Domain Item
- Select Add
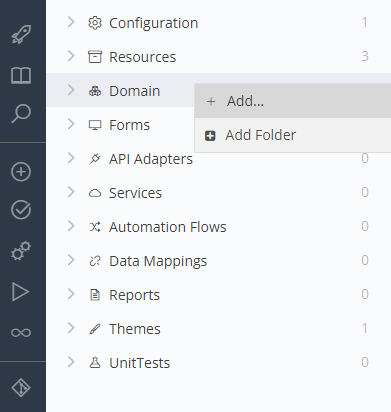
- A modal dialog is displayed
- Select Empty Business Object on Templates, if not selected
- Name the new Business Object as ProductBO
- Click Add
Tip
We use the name we want and add the initials BO (from Business Object) at the end, because it is a good practice for consistency (It will be easier to locate them later).
Classes & Attributes
Open the Products Business Objects Model (Just click on it from the Models Tree):
- First off, we will add a class
Informatiom
How to add a Class:
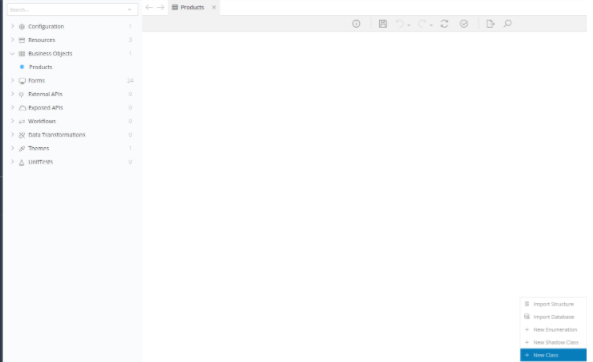
- Expand the plus (+) button at the bottom right corner of the Business Objects editor and select the New Class option
- or right click anywhere at the blank space of the editor and select the New Class option
- or hit Insert anywhere at the blank space of the editor
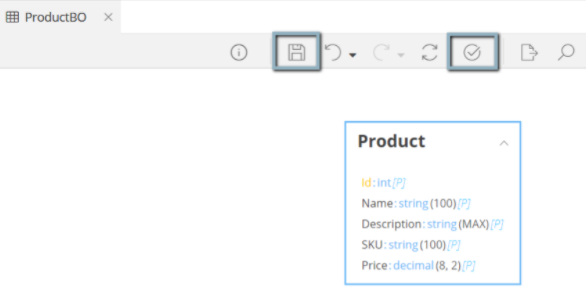
We add a Class Product into the ProductsBO, with the following attributes:
- Name
- Description
- SKU (product code)
- Price
Information
How to add an Attribute:
- Right-click on the Class and select Add Attribute
- or hit Insert on your keyboard while the class is selected
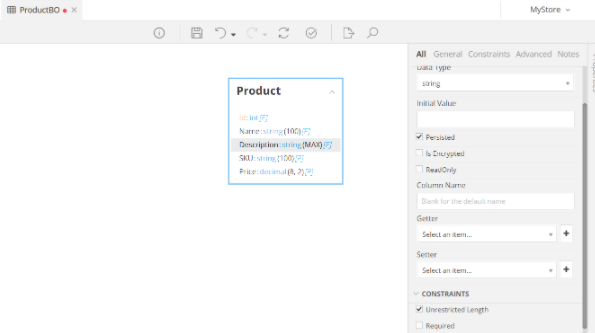
Let’s add attribute Description:
- Select the Product class
- Hit the Insert button
- Start Typing the name of the new Attribute. (In this case Description)
- Hit Enter
- A dropdown box will appear
- Choose string as the Data type for this Attribute (since a Description is a simple alphanumeric)
- Take a look at the Properties panel (Menu on your right)
- Change the Length to unrestricted
- Leave all other values to their defaults
Todo
Insert the rest of the attributes:
- Name (String)
- SKU (String)
- Price (Decimal)
At this point, you should have a Model looking like this:
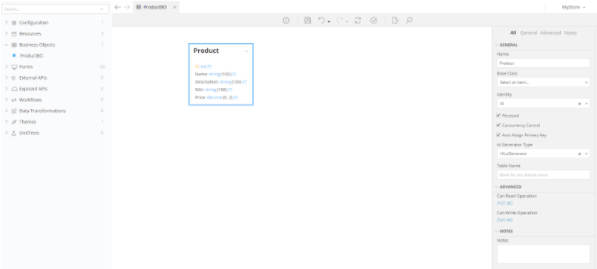
Notes
If you wish, add a Description (Notes) to your new Class, to provide your Team Members with some documentation:
- Select the class
- From the Properties menu on the right type into Notes
Red dot at the tab header, indicates there have been made changes and the model is not saved.
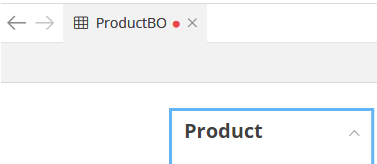
To save the ProductBO select the floppy disk on the top menu or click Ctrl + S.
To validate select the tick  on the top menu. The validation process will point us possible errors so we can fix them before building our application.
Now, let's create the rest of our Business Objects: Supplier & Order
Todo
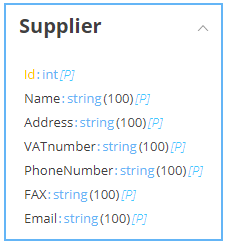
Add a Business Object named SupplierBO
Insert a class Supplier with the following attributes:
- Name (String)
- Address (String)
- VATnumber (String)
- PhoneNumber (String)
- FAX (String)
- Email (String)
Todo
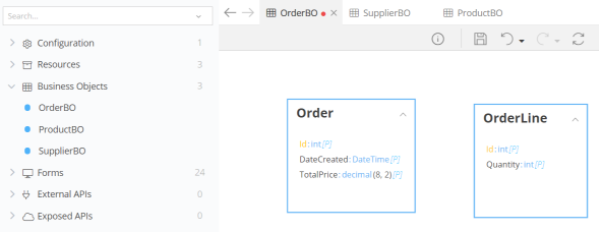
Add a Business Object named OrderBO
Insert a class named Order with the attributes:
- DateCreated (DateTime)
- TotalPrice (Decimal)
Insert a class named OrderLine with attribute:
- Quantity (int)
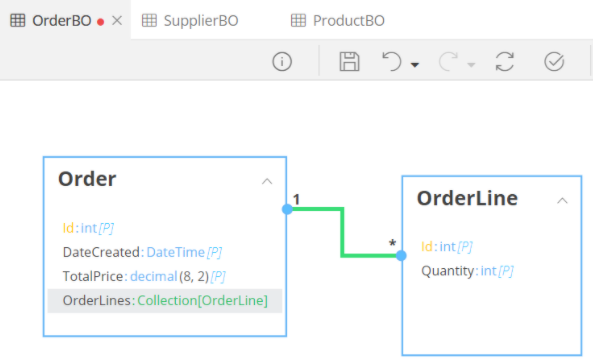
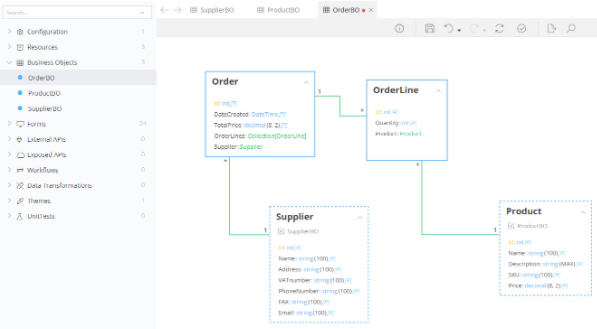
At this point, our model should look like this:
Note
If you wish, add relative Notes (at Properties) to each Class and/or Attribute
Associations
Now it is time to define the Business Relationships.
- Hover class Order, until your cursor turn into a cross
- Click on the Order class and drag a line until you reach the OrderLine class
This will create a new relationship that by default has a 0..1 to 0..1 multiplicity.
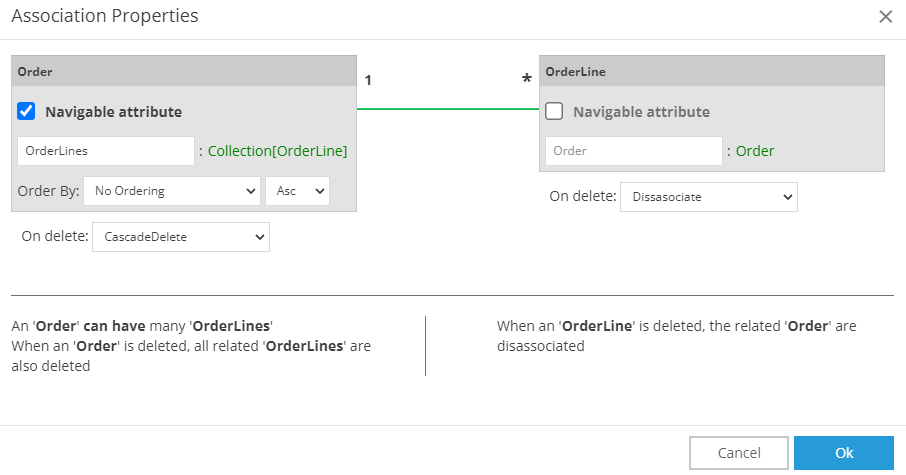
A pop-up dialogue is displayed where you can define (among others) the association's cardinality, class property names and on delete behaviour:
- Click on the 0..1 placed next to the Order and select one (1) from the Dropdown menu that will appear (as an OrderLine should always belong to an Order)
- Click on the 0..1 placed next to the OrderLine and select many (*) (as an Order may/can have many OrderLines)
- Go to the Order box and rename the OrderLine Attribute to OrderLines
Finally, let’s create our On delete rules:
- Whenever an Order is deleted, its OrderLines should be deleted as well. So select CascadeDelete
- When an OrderLine is deleted, orders should be disassociated. Select Disassociate
- Click OK to save the association
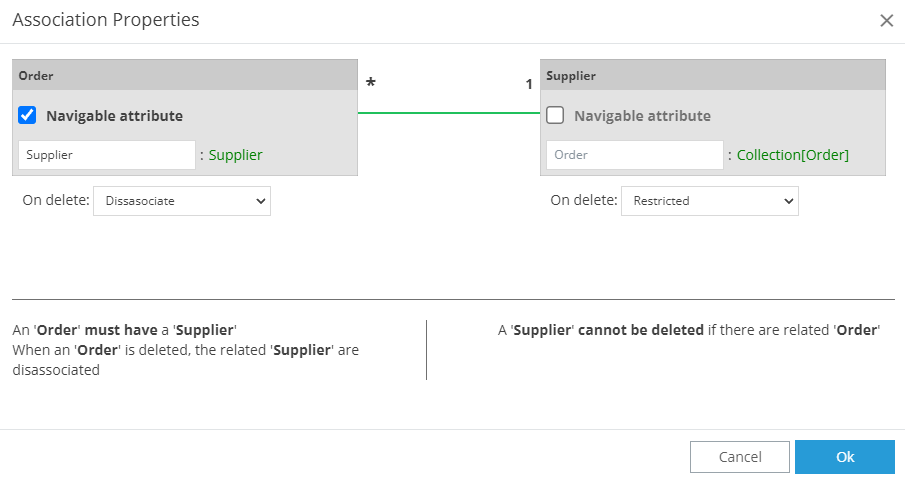
Association Properties should look like this:
To make any changes, double click on the association (green line).
Shadow Classes
Now, it is time to link the Order Class with the Supplier Class. The Business rule here is:
- A Supplier might have many Orders
- Each Order belongs to only one Supplier
- If an Order is deleted, the related Supplier will be disassociated
-
A supplier cannot be deleted, if there are related Orders
Since the Supplier class resides in a different Model, we will have to add it as a Shadow class in our current Model. So, -
Expand the plus button (+) or right click at the blank space of the editor
- Select New Shadow Class
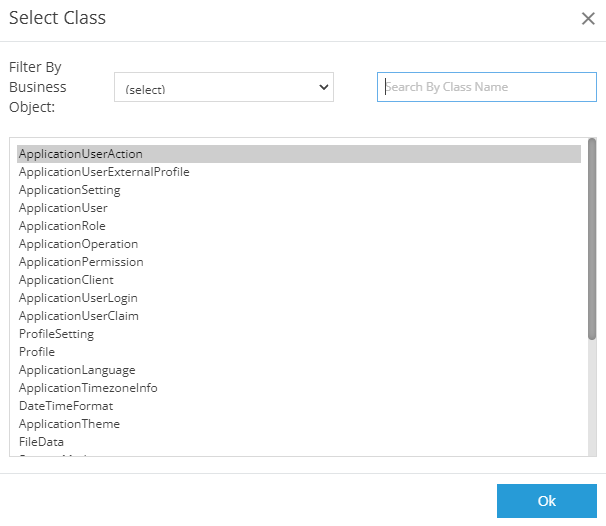
- A dialog opens that will allow you to choose the external class you wish. You can either browse through the list, or use the Search textbox
- Find the Supplier class and select it
- Click OK
Shadow classes are displayed in dotted outline:

Todo
Add a relationship between the two classes Order - Supplier and configure them like:
- An order must have a supplier
- When an order is deleted the related supplier is disassociated
- A supplier cannot be deleted if there are related orders
Todo
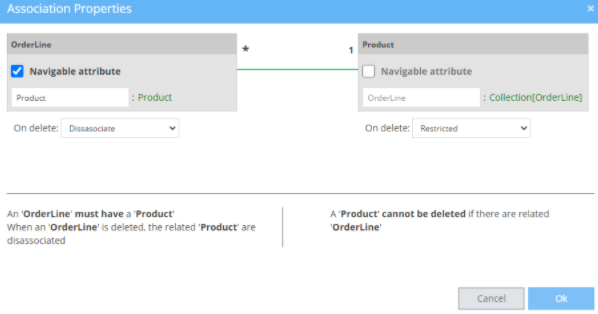
Association with Class Product.
Since the Product class resides in a different Model, add it as a Shadow class in our current Model. Afterwards associate OrderLine to Product with the following restrictions:
- An OrderLine must have a product
- A product can belong to many OrderLines
- A product cannot be deleted if there are related OrderLine
- When an OrderLine is deleted the related Product is disassociated
So, after all these changes, your OrderBO should look like this:
Tips
Select AutoLayout  , on the bottom of the screen, to fix the layout of the classes.
Click on the arrow at each class name to collapse the class. For example, it is a good practice to collapse all shadow classes in order to reduce the size of the diagram.
Remember to save and validate your work often.
Forms
In this section, we will create all the Forms that are needed (such as to insert products, suppliers and make orders).
Automatic Creation
Let’s start with the Administrative forms – the ones that manage the Products, Orders and Suppliers.
zAppDev has many predefined Templates that cover almost any View you would ever need. For our Master-Detail view, we will use zAppDev’s Data Entry and List Form.
Let’s create our Products form first:
- Right click on the class Product
- From the dropdown select Create Master Detail Form
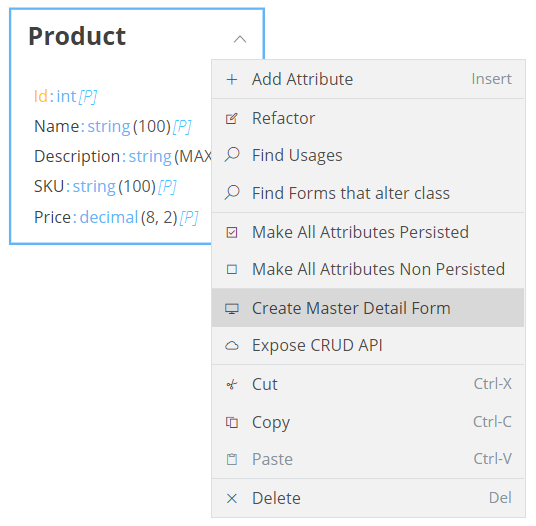
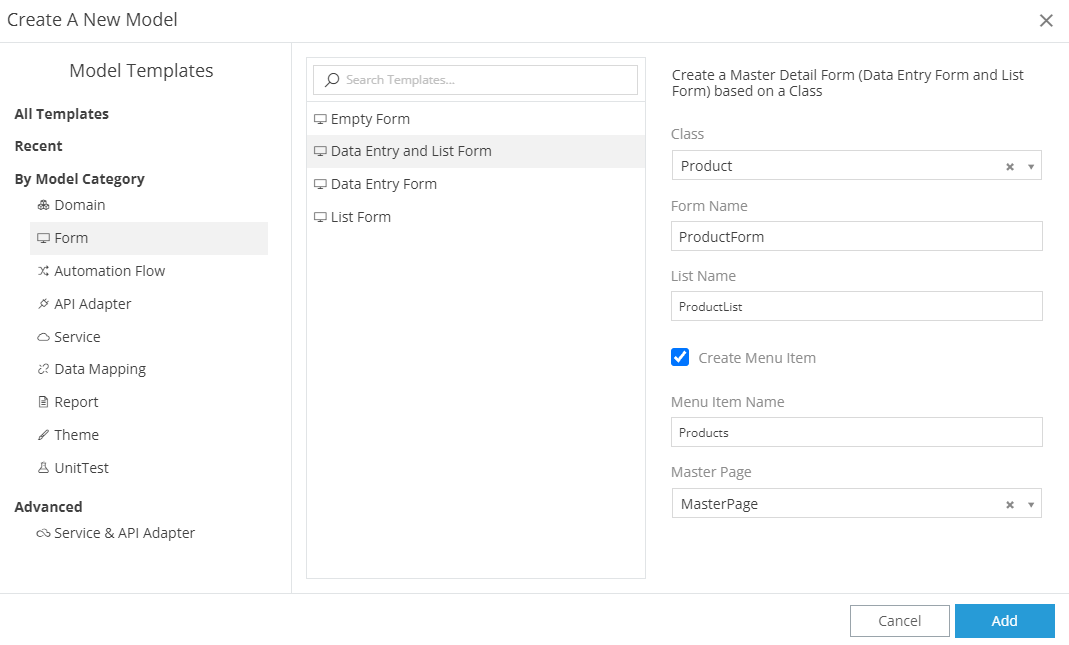
- The following modal dialog is displayed
- Leave all fields to their default values and press Add
Note
Checking Create Menu Item, wizard will create a menu item entry for each form, which is editable via the MasterPage.
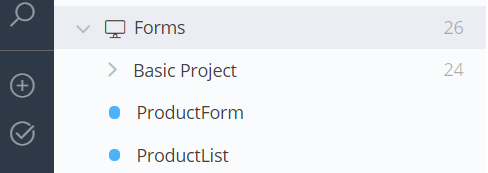
Two forms have been created:
- ProductForm is the detailed view
- ProductList is the master view
So now, if you open your Forms you will see these two Models added:
Todo
Do the same for Suppliers and Orders.
Your model tree should look like this:
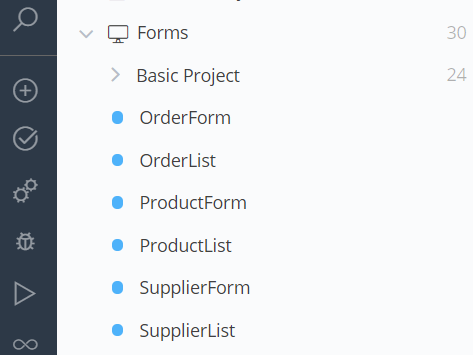
Tip
The dots at the left of a Model indicate their version control status:
- Blue indicates that it is new and not committed
- Yellow indicates that there are changes not commited
- Green indicates that it is the latest version of the model
Now we can validate and build our application to see the result of what has been done so far in a very few steps:
- Validate
 and then
 - Build
 or (Ctrl + Shift + B)
The first time it might take some time, because it needs to initialize the application runtime environment.
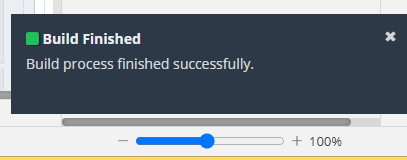
When build is finished a notification is displayed on the bottom right corner of your screen:
Now select  to run our application.
In another tab, we can see the application.
Note
The first time the application runs, user has to create an administrator (Administrator forms are created automatically by zAppDev).
Information
zAppDev contains at least 20 basic pages we do not need to worry about. For example, administrator forms are already set up for us. Of course, we can always change these forms as we wish.

Now, it is time to change the forms as we want.
Product Form
Let’s make some small adjustments to the automatically created ProductForm in order to improve the users' experience.
Required
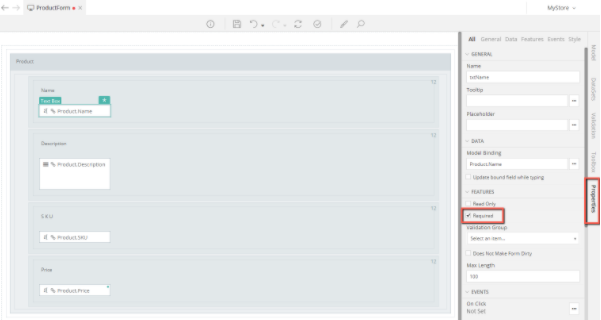
Product name should be required:
- Select Textbox ProductName
- Click on Properties (right menu)
- Check on Required
Todo
Make Price also required.
Value Format
Format Pricing:
- Select the three dots at Value Format
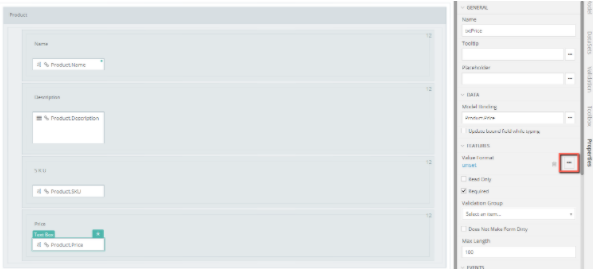
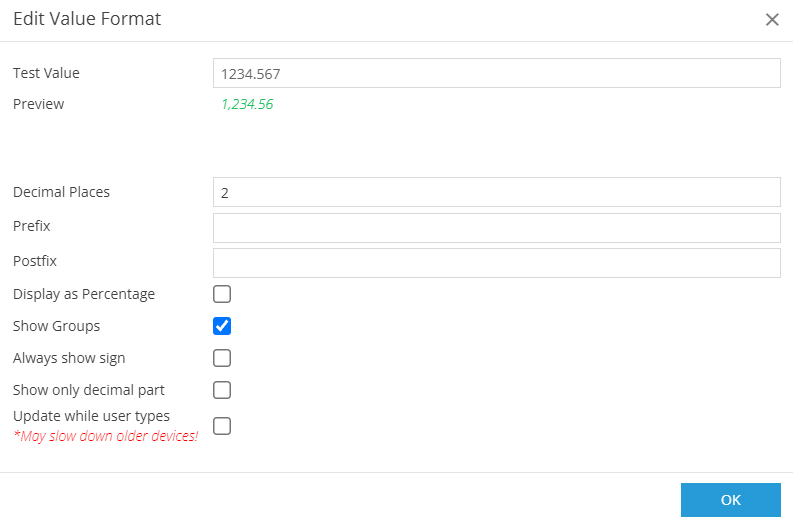
- A modal is displayed
- Insert at Decimal Places number 2
- Check Show Groups
- Select OK
Logic - Data Validation
In order to prevent the user from inserting wrong amounts, we should not allow negative numbers at pricing.
- Select Logic, from the menu at the bottom

- Hover the plus (+) button at the bottom
- Select the New Data Validation
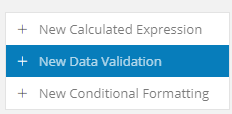
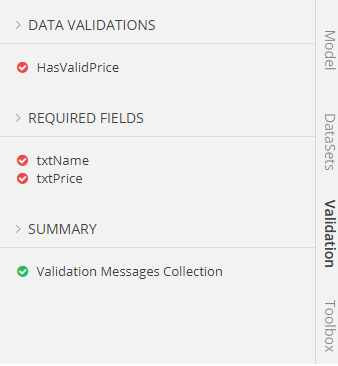
A data validation is created:
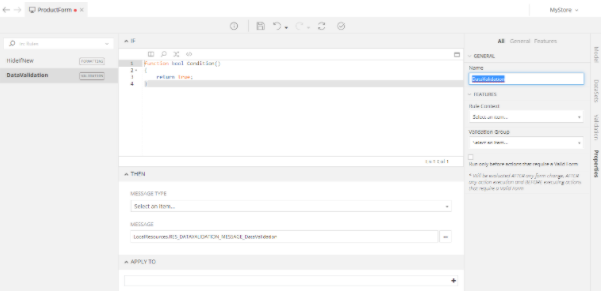
- From Properties, change the name to HasValidPrice
- Place the following Mamba Code as the Function's Body
return Model.Product.Price < 0;
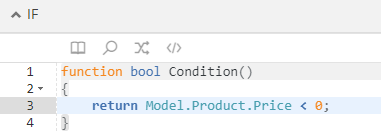
Tip
A Data Validation should return true when our state is invalid and false otherwise.
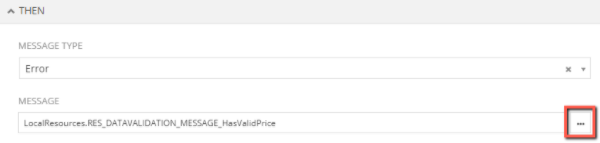
- Select as Message Type Error
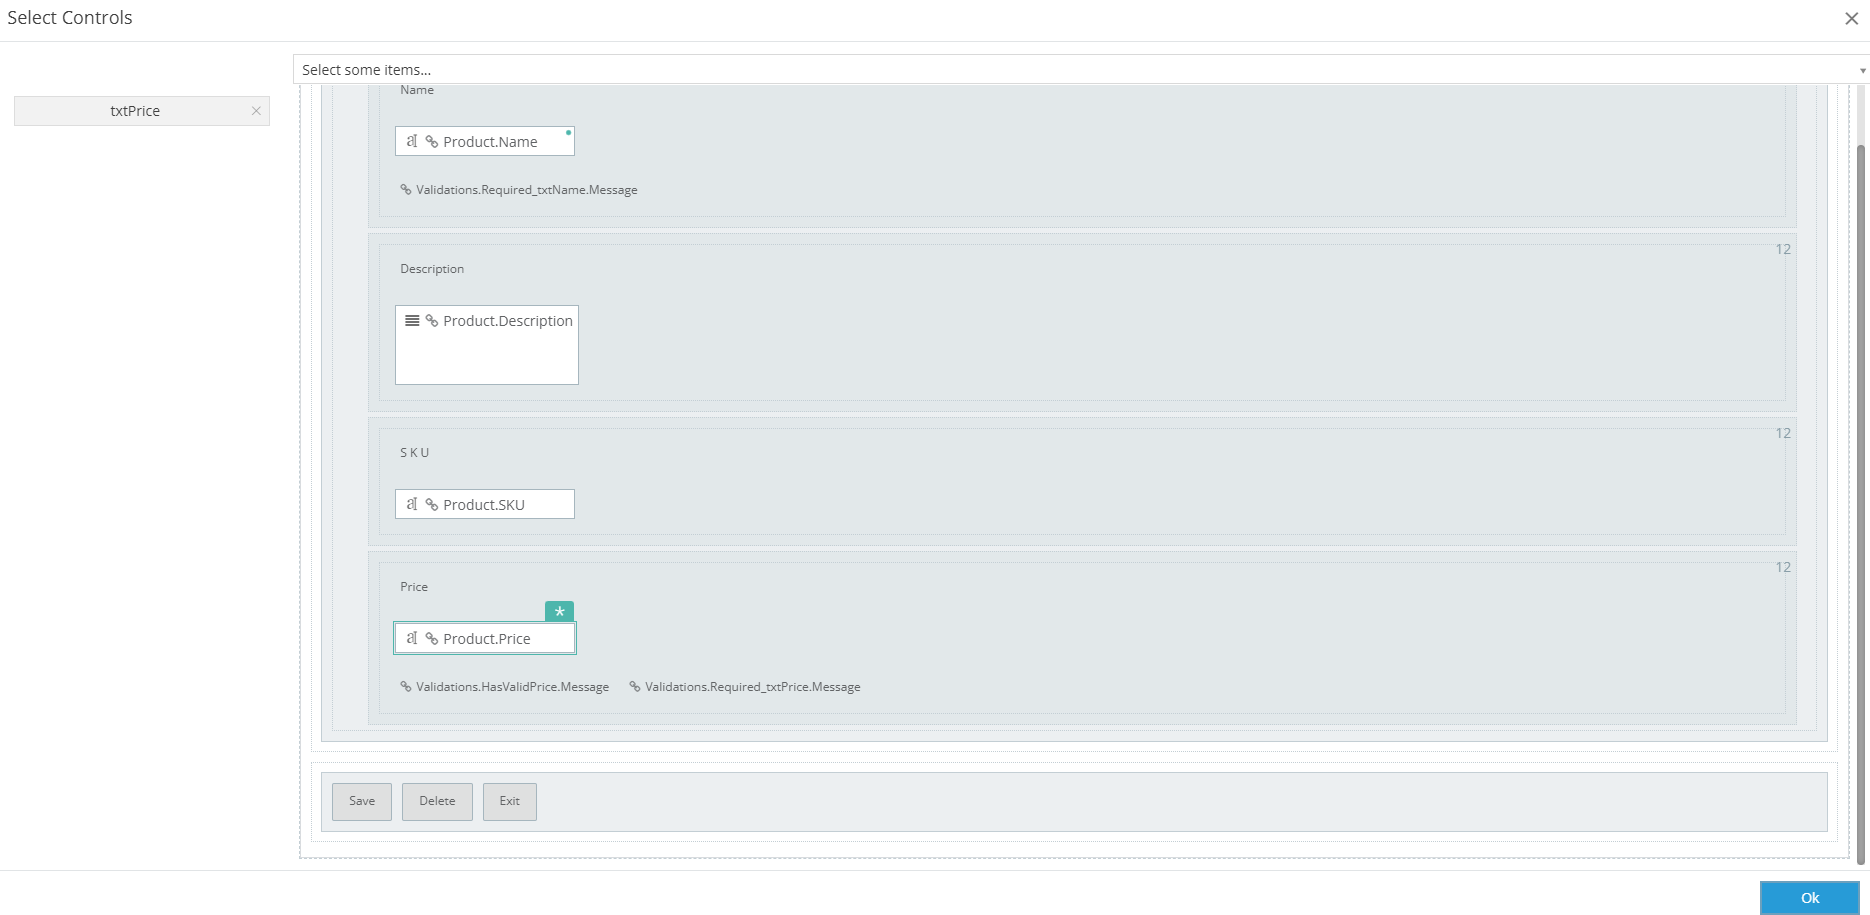
- At Apply to, click on the plus (+) on the right side
- A modal is displayed
- Select textbox ProductPrice
- Click OK
Tip
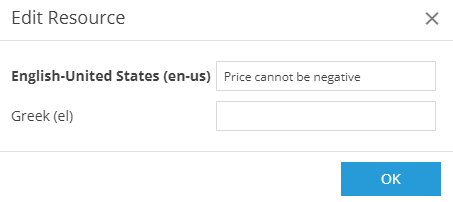
To change the message that will be displayed to the user, click on the three dots:
- Change to Price cannot be negative
- Select OK
Save and then Validate from the menu on top:
- Go to View (From the menu at the bottom)
- Select price form group (just click on it)
- Go to Properties
- At features check Has Description Container
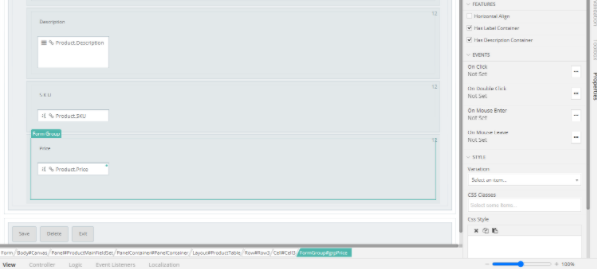
- Select Validation (From the right menu)
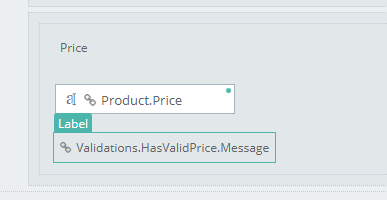
- Drag HasValidPrice and drop it inside the description container
It should look like this:
Information
The created label will automatically be hidden/displayed based on the bound Data Validation.
Todo
Do The same for the Required fields (Name & Price).
Reminder
Please remember to validate and save your models frequently.
Order Form
Now, let's make some adjustments to the OrderForm.
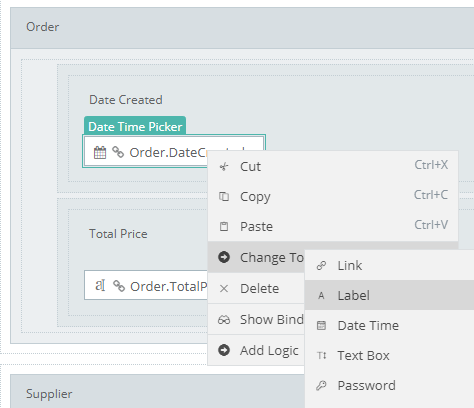
As you may notice, Date Created is displayed as editable field:
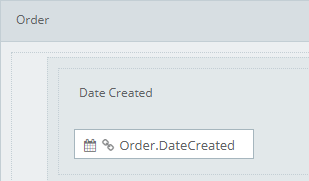
We do not want users to be able to change it. We want to systemically assign it when the user creates a new order. So,
- Right click on the Date Time Picker
- From the dropdown select Change To
- Select Label
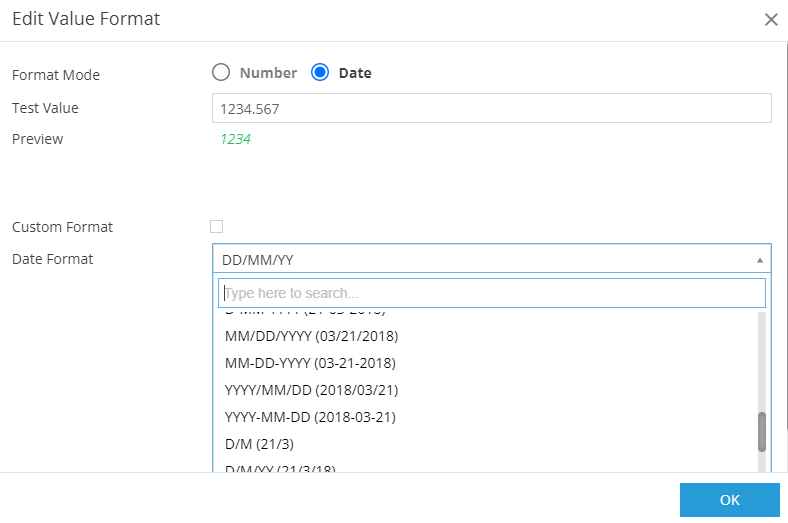
Date Value Format
Select the changed label and insert a value format (from Properties).
Modal dialog Edit Value Format is displayed:
- Select Date
- At Date Format select from the dropdown DD/MM/YY
- Click OK
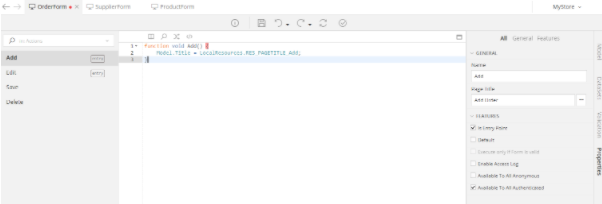
Controller
Now, select the Controller at the bottom of the screen:

The Controller editor is displayed.
By default, the wizard created the following controller actions:
- Add and Edit which are entry points
- Save & Delete
Information
With Controller Actions you can write code to fill the view model of the form, in order to define the behaviour of the form. A Controller Action can be defined as an Entry point which means that when executed, will render the UI. Furthermore, you can define the authorization options of each endpoint.
On the left menu you can see the controller actions:
- Select controller action Add and
- Append the following code:
Model.Order.DateCreated = DateTime.Now();
So now, date will be automatically assigned by the time user clicks on Add a new Order.
Picklist Control
- Select the View (from below)
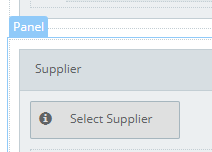
Information
For selecting the Supplier of the Order, wizard created a picklist control (basically a button that when clicked displays a modal with the available Suppliers in order to select one).
We want to replace it with a simple dropdown.
- Select supplier panel
- Delete it (Press delete from keyboard or right click on the panel and press delete)
At Order panel,
- Click on the first column
- Click on the arrow
- From the dropdown box select Insert Below
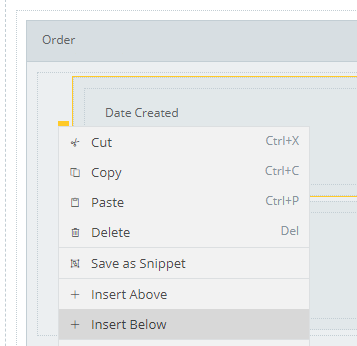
- Another column is added under datetime
There are two options in order to insert a dropdown for Supplier.
First option
Drag & Drop Supplier property from the Model (right menu).
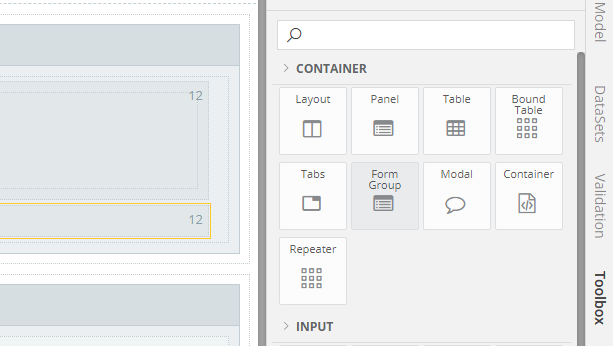
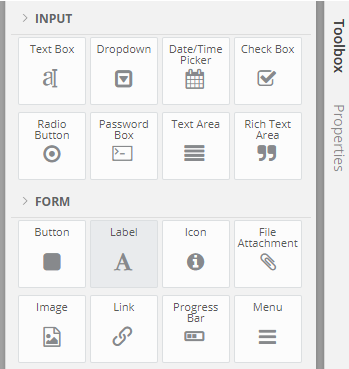
- Select Toolbox (right menu)
- Drag a FormGroup and drop it inside the new column
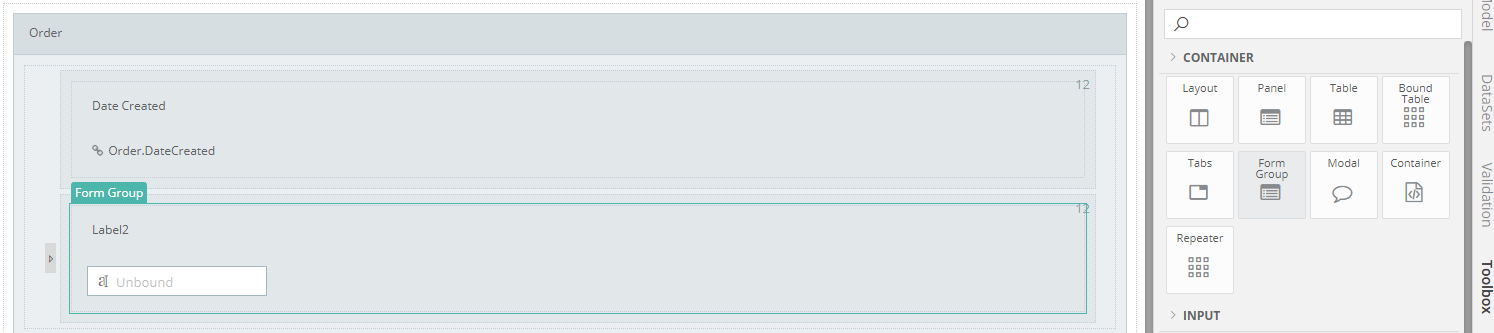
- Delete the created unbound textbox
- Select Model from the right menu
- From the tree, locate Supplier: Order ⇒ Supplier
- Drag and drop it inside the Form Group Input
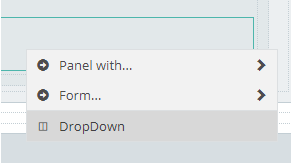
- A context menu is displayed the moment you drop the Supplier
- Select dropdown
In this case, automatically:
- the Dropdown’s model binding is auto filled, and
- The control’s dataset is already created (in order to fetch suppliers from the database)
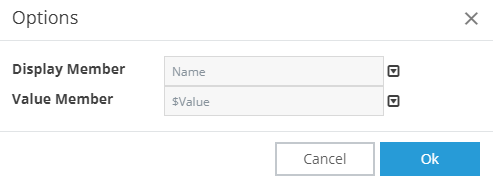
Now, we only have to change the Display & Value Options:

- Select Display & Value Options
- Options modal is displayed
- For Display Member select Name (from the arrow on the right: Supplier ⇒ Name)
- For Value Member select Supplier
- Click OK
Second option
Manually create the dropdown and its dataset.
Your Model tree looks like this:
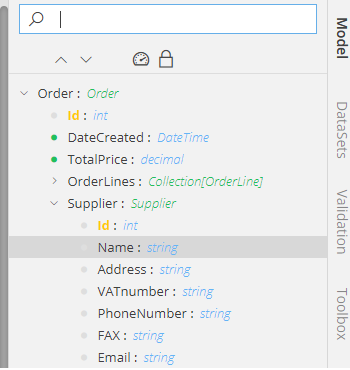
- From Model (right menu) select Suppliers’ Name (Order ⇒ Supplier ⇒ Name)
- Drag and drop it inside the column
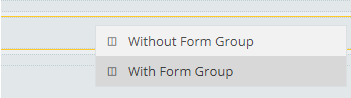
- A context menu is displayed the moment you drop the name
- Select With Form Group
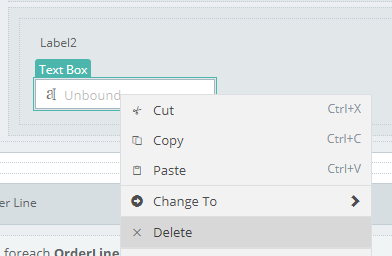
- Select the newly added Text Box
- Right click on it
- Change it to Dropdown

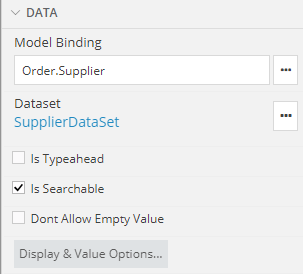
- From Properties at Model Binding type or select Order.Supplier (Remove the Name)
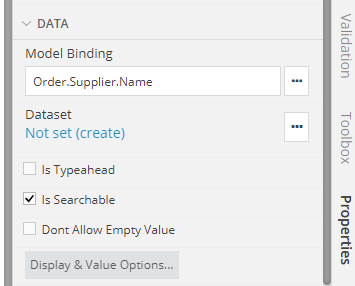
Now we need to create a dataset in order to fetch suppliers from the database:
- From properties, at Dataset click on Not set (create)
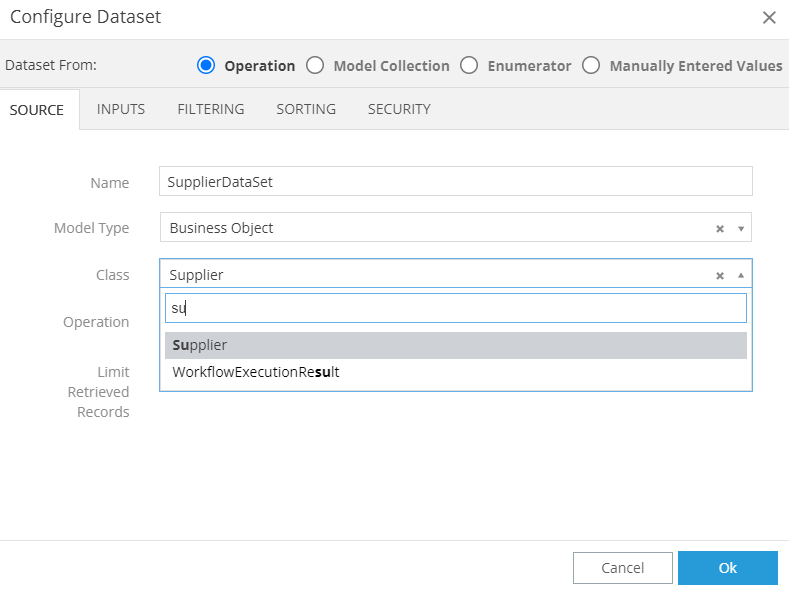
- A modal to Configure the dataset is displayed
- Select class Supplier
- Automatically name is set to SupplierDataSet. There is no need to change it
- Leave the rest fields as they are
- Click OK
Note
Basically we call the GetAll method of the Supplier class.
- Now select Display & Value Options
- Options modal is displayed
- For Display Member select Name from the arrow on the right (Supplier ⇒ Name)
- For Value Member select Supplier
- Click OK
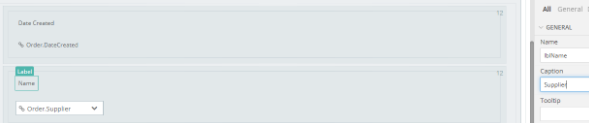
Now, it should look like this:
Double click on label Name and at Properties, at Caption change it to Supplier
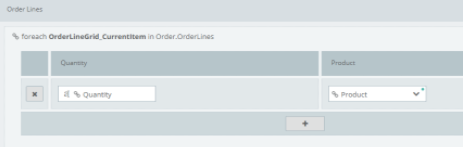
Now, it is time to check the order (order lines).
As you can see, wizard created a table that consists of the attributes we inserted at Business Object: Quantity and Product.
Update View Model
We need to add one more attribute, in order to see the price for each line, the total cost of the selected product.
- Go to OrderBO
- At class OrderLine insert an attribute, name it LinePrice (decimal)
- Save the BO
- Now go back to the OrderForm and refresh your model (it will update the form’s view model with the latest changes on the BO model)

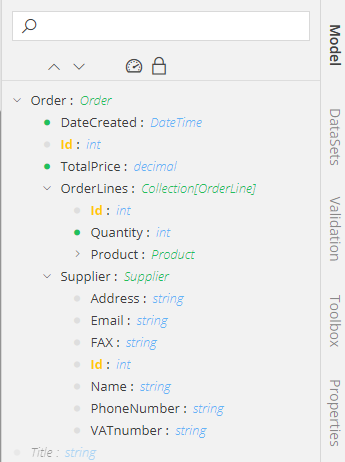
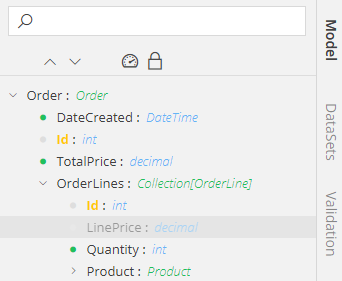
Take a look at the Model on your right side. You will notice that the new attribute has been added below OrderLines faded and with a grey dot.
Model before refresh:
Model after refresh:
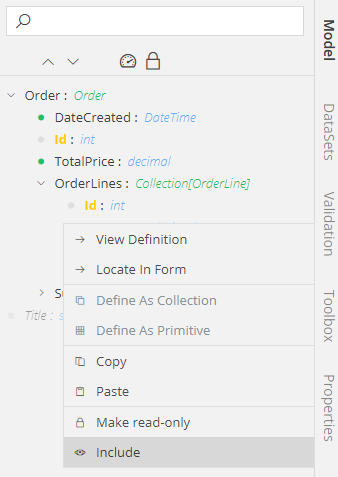
That means this attribute is not included in the current model. To include it, right click on it and select from the dropdown Include.
- Now, select the bound table, right click on it and select Insert Column
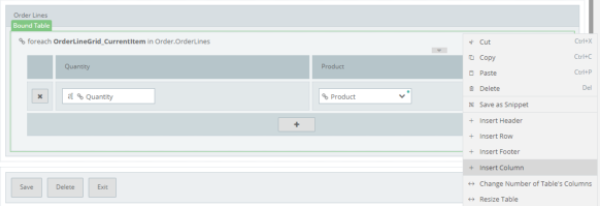
- From the Model drag the LinePrice and drop into the new column (Without Form Group)
- Change it to label
- From the Toolbox (right menu), select Label
- Drag and drop it at the header of the new column
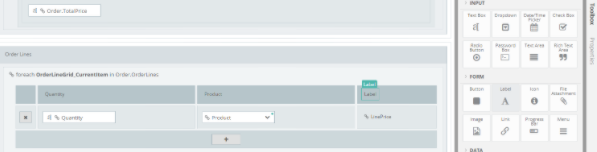
- From Properties change the text to Price (at Caption)
Note
We will see later on the implementation phase (How to calculate the total cost).
Now it is time to add the Total Order Price:
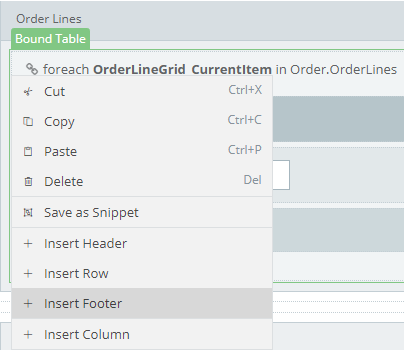
- Click on the bound table and select Insert Footer this time
As you may have noticed, total price is already created by the wizard, but we want it to be readonly and auto calculated.
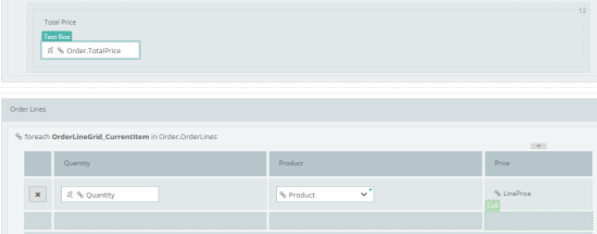
- Drag Total Price Text Box & drop it into the new footer cell
- Change it to label
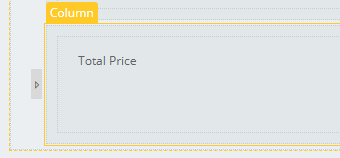
- Select the middle cell, right click on it and select Merge With The Left Cell
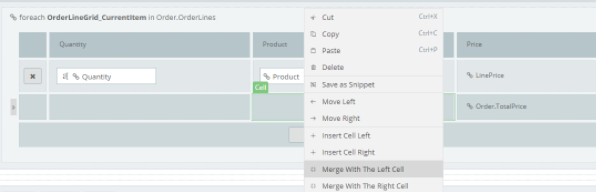
- Delete the remaining column from above
Todo
Set Value Format for the prices, as we did previously at ProductForm.
Logic - Calculated Expression
Now it is time to implement the logic for pricing.
- Each row price should display the correct amount (Quantity of product * Product price)
- Total price (Sum of all row prices)
- Quantity should allow only positive numbers
Row Price (Quantity * Product Price)
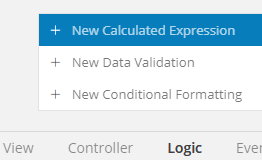
- Select Logic from the menu on bottom
- Hover the plus (+)
- Select New Calculated Expression
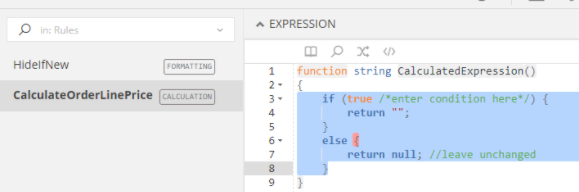
A new calculated expression is created:
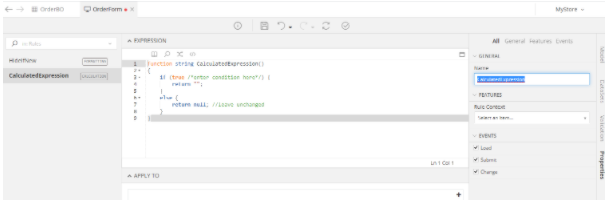
Information
A calculated expression evaluates the provided code and applies the result to a selected control.
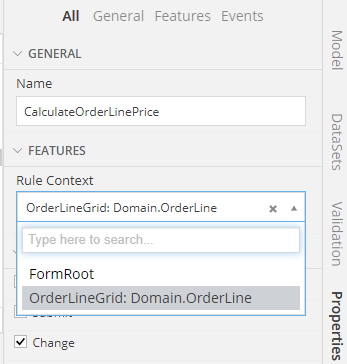
- Change the name to CalculateOrderLinePrice
- From the editor delete the already written code. We do not need it in this case
- Go to Properties menu
- From the Rule Context dropdown, select the Grid our context is located. (Because we want to apply the expression to each order line)
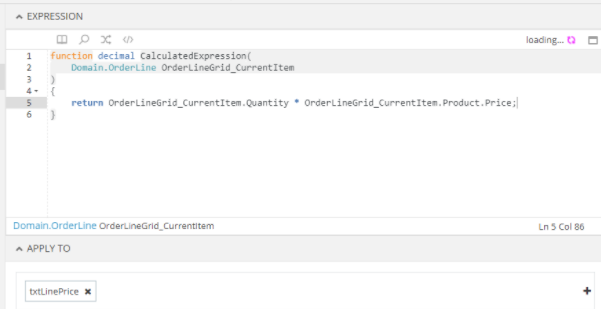
- At the editor, function should return decimal
- Place the following Mamba code inside the Condition() function
return OrderLineGrid_CurrentItem.Quantity * OrderLineGrid_CurrentItem.Product.Price; - At Apply To select label txtLinePrice
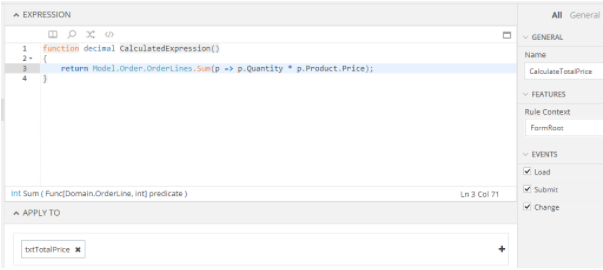
Total Price (Sum of all row prices)
- Create one more Calculated Expression
- Name it CalculateTotalPrice
- At Rule Context select FormRoot this time
- At the editor, change function to return decimal
- Place the following Mamba code inside the Condition() function:
return Model.Order.OrderLines.Sum(p => p.Quantity * p.Product.Price); - At Apply To select label txtTotalPrice
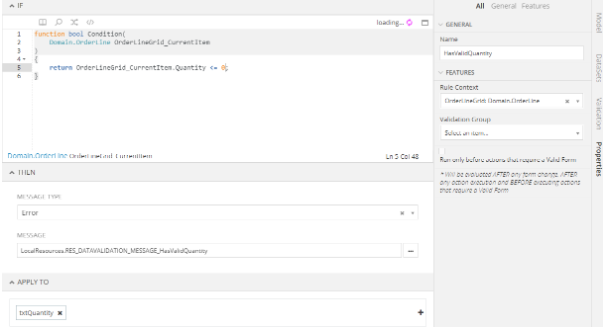
Positive Numbers
Quantity should allow only positive numbers, so as we did did previously at ProductForm, create a Data Validation HasValidQuantity that should look like this:
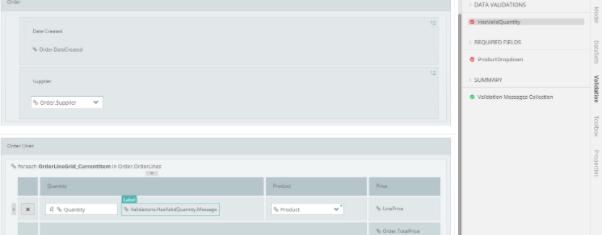
Reminder
Remember to place the data validation message besides Quantity Text Box, so user can see the message (Drag and drop as we mentioned earlier at Product Form).
Now all you have to do is to:
- Save (Click Ctrl + S)
- Validate
- Build and
- Run your application to see the results
Note
At this point, with very few steps, you have the user management forms and 6 set up, ready, fully functional and secure forms that your Administrator can use to fill their database.