Security
Setting up your Application
Google
Login to your Google+ Account and visit the Google Developers Console.
Follow the steps described here.
Hint
You will not need to set up everything you see in the tutorial. The follolwing are enough
-
Application Name
-
Product name (in OAuth consent screen)
When creating your Credentials, remember to
- Select OAuth client ID
- Select Web application as your Application Type
- Set the address of your application under Authorized JavaScript origins
- Set the address of your application followed by /signin-google under Authorized redirect URIs
- Enable the Google+ API
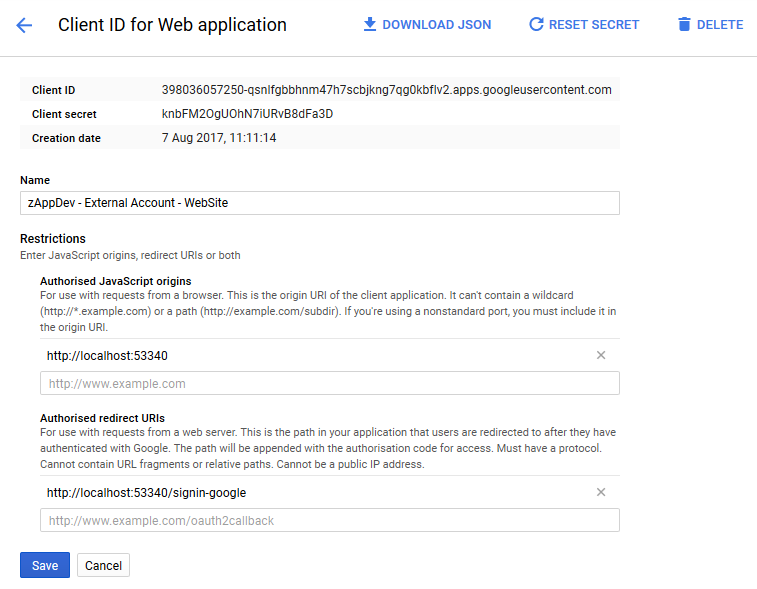
Attention
If your web page’s address contains a specific port, you must use it on both fields shown above. Otherwise, just the URI is enough. For example
When ready, write down the Client ID and Client secret given to you by Google. You will use them later to enable Google as an External Provider in zAppDev.

Facebook
Login to your Facebook account and visit the Facebook Developers Panel.
Follow the steps described here.
Hint
You will not need to set up everything you see in the tutorial. Just the Application Name should be enough.
Remember to visit your Settings -> Basic page to set the Website’s URL: this should be the root address of your website.
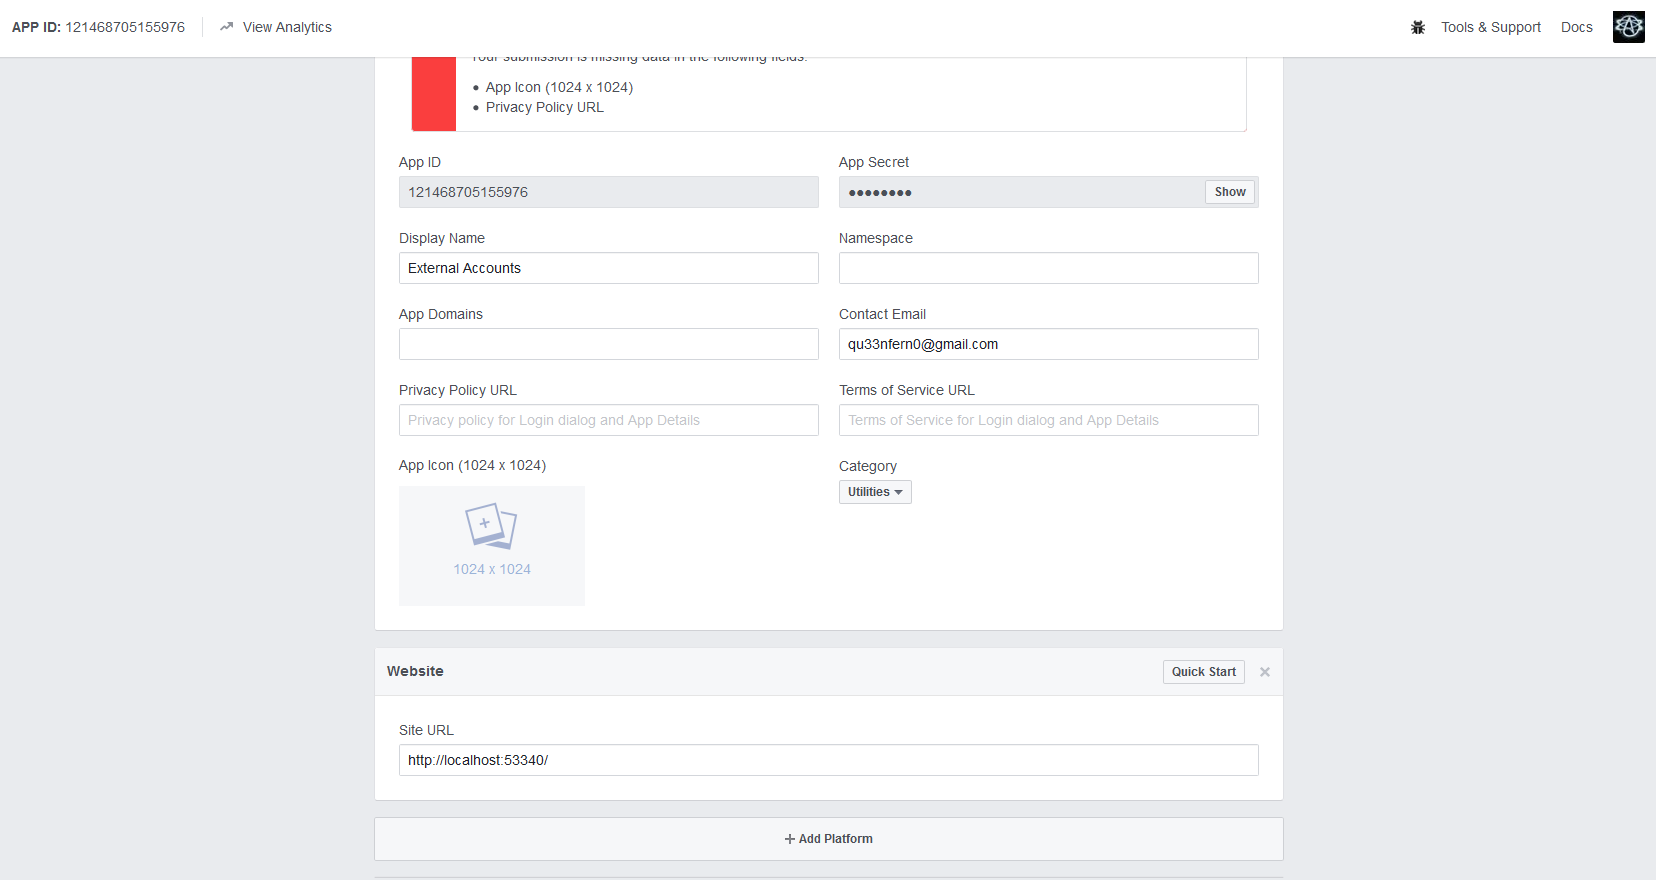
Attention
If your web page’s address contains a specific port, you must use it in the Site URL Field. Otherwise, just the root URI is enough.
When ready, write down the App ID and App Secret given to you by Facebook. You will use them later to enable the Facebook as an External Provider in zAppDev.

Setting Up External Providers in zAppDev
In order for all the External Provider actions (e.g. Login, Register etc.) to work in zAppDev, you will need to feed the latter with the information you previously created.
- Open the Application you with to use External Providers in
- Go to Configuration -> app -> Security -> External Login Providers
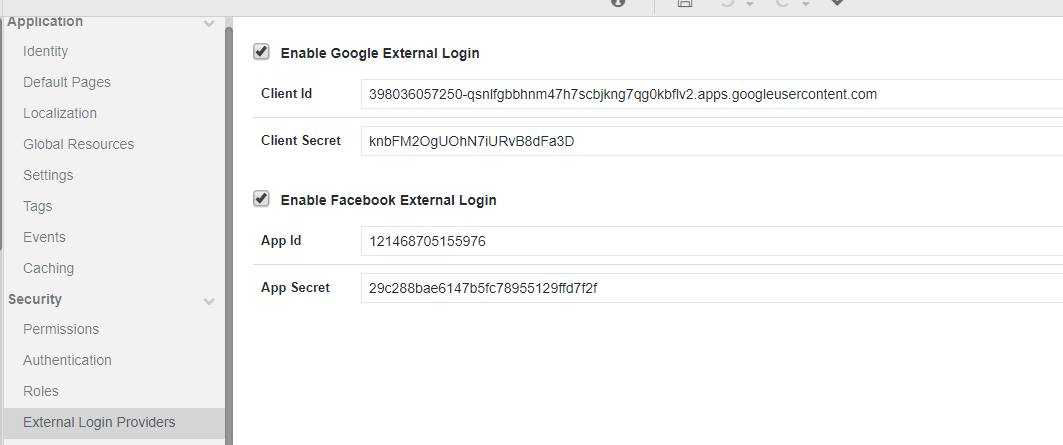
- To enable Google as your External Login Provider
- Check the “Enable Google External Login” checkbox
- Copy the Client Id and Secret generated previously into their respective fields
- To enable Facebook as your External Login Provider
- Check the “Enable Facebook External Login” checkbox
- Copy the App ID and App Secret generated previously, into their respective fields
An example with both Google+ and Facebook External Login Providers is shown below
Now, you should be all set to use Google+ and/or Facebook as your External Providers in your Application. Check the sections that follow, for supported actions and examples.
Supported Actions
Overview
Most of the Actions you can execute against an External Login Provider have been “templated” as pre-defined Action Properties. These are:
- Log in
- Register
- Link
- Get Profile
Other helpful functions have been defined as Mamba Methods:
- AppLib.Security.GoogleAccountIsLinked
- AppLib.Security.FacebookAccountIsLinked
- Domain.ApplicationUserExternalProfile.Read()
Pre-Defined Actions
The pre-defined Actions mentioned before, follow the same logic in their implementation
- They expect the name of the External Login Provider, under which the Action will be performed (e.g. Login with Google)
- They can Execute an On Success Action, after the successful execution of the External Action
- They can Execute an On Fail Action, after the failed execution of the External Action
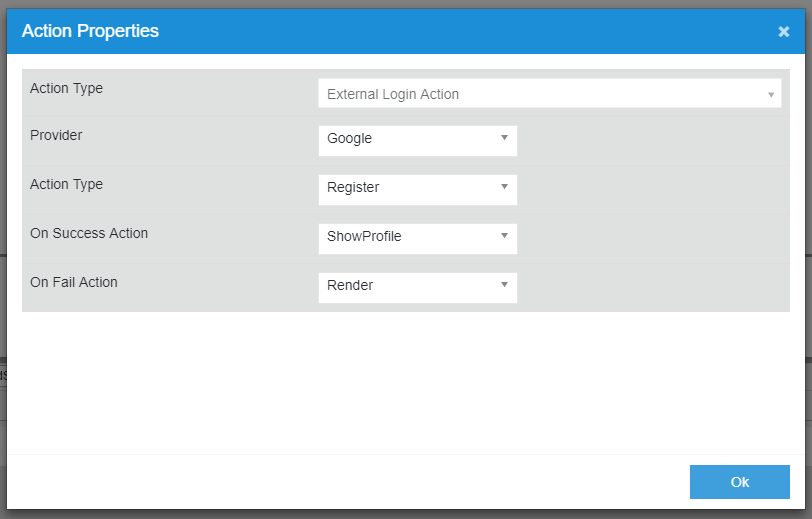
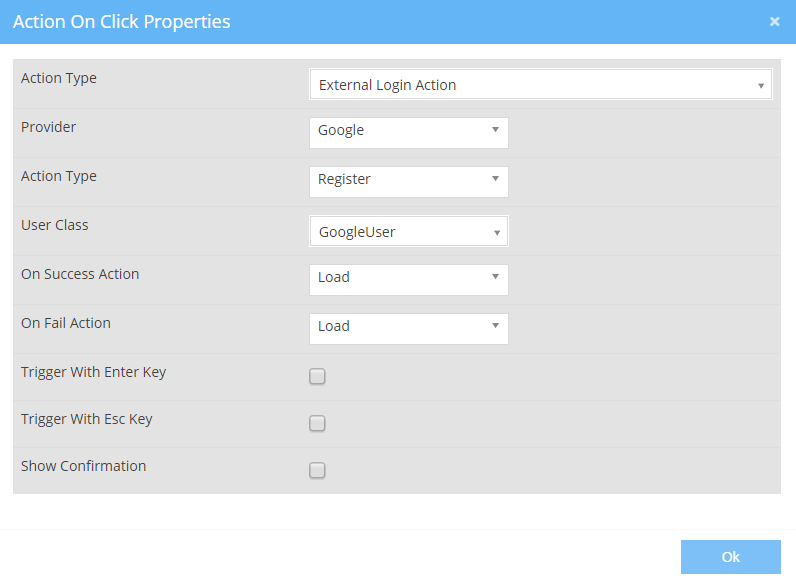
The image above presents a relevant example:
- It assigns an External Login Action to a button
- That uses Google as the External Provider
- To Perform a Registration
- If the Registration is successful, the ShowProfile() Action will be executed
- If the Registration fails, the Render() Action will be executed
On Success / On Fail Callbacks
Some important things to remember regarding the On Success and On Fail Actions can be summarized as:
- Both Actions must be created in the Controller of the same Page. Thus, Actions from other Pages cannot be executed.
- Both Actions must be Entry Points (HTTP GET)
- Neither Action can have any input parameters
An example of a valid action after a successful registration, can be:

Register
The Register Action can be used to add a new user to the Generated Application. It executes the following logic:
- Check whether the user with the fetched e-mail address (obtained by Google+ or Facebook while authenticating) already exists in the system
- If yes
- Log him in
- Execute the On Success Action
- If not,
- Create him as a new User
- If creation succeeds
- Log him in
- Execute the On Success Action
- If creation fails
- Execute the On Fail Action
- If creation succeeds
- Create him as a new User
Now, if you have defined your own classes that depicts your Application's Users (classes that inherit from the ApplicationUser class either directly or via another ApplicationUser inheritor), you might want to use that class as the user registering into your app via an external provider. Why would you do that? Well, because:
- You might want to change the User class and add some custom fields (e.g. Profile ID, Logo etc), something you cannot do with the systemic ApplicationUser class
- You might want to differentiate between the users: track those that use a plain username-password pair to login, those that login using Facebook and those that login using Google
So, in the case you have your own user class, all you have to do is to select it as the User Class during your External Action's Registration (why just Registration? Because that's when the user is actually created. From that point on, he/she will be described by your selected class)
Tip
The User Classes available are those (and only those) classes that are related to the ApplicationUser class via inheritence
Warning
If the User Class you select is wrong or does not exist, the Application will use the ApplicationUser class by default
Warning
Should anything wrong go during the External Registration, the ApplicationUser will be used. The exception will be handled silently and the application will log it into your log file. So, if you cannot find a user in your (example) GoogleUser list, check him in the ApplicationUser class (Domain.ApplicationUser.GetAll()): he/she might have been added there, instead of your chosen class, due to an exception
Login
The Login Action can be used to Log In an existing user into the Generated Application. It executes the following logic:
- Log in the user using his Google+ or Facebook Account
- If the login is successful, execute the On Success Action
- If the login fails, execute the On Fail Action
Link
The Link Action can be used to “link” an existent user with his external account. A possible scenario can be the following:
- An Administrator adds user “Queen” into the System, using “queen” as his username and “queen1@” as his password
- Later, user “Queen” logs into the system, using his username and password
- The user decides that he would like to be able to login using his Google+ account as well
- He visits the page where the “Link” action for Google has been set
- He presses a “Link your Google+ Account” button
- After the successful authentication and redirections, the user can now log into the system using both his credentials and his Google+ Account, since the two have been “linked” as “belong to the same user”
The Link action executes the following logic:
- Authenticate the user using his Google+ or Facebook Account
- If the authentication is successful
- Check whether the user has already linked his External Account
- If yes, execute the On Success Action
- Otherwise,
- Link this user to the External Account, as an alternative login provider
- Execute the On Success Action (of the On Fail, if something goes wrong)
- Check whether the user has already linked his External Account
- Otherwise
- Execute the On Fail Action
Get Profile
The Get Profile action can be used to fetch the user’s information from any External Provider. In other words, even if the user is logged in using Facebook, or is browsing anonymously, he will be able to get his Google+ profile.
Important
For better results, use this Action with a On Success Action that uses the External Profile, by calling Domain.ApplicationUserExternalProfile.Read
Mamba Methods
AppLib.Security.GoogleAccountIsLinked
This Mamba Method, defined in the AppLib -> Security Library, can be used to check whether a user can use his Google Account in the Generated System (e.g. he had Registered with a Google+ Account, or added it later by Linking it) You can execute it:
- Without any input parameters, to check whether the Current user has been linked or not
- Using a Domain.ApplicationUser as an input parameter, to check whether some other user has been linked or not
AppLib.Security.FacebookAccountIsLinked
Same as above, using Facebook as the External Provider
Domain.ApplicationUserExternalProfile.Read
This function reads the External Profile of the Logged In User, populates a Domain.ApplicationUserExternalProfile object and returns it. The execution follows the logic described below: - Try to reach the External Login Provider of the User - If reached - Read the required information - Otherwise - Try to get the logged in user’s profile, as populated while Logging In - If read, - Read the required information - Otherwise, - Return null
Important. If you use the Domain.ApplicationUserExternalProfile.Read() inside the On Success / On Fail Actions, then the Profile returned will be the one fetched by that External Provider. For example:
- The user logs in using his Facebook Account
- The user decides to add his Google+ Account to the System
- The user Links his Google+ Account
- The On Success Action of the Link Action fetches the Profile
- The Profile shown will be the user’s Google Profile
Thus, if you want to see any profile of the current user (regardless of how he is logged in), use the Read() function inside the action executed as On Success or On Fail Action. Otherwise, the profile returned will be the one used by the user to log in. To just get the profile of the user, regardless of the way he logged in (if he even has been Authenticated), use this method inside the On Success Action of the Get Profile Action.