Hello World! Part One
This Walkthrough Tutorial will show you how to create an Application from scratch
In this part we will see how to:
- Create an empty Application
- Create a Master Page
- Create a Home Page
- Set a Default page
- Navigate between pages
Create an empty Application
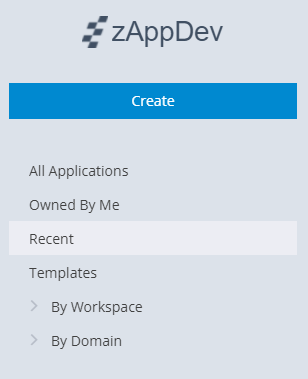
Click on Create
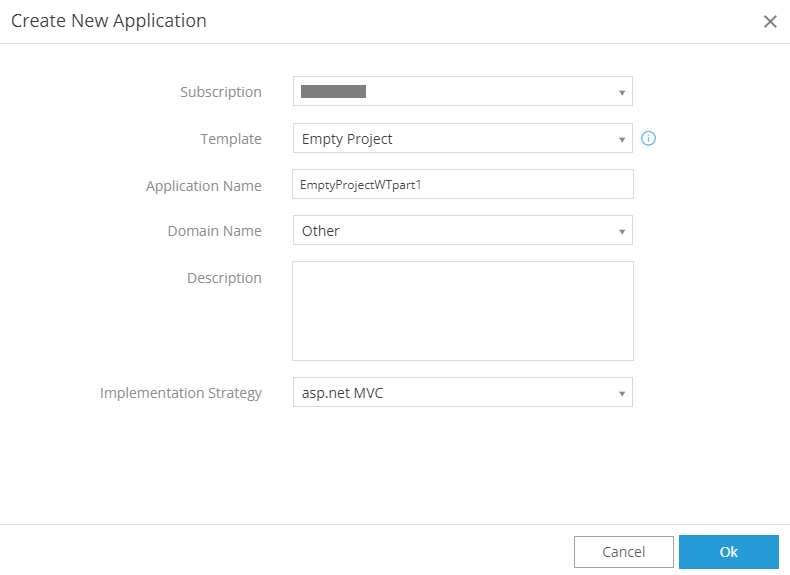
A modal is displayed
- Select the Empty Project as Template
- Type a Name for the application
- Click OK
Info
The first time you create a new project, building starts automatically. When it is completed a notification is displayed and you can click run  to browse the generated application
Build process
Βuild process activates the selected Implementation Strategy which translates all your models into native source code. Then, it compiles that code and deploys the compiled artifacts into your deployment environment. A unique URL is created for you, so you can test your application.
Create a Master Page
What is a Master Page?
Master page allows you to create a consistent look and behavior for all the pages (or group of pages) in your application. A master page provides a template for other pages, with shared layout and functionality. Master page defines placeholders for the content, which can be overridden by content pages.
Prerequisites:
- Each form must have a Master Page 1
- Multiple forms can share the same Master Page
- Multiple Master Pages are allowed to co-exist, but a form is allowed to have only one Master Page
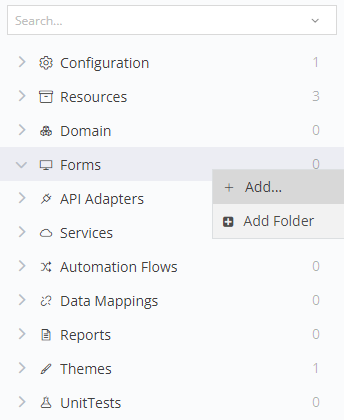
From Explorer on the left, right click on Forms and select Add
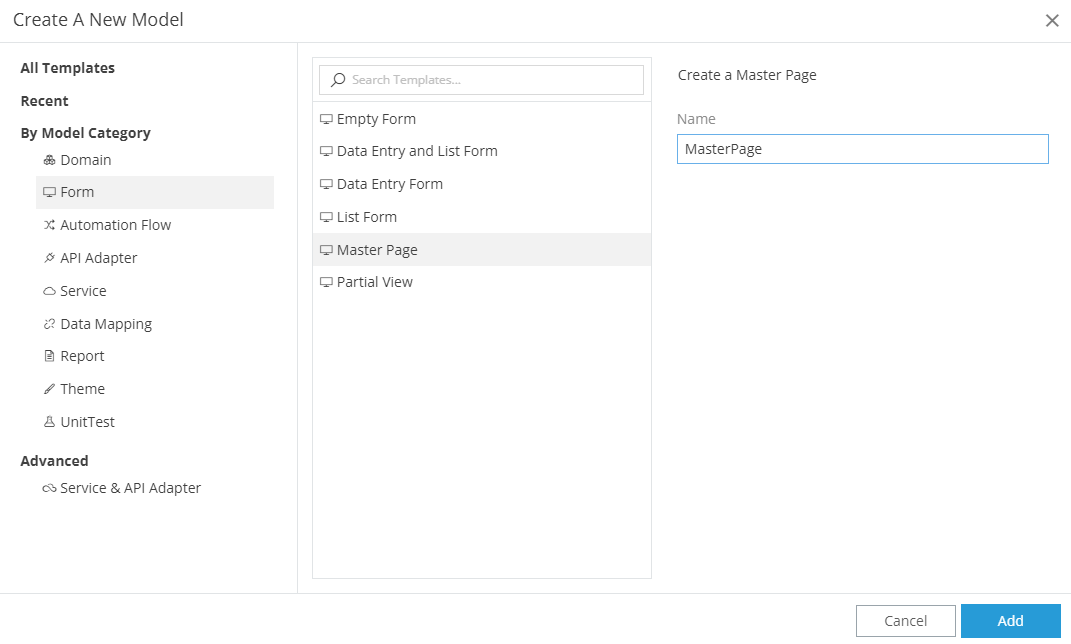
A modal is displayed:
- Select MasterPage as Template
- Insert for name MasterPage
- Click Add
A new empty form opens, displaying the View of the form, consisting of the Body and a Form Container
What is a Form Container?
A Form Container is a placeholder where the inner form will be rendered.
Each Master Page must have a Form Container control.
Create a Home Page
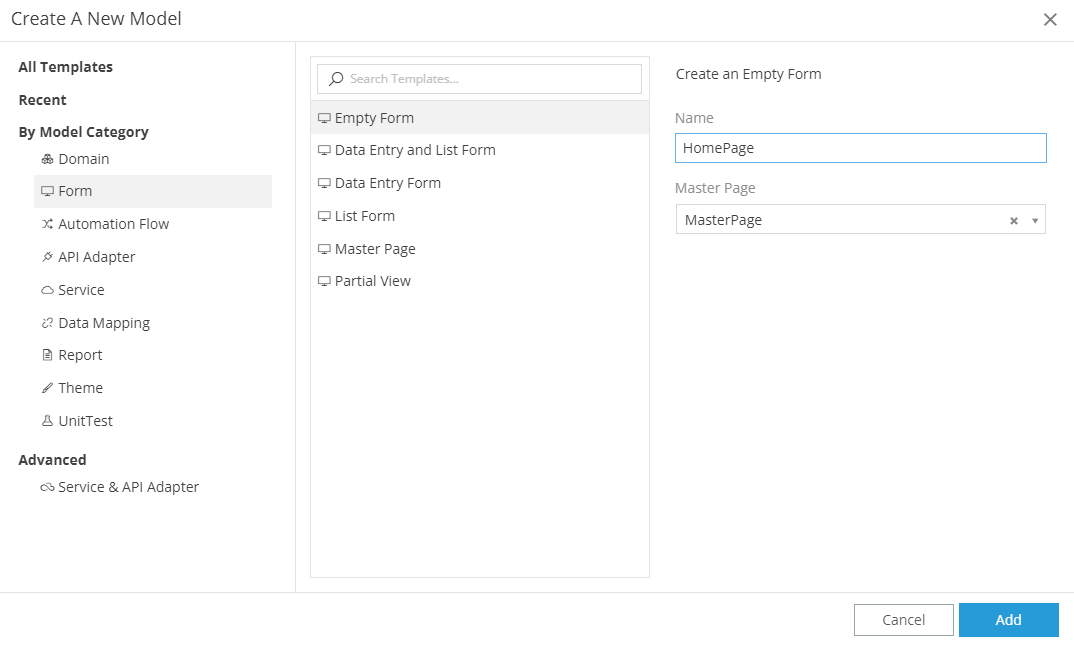
Add one more Form from the explorer on the left
- Select Empty Form as the Template
- Insert a name
- Select MasterPage you created in the previous step
- Click Add
Insert a Hello World label
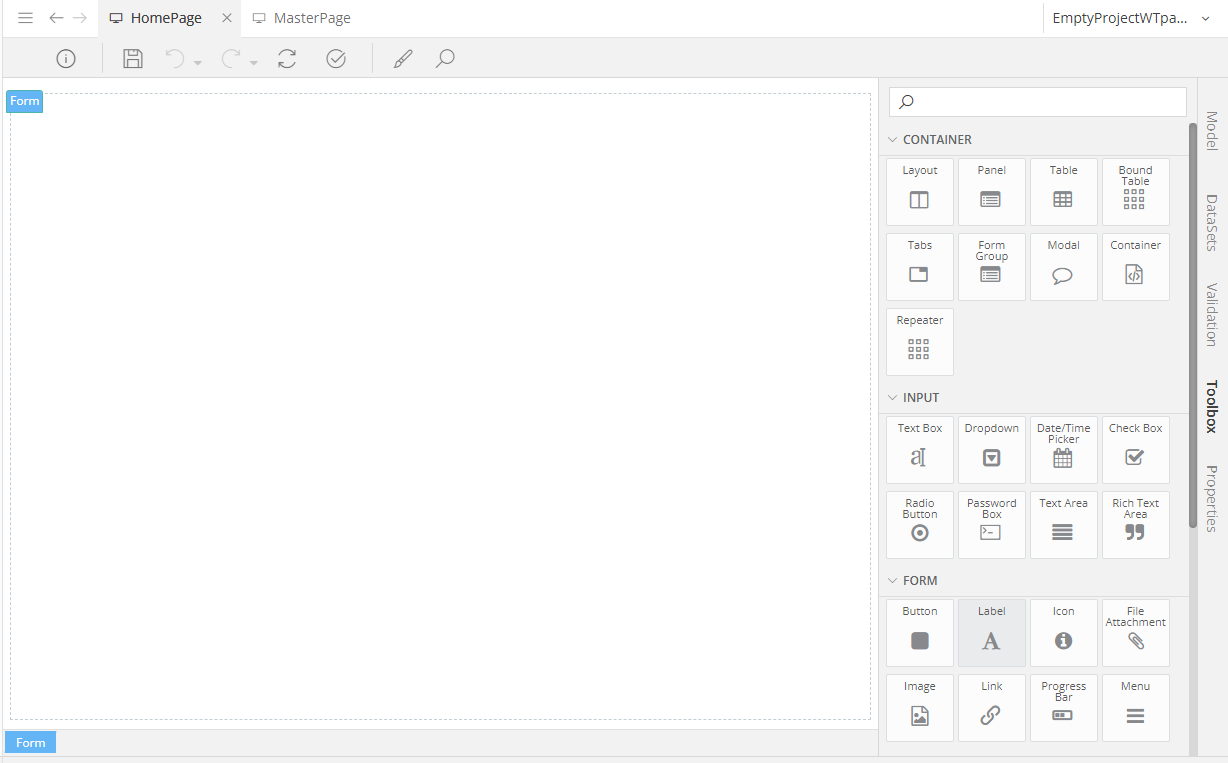
A tab with the newly inserted form opens. From Toolbox on the right:
- Find the Label control
- Drag & drop it inside the Body
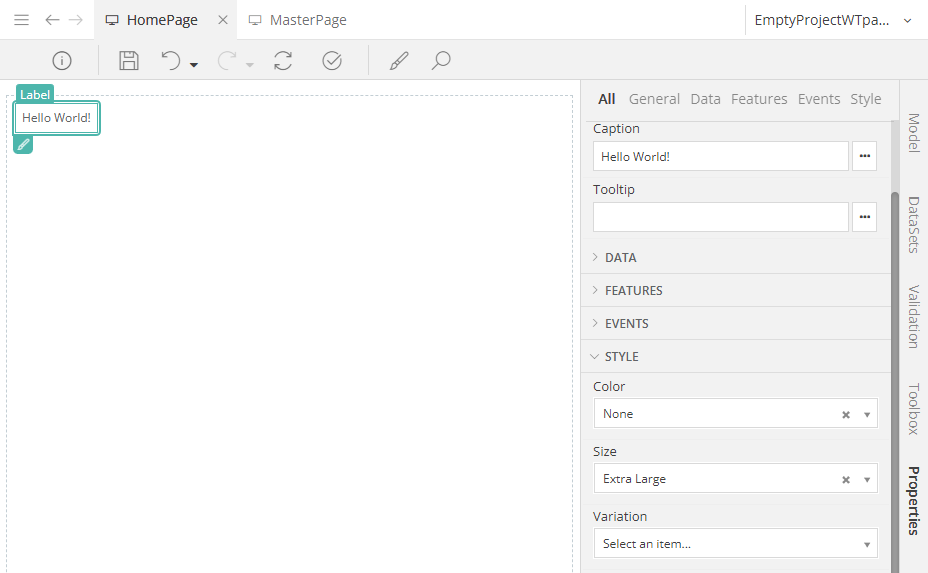
Double click on Label. Its Properties are displayed on the right
- At Caption type Hello World!
- From STYLE section below, select Size Extra Large
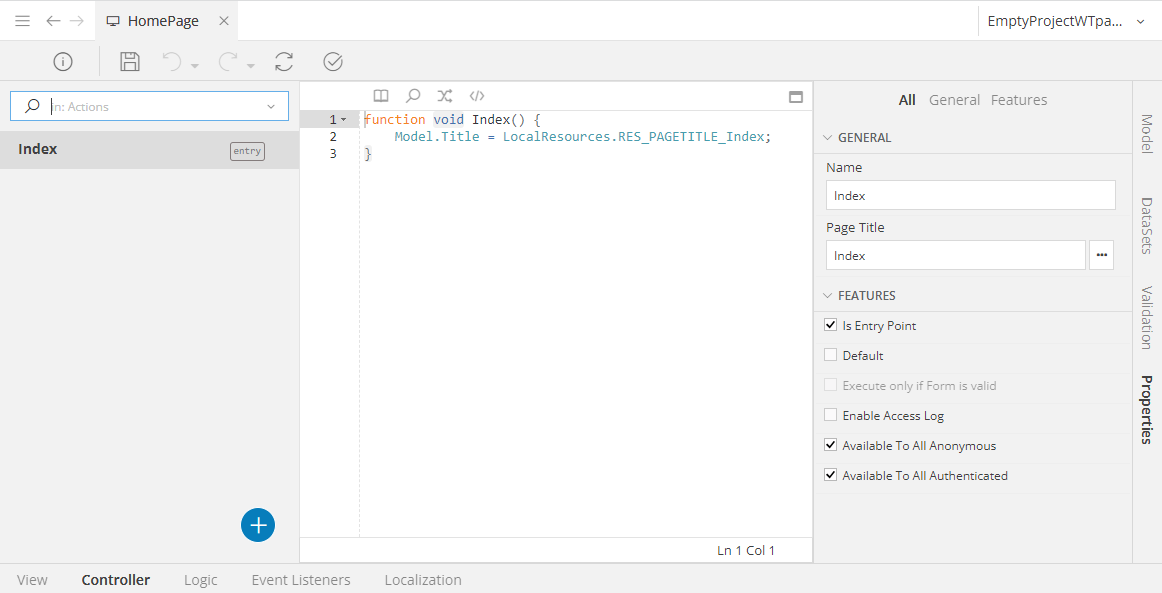
Click on Controller at the bottom of the tab
What is a Controller?
The Controller of your form contains methods called Actions.
- Actions are responsible for the business logic of your form, updating the state of the model, saving/retrieving data to/from the persistence layer, etc.
- A Controller Action can be marked as Entry Point. These actions render your form and are accessible from the web browser
Index
An Entry Point Action called Index is automatically created.
Info
When you run the application, you will see an error page (404 error code) because no default page is defined. By default, for each Entry Point Controller Action, a route is created based on the Form’s and the Action’s name. In our example, that route will be HomePage/Index, and if you type this in your browser your Form will be rendered.
- Add to the URL HomePage/Index to test the generated application
Set a Default page
Default Pages
At the Default Pages section of the App model, you can select the Forms that will be rendered in common scenarios, such as not found, unauthorized etc
From the explorer on the left, select Configuration and then app
- Select Default Pages
- For Default page select Home Page
- For Controller Action select Index
Executing a Controller Action
When you want to execute a Controller Action there are two options:
- The first one is to execute an Entry Point action of a form. This will redirect you to that form
- The second one is to execute a non Entry Point action of the Form you already are. This will execute the logic of that action, updating your model, without re-rendering the whole Form
Build, and then refresh your application to see the changes
Navigate between pages
Create one more Form and insert a Label
Go back to Home Page:
- From Toolbox (on the right), drag & drop a Button inside the Body
- Double-click on the Button 2
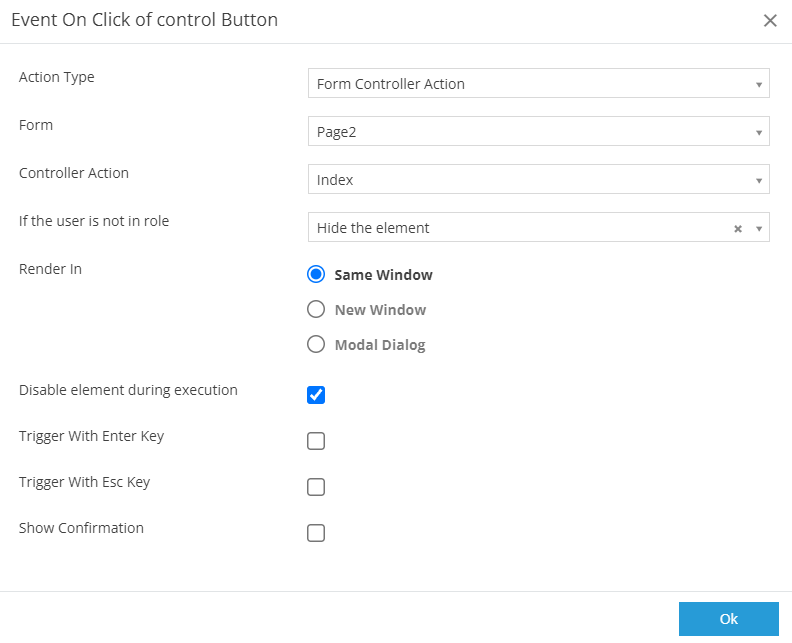
- From Properties on the right, at EVENTS select On Click (the three dots on the right)
- A modal is displayed
- Select the Form you created earlier
- Select Index for Controller Action
- Click OK
Save, build and run
