Deploying Applications
Before you start
The following sections will guide you through an Application Deployment. Please, remember that the procedures that follow will work ONLY for either a greenfield environment or an environment in which the Procedure has not been “messed up”:
- The deployed database was not existent prior to the very first Deployment
- The Deployed Site, if exists, was created using only this procedure and nothing else (plain project copy, database alterations by hand etc.)
In other words, it is strongly suggested to run your very first migration in a completely new/empty environment and then continue to use the same procedure for any subsequent versions, without deviating from the workflow or messing up the generated files.
Prepare your Environment
First, you will need to enable the Deployments for your application. So:
Todo
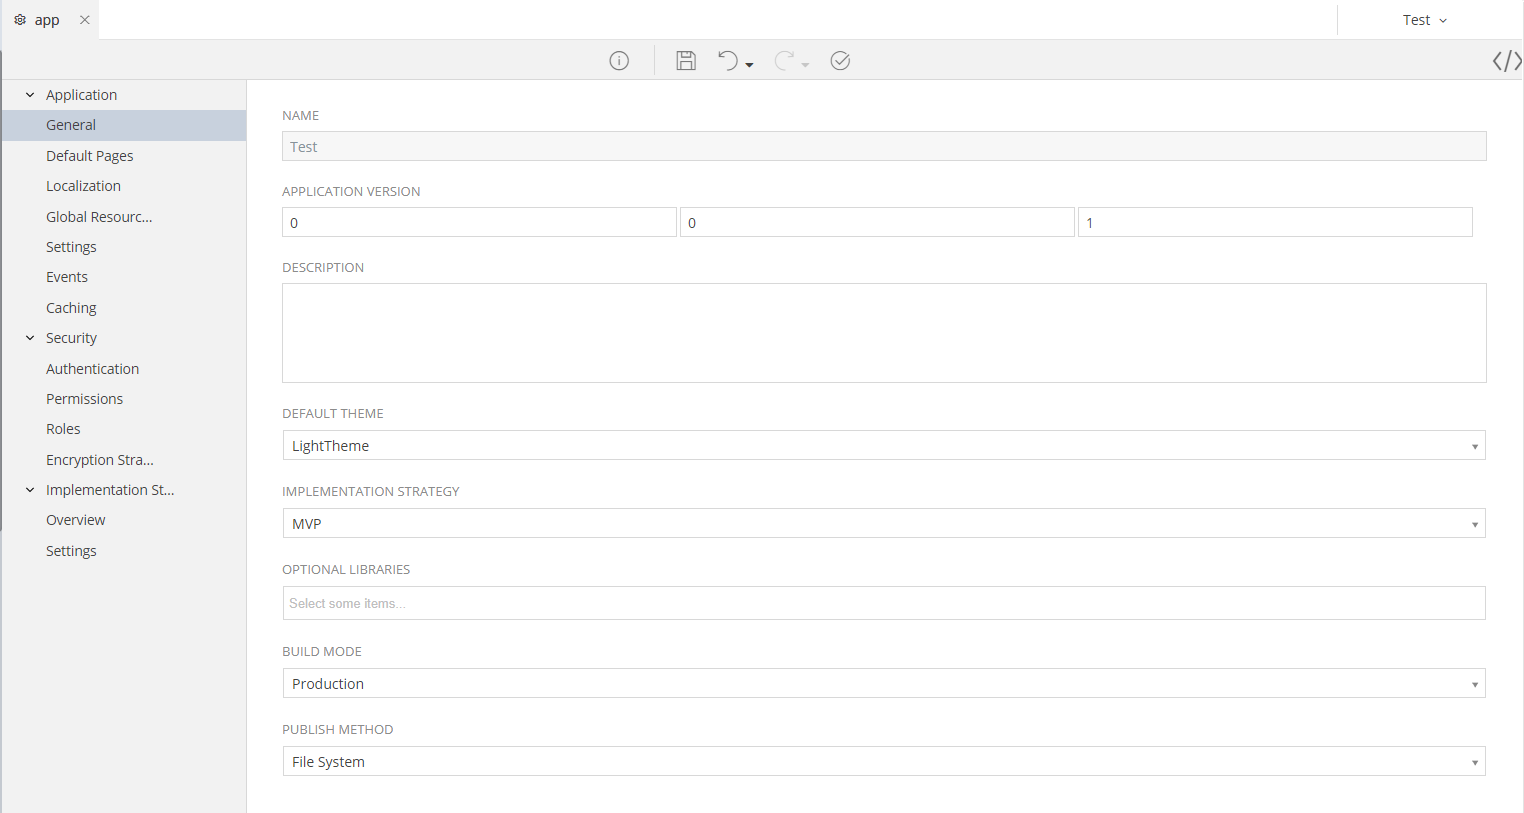
- Open your Application's Configuration by navigating to Configuration → app → Application → General.
- To run a Deployment, you need to be in a Production Build Mode. Select Production from the drop-down list of the Build Mode.
- Choose your Publish Method:
- File System: This Method will create a ZIP file on the server that you can then download and copy to the server of your choice. This is recommended if you do not have an internet connection, if you do not have an FTP server on your target server or if you just want to take your ZIP and go
- FTP: This Method will create all the files to be Deployed and send them to the Server of your choice, freeing you from the requirement to copy them to your IIS server. This is recommended if you have an FTP server on your target server that you can reach using your network connection and you wish to automatically send all the files to the target.
- Enter an Application Version. This will be the versioning of your Deployments. For example, for your very first deployment, you can choose 0.0.1. For the second, 0.0.2 and so forth. Note. Every time you Deploy your application, you need to increase the Application Version number.
Configure the Deployment
Since your Deployed version will have its own configuration (web.config) that might differ from your local one, you will need to change the configuration settings to reflect the Deployed ones. This can be done from the Implementation Strategy Settings in Configuration → app → Implementation Strategy → Settings
This section will provide information regarding only those settings that are mandatory for a successful Deployment. All other settings having to do with the actual execution of your Deployed Application will be ignored (i.e. RabbitMQ, Redis, SSL etc.).
SQL Settings
You must configure your SQL Settings, to reflect the Remote Database.
Hint
The Remote database is the database of your Deployed Application and NOT the one you use as a zAppDev developer.
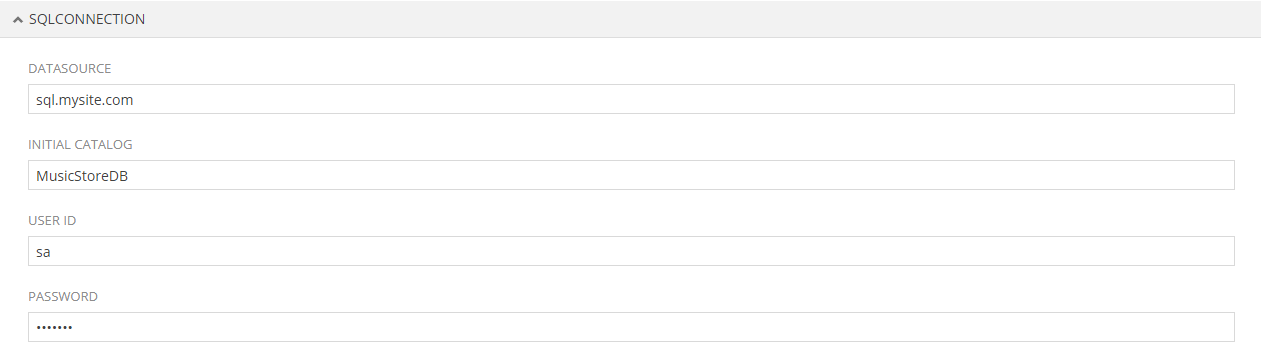
| Property | Description | Rules | Remarks |
|---|---|---|---|
| SQL Connection | This is the IP or the Hostname that you use to connect to your SQL Server | Required | |
| SQL Connection Initial Catalog | This is the Name of your remote Database. Usually, it will differ than the name you use as a zAppDev Developer | Required | Example: your development DB’s name might be "MusicStore_Dev", while the Deployed DB’s name (the production DB, if you will) might be "MusicStore_Prod". |
| SQL Connection User ID | The username used to connect to the database | Required | Important: The user you use here must have permissions to alter the Database |
| SQL Connection Password | The password used to connect to the database | Optional |
FTP Settings
Important
Ignore this section if you have chosen a File System Publish Method
The FTP Settings are required for the FTP Publish Method. You must configure them correctly, so that zAppDev can communicate with your remote FTP Server (normally set on the same device as your IIS).
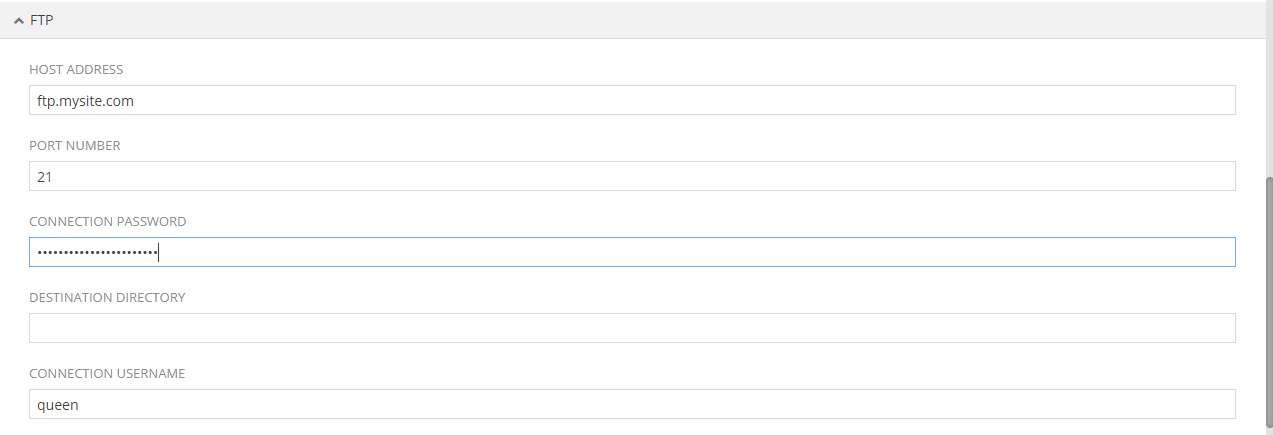
| Property | Description | Rules |
|---|---|---|
| FTP Host Address | The IP or Host Address of your FTP Server | Required |
| FTP Port Number | The Port Number to access your FTP Server | Required |
| FTP Connection Username | The Username assigned for you to connect to the FTP | Required |
| FTP Connection Password | The Password you use to connect to the FTP | Optional |
| FTP Destination Directory | The Folder on the FTP Server to use for the Deployment (must be accessible and writable by the User | Optional |
Important
Your FTP User must have Read, Write and Delete permissions to the remote folder An example of a nice to have user for an FTP connection is shown below, using a FileZilla Server:
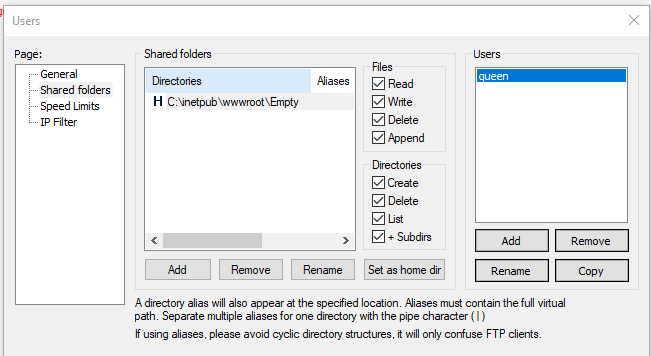
Here, the user "queen" can connect to folder C:\inetpub\wwwroot\Empty with Read/Write permissions on Files and Folders. Remember: this is what we want! Thus, whenever user "queen" is Deploying an Application using FTP, the files of the latter will be copied to C:\inetpub\wwwroot\Empty.
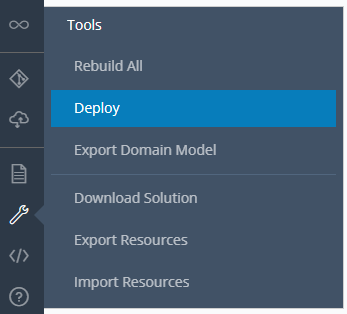
Deploy your Application
After you have configured everything, run the Deployment by clicking on the Deploy options under the Tools
After it has finished, you will be able to see your Deployment (as well as all previous ones, if any) in the Published Versions blade (Tools → Published Versions). In the case of an FTP Deployment, your Application will be also sent to the FTP Destination you set earlier.
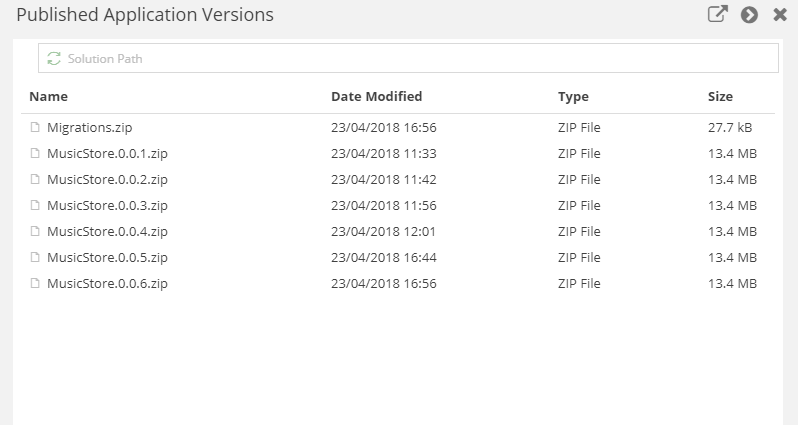
Published Application ZIP
As mentioned, every time you successfully run an Application Deployment procedure, regardless of its Publish Method, the Deployed Solution will be saved as a ZIP. The zipped file will have a unique name, consisting of your Application's name and its deployed Version. At any time, you can download a version (by right-clicking on the file) and then deploy its contents to the server of your choice.
Migrations ZIP
The first time that your Deployed Application will run, it will Migrate your remote Database, to the state of your development one. Basically, what happens during the Deployment procedure and after the Application is ran, is:
-
During the Deployment Procedure:
- zAppDev compares your remote, deployment Database with the one you are using during development
- If changes are detected, it generates a .sql file that applies said changes
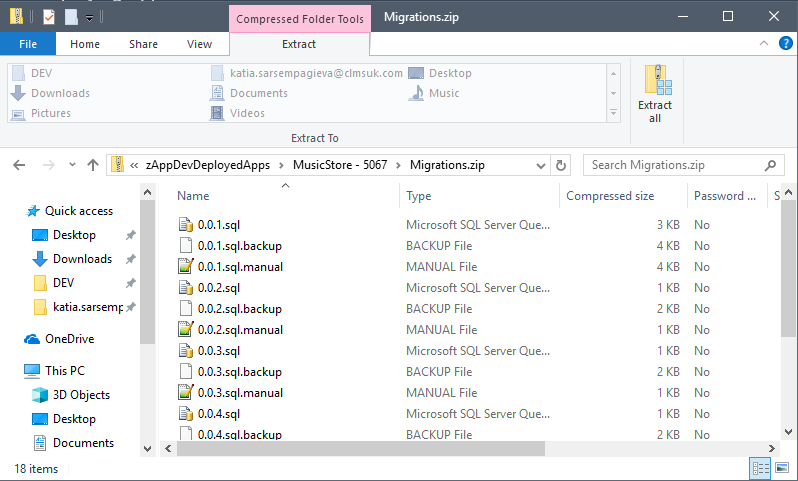
- The .sql file is saved in your Application's APP_DATA folder, as well as into the Migrations.zip file
-
When the Deployed Application runs for the first time
- It gets the pending Migrations from the APP_DATA folder
- Runs (executes) those that have not yet ran
Now, some times you might want to run the Migration scripts manually (for example in cases when your IIS user does not have the required permissions to alter your Database). In such cases, you will need to:
- Stop the Deployed Application from running them automatically
- Get the required scripts and run them against your remote Database
To do that:
- Remove the APP_DATA\Migrations file (or the entire folder)
- Download the Migrations.zip file
- Get the all those scripts that have been marked with manual extension (e.g. 0.0.1.sql.manual)
- Execute then against your Database !!! important When executing the Migration scripts, make sure to run them in the correct order, based on their Version. Example: 0.0.1.sql.manual must be ran first, then 0.0.2.sql.manual and so on and so forth.
FAQ
I would like to run a Deployment, but I already have a Production Database with tables and everything. Can I?
No. If you really want to though, there's a workaround here
I ran a Deployment that finished successfully. Then I played with the Remote Database and changed some stuff (tables, columns). Can I run the Deployment procedure?
No. If you really want to though, there's a workaround here
Do I need to Build or Rebuild my Application before running a Deployment
No. The Deployment procedure will Rebuild your Application itself. No need to do the same thing twice.
What settings will the web.config of the Deployed Application reflect?
The web.config of the Deployed Application will differ than the one of your local: it will have those values that you set in Section Configure the Deployment. That been said, remember that if you left some settings empty, they will be empty in the Deployed web.config as well.
I started my Deployed Application, but it failed during the Database Migrations. Is my Database ruined?
No. When running the Migrations, I make sure to execute everything in a Transaction. So, if something goes wrong, the Transaction will Rollback leaving the Database in its previous glory.
Remarks
Non-Greenfield Environment
Say you wish to be able to automatically deploy your Application, using zAppDev, however you
- Already have a created Remote Database or
- You have changed the Remote Database by hand
In this case, the Deployment, as is, will not work. You will have to “reset” it. Here’s how:
- Make sure your databases are completely equal. Use a tool (e.g. RedGate) to do that. Do not proceed to the next steps if you are not sure whether your two Databases are the came (schema-wise)
- While following these steps, make sure your Databases are not being changed by anybody else. (A user can still use them, however not change their schemas). Not that anything will happen, but you don’t want to repeat this whole procedure twice.
- Now, go to your Remote database and run:
If the table is empty, then go to step 5. Otherwise, remove its data:
select * from Migrationsdelete from Migrations - Before running your Deployment, write down the Version Number it will get. In this example, let’s say it’s 0.0.1
- Enter that value into the Migrations table of the Remote database:
insert into Migrations values ('0.0.1', GETDATE()); - Now, you can run the Deployment. Everything should be fine. From now on, you will be able to use the automated Deployment procedures with no problems.